Hello everyone! My name is Yana Lyashenko, and I’m a Google logistics specialist. Today we’ll break down how to create a feed export for Merchant Center to launch Google Shopping on a WordPress site using the WooCommerce plugin.
Installing the Google Listings & Ads Plugin
Google offers its own free plugin for integrating your store with Merchant Center — it’s called Google Listings & Ads. Essentially, it’s similar to the solution Google has long provided for Shopify, but adapted for WooCommerce. If you check the reviews — the rating is, let’s say, not brilliant. But it’s important to remember: the plugin is completely free, so there’s not much to complain about.
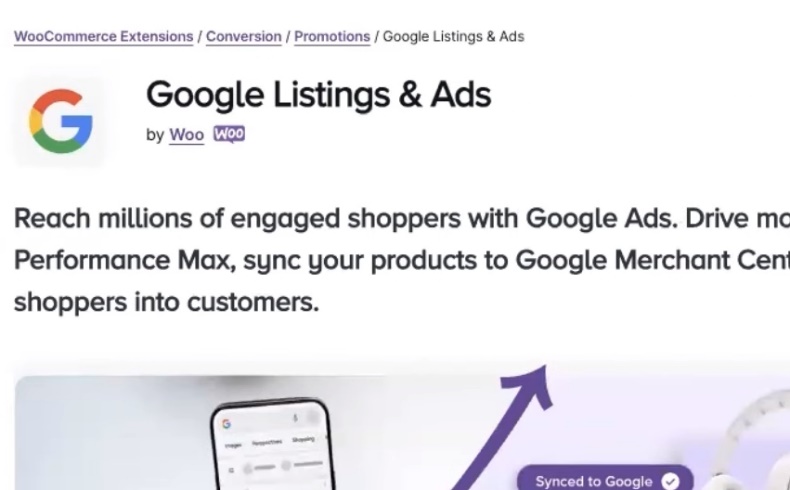
What do you need to do? Go to your WordPress admin panel, navigate to the “Plugins” section, find Google Listings & Ads through search, and install it on your site. After activation, finding the plugin is easy — it will appear in the sidebar menu among other installed plugins.
Open it, and you’ll see the initial setup interface. Here, click the “Start listing products” button — it will launch a step-by-step connection wizard. On the next screen, you’ll be asked to complete several key steps without which the feed won’t work.

Connecting the Plugin to Google Merchant Center
At this stage, we begin linking the site to Merchant Center. If you already have an active account — great, you can connect it. If not — the plugin allows you to create a new Merchant Center right during setup, without extra hassle.
Let me briefly remind you why Merchant Center is needed at all. This is the service through which you transfer product data to Google. Google checks it, points out errors (if any), and if everything is in order, approves products for advertising display. Essentially, Merchant Center is the foundation for any online store that wants to work with shopping ads. Without it, you simply cannot launch Google Shopping, even if you already have Google Ads set up.
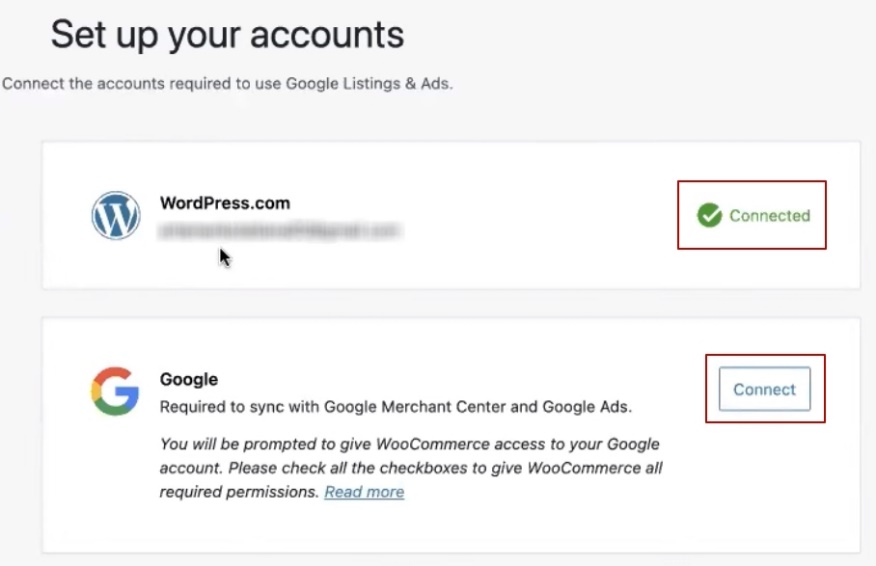
First, the plugin will ask you to set up the connection with WordPress. This is done through your admin email: click the “Connect” button, receive an email, and follow the link in the email. Important note — the link is only valid for one hour, so don’t delay confirmation. After following the link, the status will change to “Connected”.
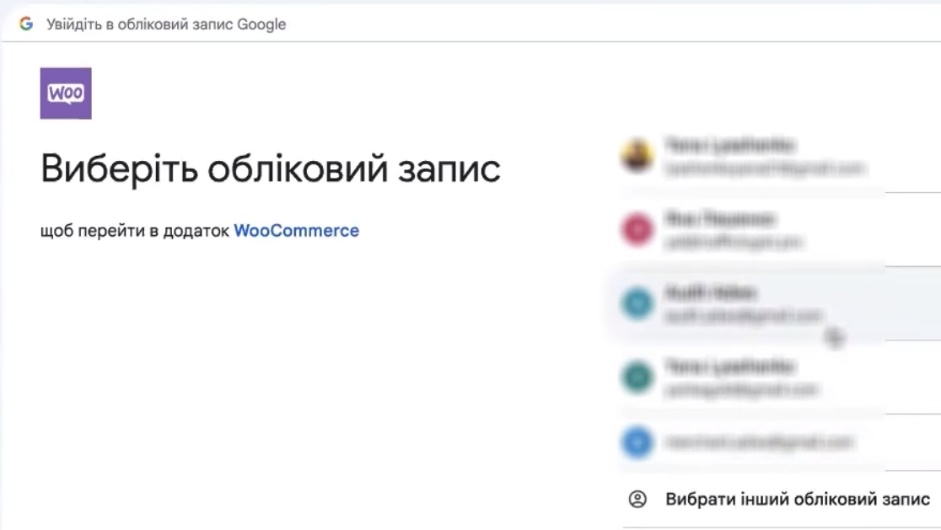
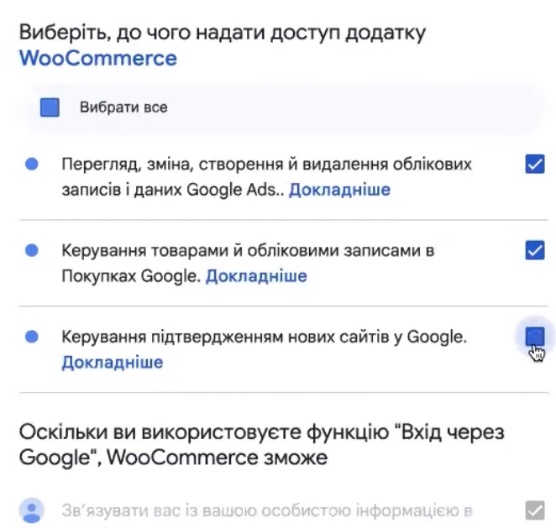
The next step is synchronizing Merchant Center and Google Ads. The plugin is designed to automatically link everything in one window. Select the Google account that has access to your Merchant Center. The plugin will also request permissions to access data — nothing critical here, this information is already tracked when working with Google’s advertising services, so you can safely confirm.
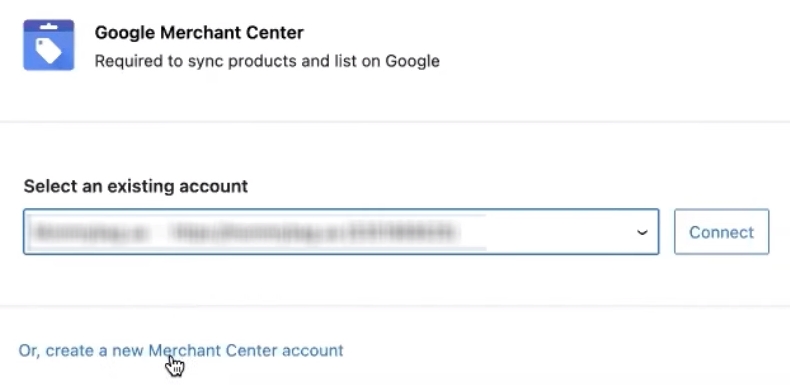
Next, a Google Merchant Center block will appear with a list of available accounts. If you have several — you need to select exactly the one you plan to link the store to. Once selected — click “Connect”.
If you don’t have a Merchant Center yet — simply click “Create New Merchant Center account”. The plugin will create the account itself, fill in the basic profile, and pull information from the site. Everything is maximally automated.
By the way, if you’ve worked with the Google Channel plugin on Shopify before, the process will look familiar — the logic is exactly the same: link the two services together and move on to feed setup.
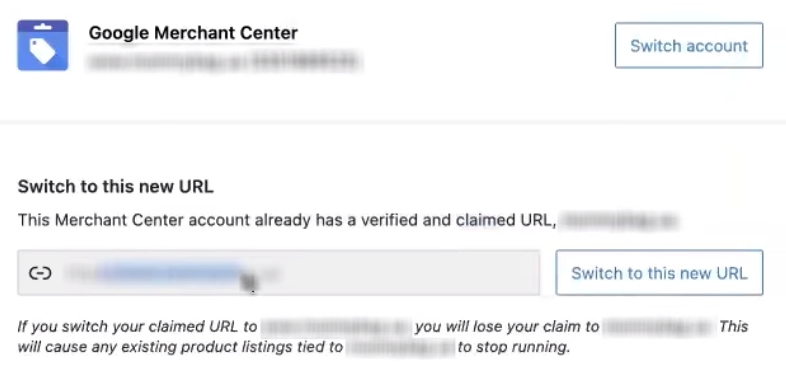
After connection, Google may notify you that your Merchant Center is already verified with a different URL. In this case, the system will offer to switch to the new site address. Click “Switch to this new URL” to activate the “Continue” button and move forward. Apparently, a separate site ownership verification procedure launches here — simply wait for it to complete.
Checking Connections to External Services
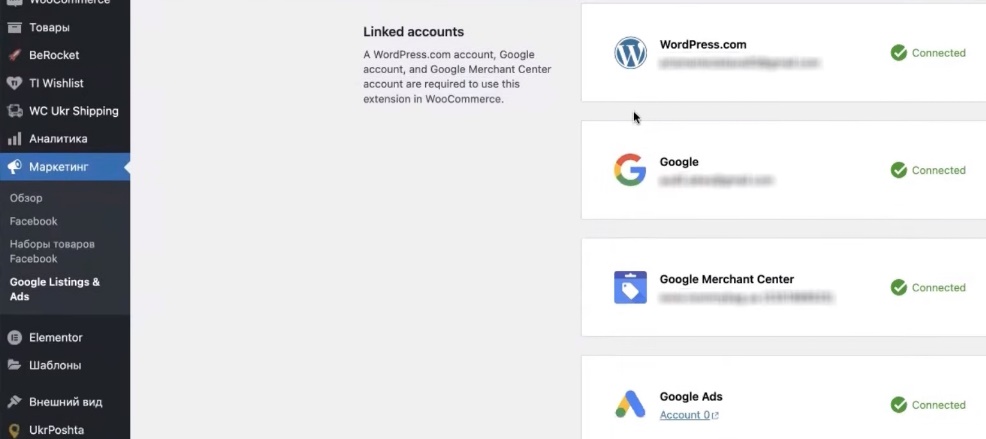
Let’s make sure everything is configured correctly at this stage. The basic connections in the plugin should look like this: the plugin is connected and linked to WordPress, binding is confirmed through the Google email account that gives you access to Google Ads and Merchant Center. At the same time, you can later link any account to Google Ads, and select the Merchant Center associated with the needed email.
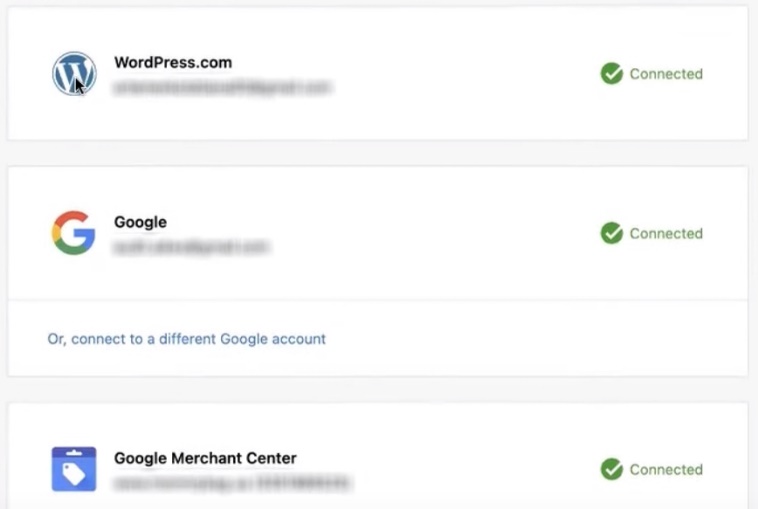
The ideal option is to create a separate email specifically for linking all advertising services, making it a single entry point. Then distribute account access to other people as needed. But you can also do it simpler — as in my case: I linked an existing email with several Merchant Centers attached, passed verification, selected the needed account, and clicked “Continue”.
Additional Plugin Settings
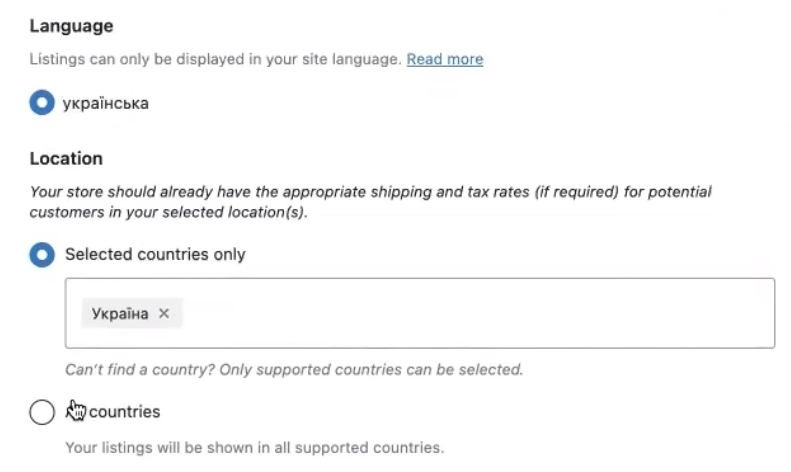
After connecting accounts, the plugin will ask you to specify the language (Language) and location — in my case, Ukraine is selected. You’ll also need to fill in shipping information and several other parameters. Plus, campaign creation functionality is built in here — the plugin will offer to set up Performance Max immediately, but this can be done later.
Setting Up Shipping Rates
If your store sells products abroad, it’s most convenient to automatically synchronize shipping settings with the site. But there are other options — for example, manually setting Shipping settings directly in Merchant Center.
For the Ukrainian market, manual setup is quite normal practice, this is not an error. You can manually specify shipping cost and timeframes in Google Merchant Center, especially if you don’t have direct integration with logistics services.
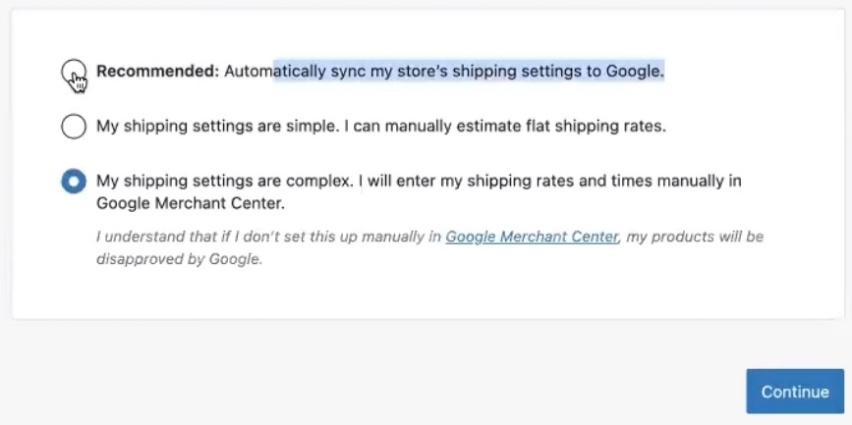
However, if you’re selling to Europe, Canada, Australia, or the States — there are often ready integrations with delivery services. In that case, simply select the “Recommended” block, and the system will pull the necessary data itself. After setting up shipping, we click “Continue”.
Phone Number: An Important Detail
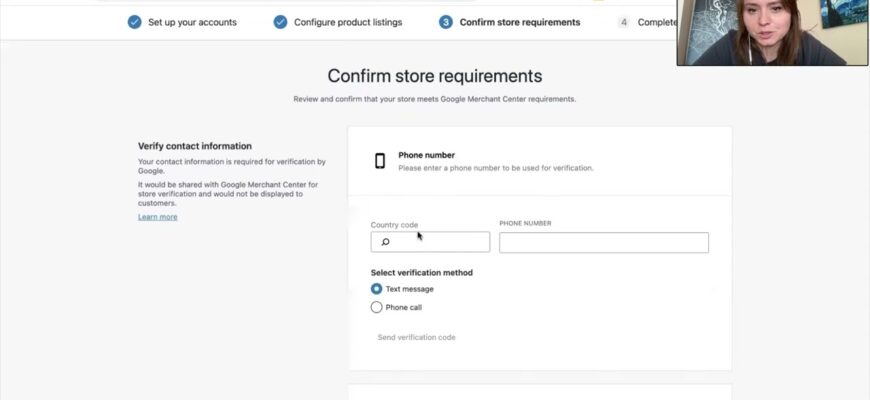
At the next step, the plugin will ask you to fill in several fields, and one of the most important is the phone number. This data is needed to duplicate contact information to Merchant Center. You cannot move forward without a completed and verified phone number.
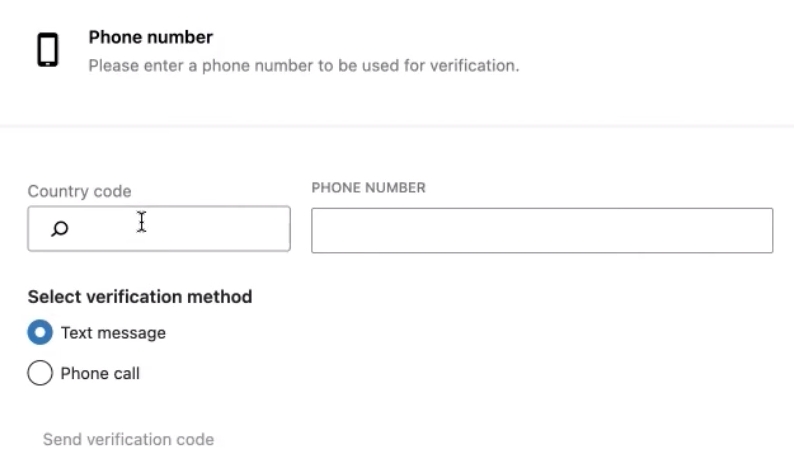
Pay attention to a key point: the phone number you specify in the plugin must match the one listed on your website. If one number is on the site and another in Merchant Center — this can cause problems during moderation. The phone verification procedure itself is not complicated, takes a couple of minutes.
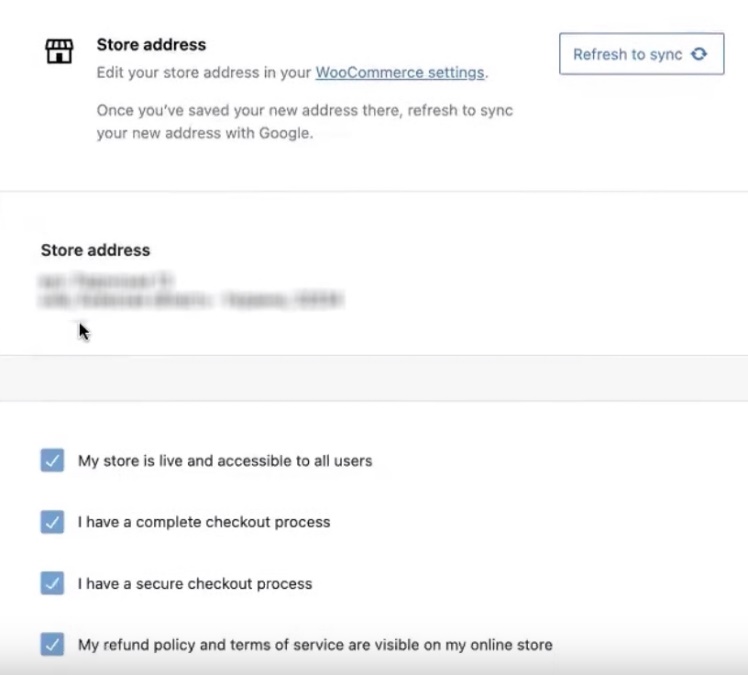
Address and Confirmation of Google Policy Compliance
The next step is to specify the address and check all necessary boxes. Essentially, this is something like a policy agreement: you confirm that your store complies with Google’s rules. Nothing unusual — simply check all boxes and click “Continue”.
Feed Setup and Google Ads Connection
After this, the plugin will “bother” you with a few more settings, but the hardest part is already behind you. A Feed status block will appear on screen with the note “Product listings are ready to be uploaded” — this means the feed for Google Merchant Center has been formed and is ready for upload. Products will soon be sent for review.

Right here, the plugin will offer to link the store to an advertising account. There are two options: connect an existing Google Ads linked to the Gmail you logged in with, or create a new advertising account right from here. In my case, I didn’t link accounts at this stage because I use different logins for different projects.
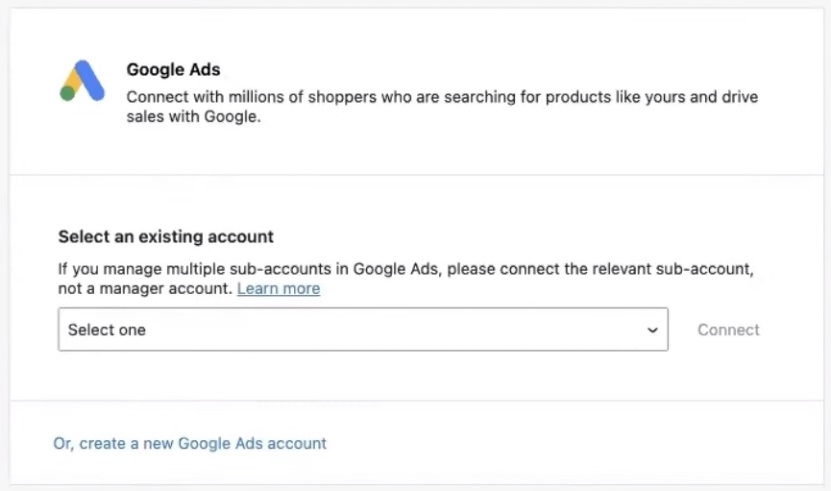
But if you don’t have an advertising account at all yet — you can safely create it through the plugin. The functionality will be exactly the same as if you were creating an account manually through Google’s interface. You’ll need to fill in payment details and standard information. Some people just find it more convenient to do everything from one place without jumping between tabs.
Working in Merchant Center After Connection
Now for an important point — be sure to go to your Merchant Center and check that everything pulled in correctly. In my case, immediately after connection, the first errors already appeared — this is normal, don’t panic.
Google says “Ready to be uploaded”, which means the system needs time to check all products. Usually, full feed processing takes up to 72 hours, but sometimes the process can take longer — the plugin itself warns about this.
Checking Connected Services in Google Ads and Merchant Center
After setup, it’s worth making sure all services have actually “seen” each other.
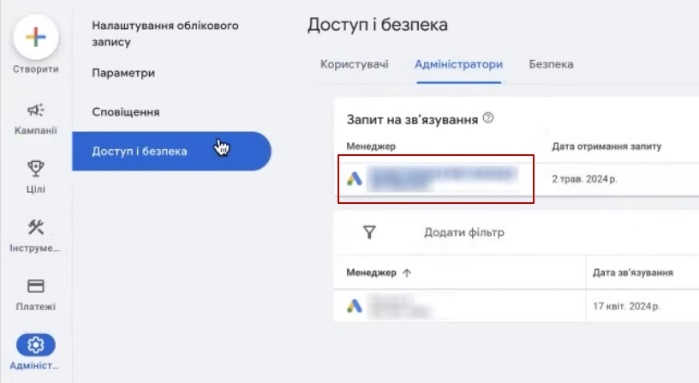
In Google Ads, go to the “Access and security” section, open the “Administrators” tab. A manager named Google Listings & Ads should appear there — this is your WooCommerce plugin. I recommend immediately accepting its access request so the link between the two accounts works without restrictions.
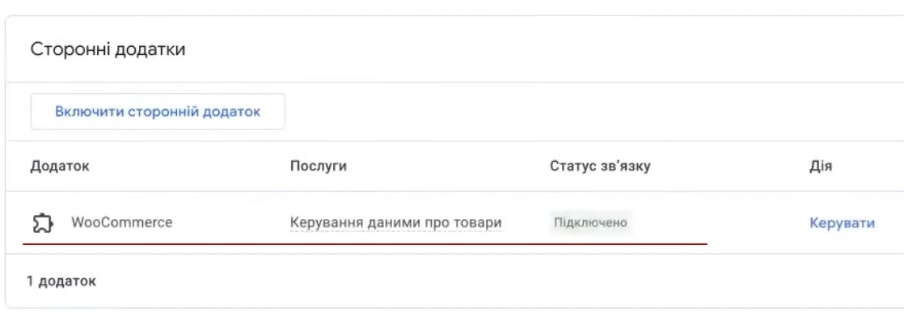
You’ll see a similar picture in Merchant Center itself. Go to settings, open the “Apps and services” section — WooCommerce should already be displayed there with the note “product data management”. If you see it in the list — everything is in place, integration was successful and you can move forward.
Plugin Dashboard in WooCommerce
After all settings, the main plugin dashboard will open before you. If you, like me, deleted the old feed — the new one will pull in with a small delay of a few minutes, this is normal.

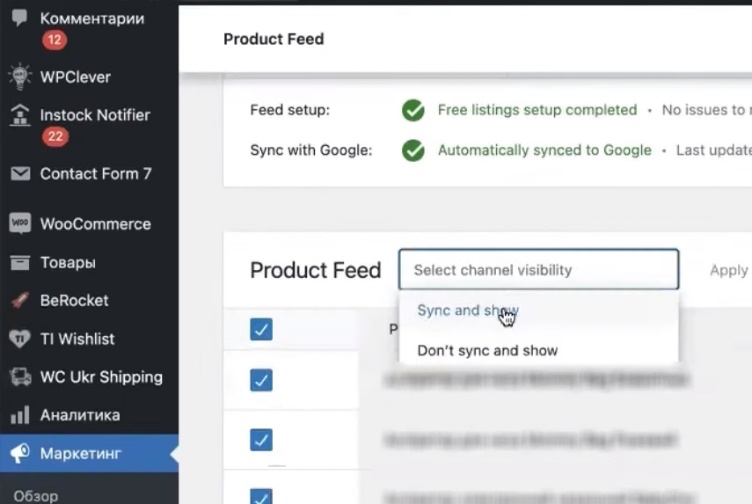
What can you see in the dashboard? Basic information about the store’s work with Google is collected here: the Free listing section (free product listings), the ability to create a paid advertising campaign, basic reports on clicks, impressions, and reach. The product feed loading into Merchant Center is also displayed, attribute rules are available, and settings for connected advertising accounts.
If you see the note “Disconnect Google Ads account only” — most likely, you haven’t confirmed access to the advertising account yet. This isn’t critical at this stage. The main thing now is to wait for all product information to load into Merchant Center.
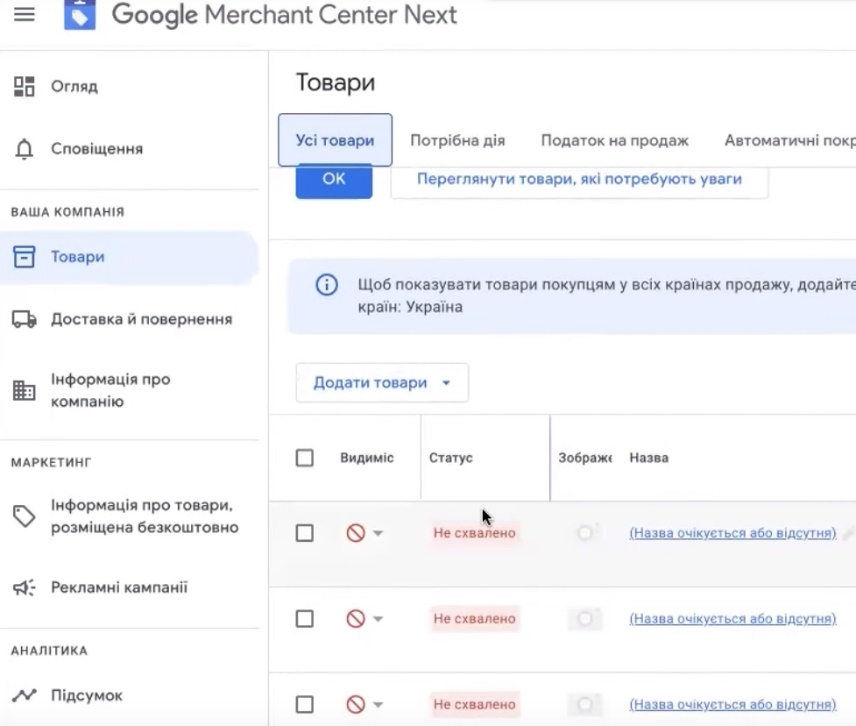
Monitoring Product Moderation
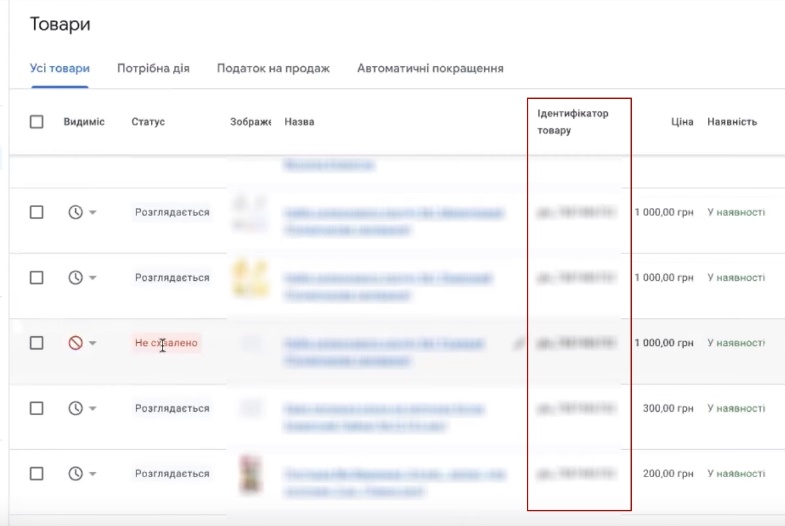
When data starts pulling in, you’ll see product identifiers and their statuses in Merchant Center: some are already under review, some are marked as “not approved”. Don’t rush to panic — until the check is fully complete, it’s too early to draw conclusions.
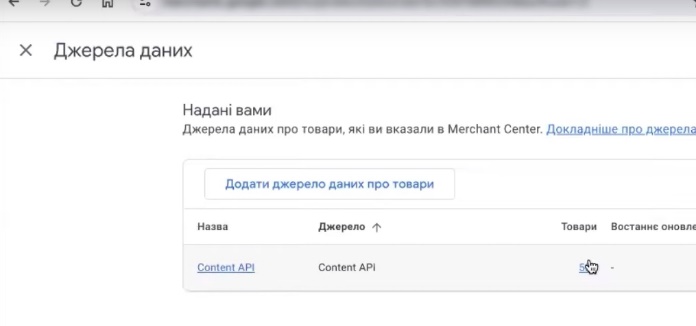
In my case, instead of the old feed that was previously uploaded manually, Content API appeared — this is exactly the result of the plugin’s work. Through it, 522 product positions pulled in, although the plugin showed 991 products. Some positions loaded with errors, some without. The number of processed products gradually grew: 555, then 652 — the system loads them in portions, not all at once.
By the way, one noticeable plugin drawback — if you have many products, scrolling through them page by page is quite painful. Convenient filtering or bulk viewing isn’t available here, unfortunately.
What needs to be done next? Wait. Full moderation checking usually takes up to three days. Only after it will you get an adequate picture: which products passed moderation, which didn’t, and what exactly needs to be fixed. Until that moment, saying that any specific product is “good” or “bad” is premature. Perhaps some attributes simply haven’t finished loading yet.
Actions for Re-review
Even at the upload stage, first rejections may appear. For example, some of my products were marked as “adult content”, and hydrogen peroxide fell under the “health protection” category — Google decided that such a product shouldn’t be shown in ads. But rushing with appeals isn’t worth it.
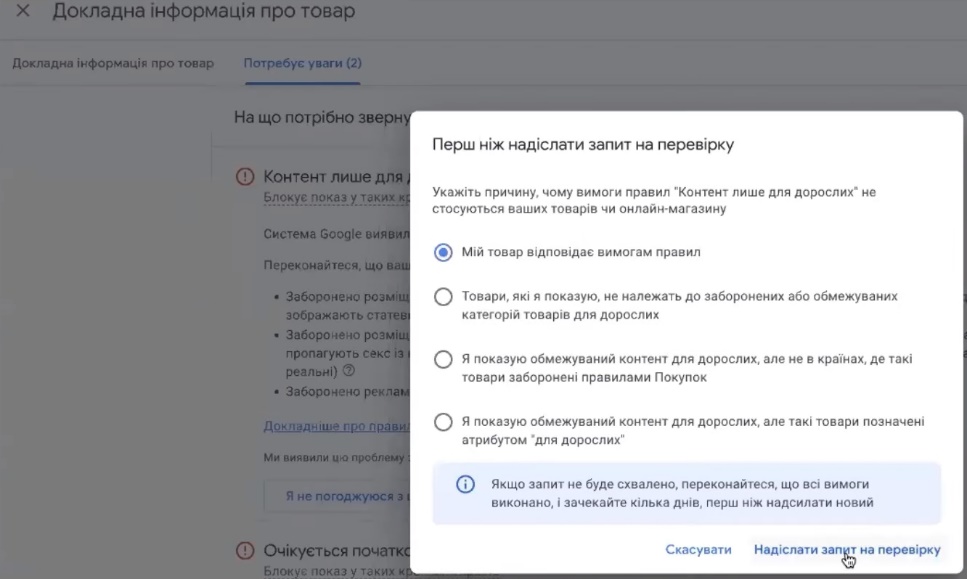
The right strategy is to wait for the full three-day check to complete. Only then will you get a complete block of information: which product cards have problems, whether you need to make edits on the site or adjust data in the product positions themselves. And only based on this data can you submit appeals or fix errors point by point.
Specifying Shipping and Return Data
After feed upload, Google may ask you to fill in additional shipping information. Remember, at one of the previous stages we selected the manual entry format (Manually), not automatic synchronization with the site? Now it’s time to fill in this data.
Before entering anything in Merchant Center, I recommend opening your site and checking what’s written in the “Shipping” and “Payment” sections. The data should match — discrepancies between the site and Merchant Center can cause product rejection during moderation.
The filling process itself isn’t complicated. First, add the country and click “Continue”. Don’t skip this step — the system will “complain” until the shipping block is filled.
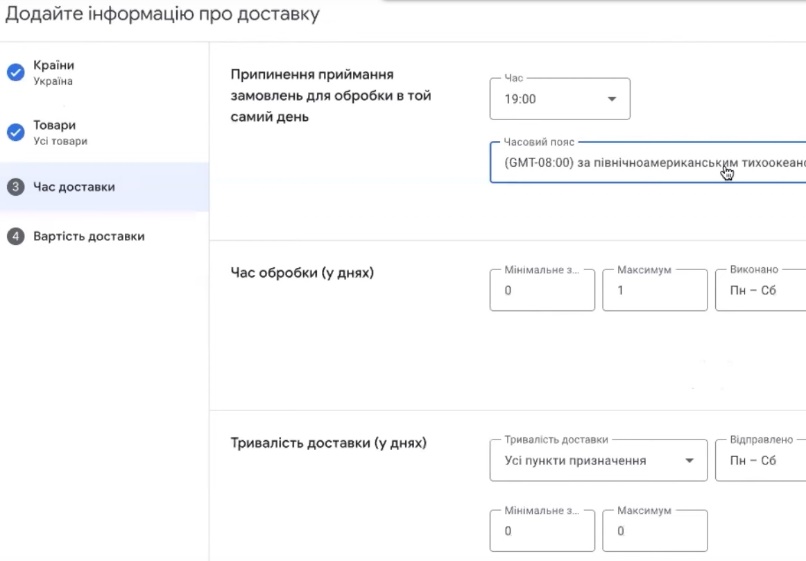
Next, you need to specify several parameters:
- Order acceptance time. If you don’t have a strict deadline — indicate a reasonable time, for example, until 19:00. The main thing is that it matches the actual store operating schedule.
- Order processing time. How long passes from order placement to transfer to the delivery service. Usually this is 1 business day, but depends on your business.
- Delivery timeframes. For Ukraine, if you ship via Nova Poshta, the typical range is 1–3 days. That’s what we indicate.
- Shipping cost. If you have free shipping — select the corresponding option. If paid — indicate a fixed amount or range. In my case, I set free shipping for now.
After filling in all fields, we click “Save” — and shipping setup is complete.
Now we just wait for the full Merchant Center check to finish. When moderation is complete, you’ll be able to analyze in detail which products passed and which need improvement — and only then make point corrections.