
Hello! My name is Yana Lyashenko, and I am a Google logist. My job is to help businesses find their target audience and scale their online sales through Google advertising tools. Today, we will discuss how to launch Performance Max for a store on Prom.ua.
What should you pay attention to when registering Google accounts?
Before you begin configuration, remember a few important points.
Setting up Performance Max consists of several consecutive steps. But before you start, I strongly recommend creating a single email address that you will use to log in to all Google services. Having a single login for Merchant Center, Google Analytics, Google Ads, and Search Console is convenient and will prevent confusion in the future. I will discuss the purpose of each service further on.
So, what stages await you:
- Creating a Google Merchant Center account is the most labor-intensive and time-consuming stage. Merchant Center is a separate service where your store undergoes verification and moderation. Without it, you won’t be able to launch product ads on Google Ads. Why is this stage so difficult? Website moderation takes an average of 72 hours. Plus, Google has now tightened its checks: almost all accounts go through manual moderation. Some are approved, some are not. Keep this in mind when planning your launch dates.
- Connecting Google Analytics and setting up dynamic remarketing is much simpler here. Create an analytics account, copy the code snippet, and paste it into the appropriate field on Prom.ua. This does not affect moderation in any way. The whole process takes just a few minutes — almost like on Shopify.
- Creating a Performance Max campaign—I’ll show you one of the fastest and most proven ways to set it up, with minimal issues. This option is great for getting started.
Merchant Center creation
We’ll start with the longest stage, which makes sense. While Merchant Center is being moderated, you can calmly take care of the rest of the settings.
Before creating an account, here’s an important reminder: use the same email address for all Google services (Search Console, Analytics, Merchant Center, Google Ads). Why is this critical? The fact is that Merchant Center is linked to a website on a one-to-one basis. You can install as many analytics counters as you want on your website and create several Google Ads advertising accounts, but there can only be one Merchant Center for a single domain. If you create it with a random email address and then want to combine everything into a single ecosystem, you will run into problems.

Step-by-step registration:
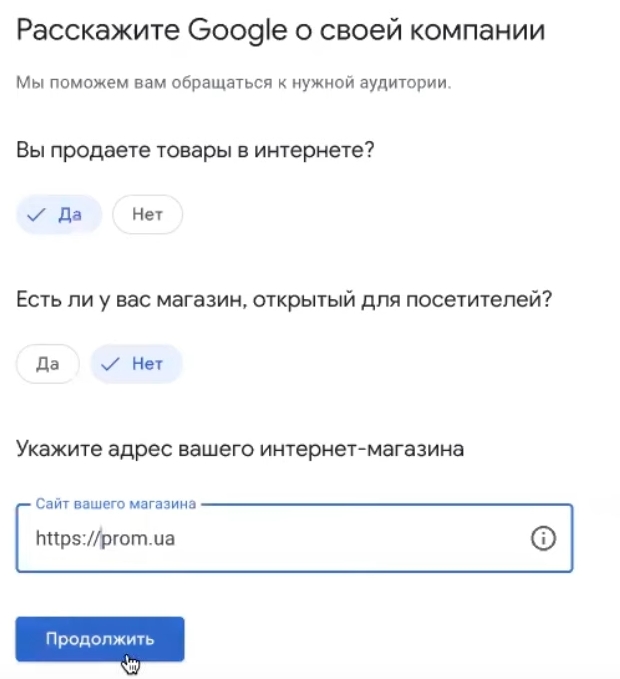
- Go to the link Google Merchant Center and click “Create account.”
- The system will ask if you have an offline store. If you only sell online, select “No.” Owners of physical points of sale should select “Yes” — this will open up additional opportunities for local advertising.
- Enter the website domain and click “Continue.”
- On the next screen, Google will display the requirements for stores. I recommend skimming through them—they describe the basic rules, and violating them will result in your account being blocked.
- Agree to receive notifications — this is really useful. Google will send you information about errors in the feed, problems with products, and moderation status.
The new Merchant Center Next interface: how to switch to the classic version
An important point to note. Google now automatically creates accounts in the new interface—Merchant Center Next. However, most instructions and video tutorials on the internet still show the old version—the classic Google Merchant Center. This is not critical for work, but it can be confusing when setting up.
If you want to work in the familiar interface shown in most training materials, switch to the classic version.
How to do it:
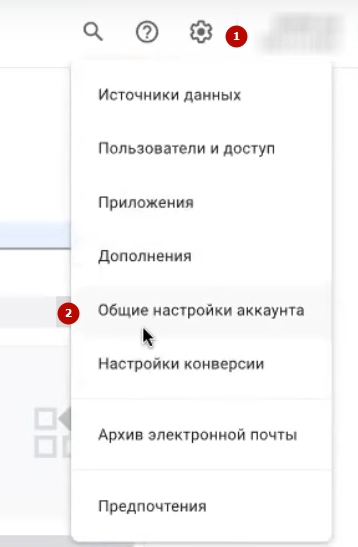
- Go to “General Account Settings” in Merchant Center Next.
- Scroll down to the bottom of the page.
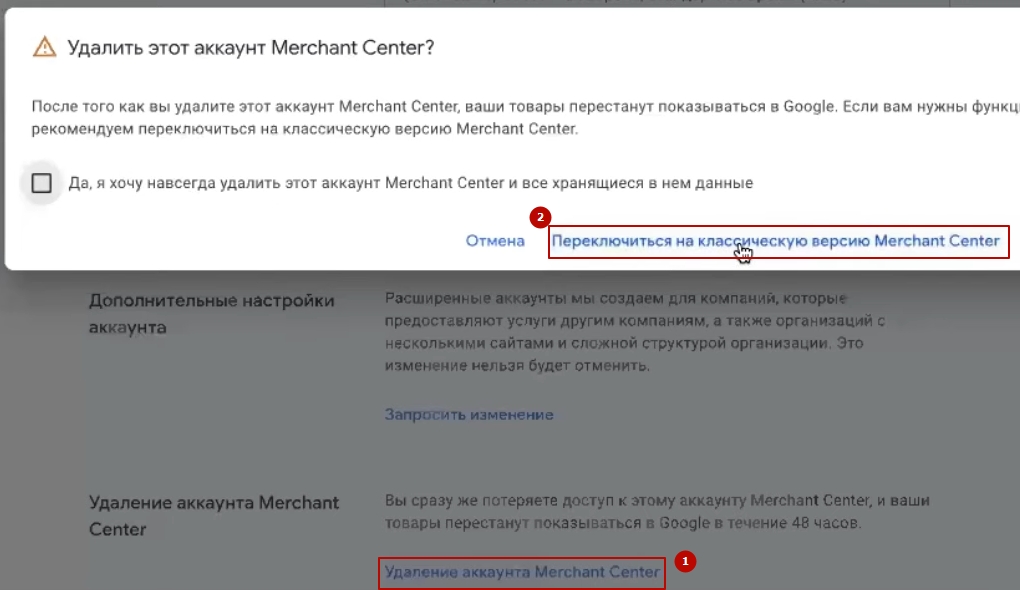
- Find the section titled “Delete Account” — don’t be alarmed by the name.
- Click on the link “Switch to the classic version of Merchant Center” — no need to check any boxes.
Done! Now you have the good old interface that 90% of the training videos are based on.
Fill in the company information in Merchant Center
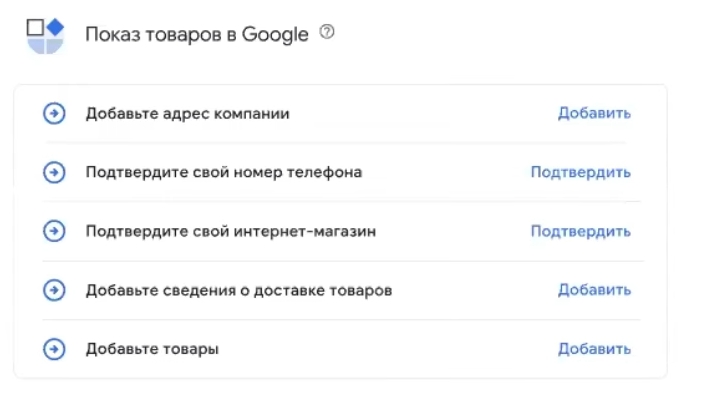
If you are just getting started and the new interface does not bother you, let’s move on to filling in the data. On the main page, you will see a section with the information you need to enter. Let’s go through it step by step.
Company address
There is one important point to note: the address in Merchant Center must match the address on your website exactly, right down to the postal code. Google checks this information during moderation.
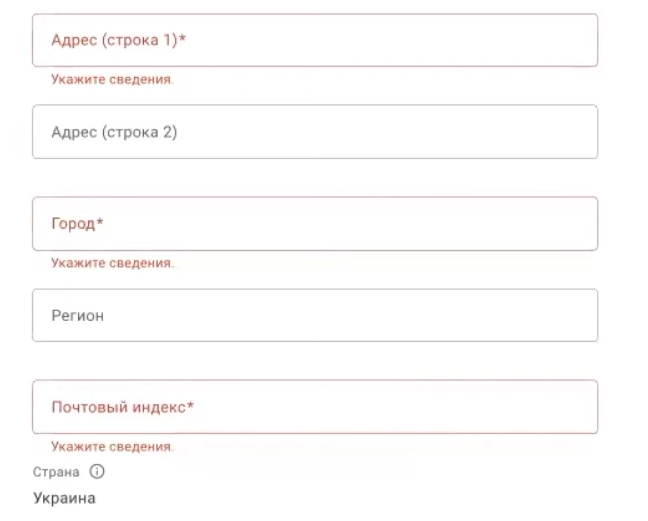
A few practical tips:
- If you have a Google My Business profile (and it is advisable to create one), copy the address from there. This will ensure that there are no discrepancies.
- For residents of Kyiv: in the “Region” field, write “Kyiv” rather than “Kyiv Oblast.” Administratively, Kyiv is a separate entity, just like the Autonomous Republic of Crimea. It’s a minor detail, but moderators pay attention to it.
Phone number verification
The next mandatory step is phone verification. And here there are some nuances that can save you a lot of hassle.
- Rule number one: the phone number in Merchant Center must match the number on the website. Google moderators directly compare this information.
- Rule two: verify the uniqueness of the number. Enter it into a search engine and ensure that it does not appear on Bigl, OLX, Prom.ua, or other platforms. Why is this important? During manual verification, moderators may take issue with the fact that your number is linked to other resources. It is preferable to use a separate number specifically for this store.

How to confirm:
- Enter your phone number;
- Click “Confirm”;
- Select how you want to receive the code—voice call or SMS;
- Enter the code you received and save it.
Регистрация в Google Search Console
Now you need to confirm your rights to the online store. Remember how I mentioned at the beginning about using a single email address for all Google services? This is where that rule comes into play. When all services are created under one account, the connection between them can be set up in literally a minute—no fuss, no muss.
To verify your rights to the website on Prom.ua, you will need Google Search Console. This service will come in handy in the future anyway — for tracking the website’s position in search results, analyzing indexing errors, and much more. So, let’s create an account and move on.
How to connect Search Console to a website on Prom.ua?
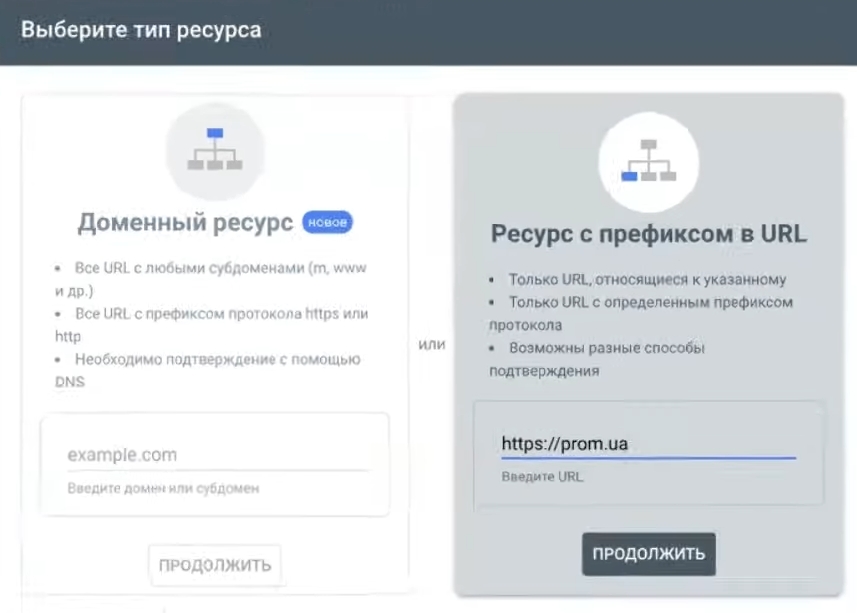
- Go to Google Search Console and enter your store’s URL. Click “Continue.”
- The system will generate a long confirmation code — copy it.
- Open the store’s admin panel on Prom.ua. Look for the “Webmaster Tools” section.
- Paste the copied code into the “Search Console verification code” field and save the settings.
- Return to Search Console — the website address should now be displayed as verified.
After that, Merchant Center will give you the option to claim your website. Find the corresponding button, click it, and you’re done. The whole process takes a couple of minutes if you do everything under one Google account.
This completes the main part of setting up Merchant Center. If you encounter any difficulties at any stage, please write to me and I will help you figure it out.
Indication of information about the delivery of goods
The next mandatory step is to add information about the delivery of goods. Google in Ukraine insists that this section be filled out, so you cannot skip it.
Important note: we are talking specifically about targeted delivery — when a courier delivers an order to a customer’s home or office. This does not include delivery to a Ukrposhta branch or Nova Poshta warehouse. If your website does not currently have a “delivery by address” option, add it. Without this, the Merchant Center setup will not be complete.
How to fill in the delivery parameters:
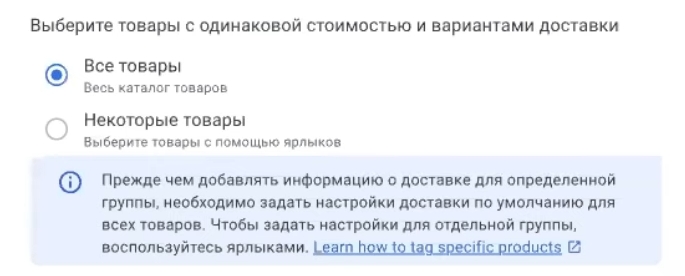
- Select which products are eligible for delivery—all or only part of the range. Click “Continue.”
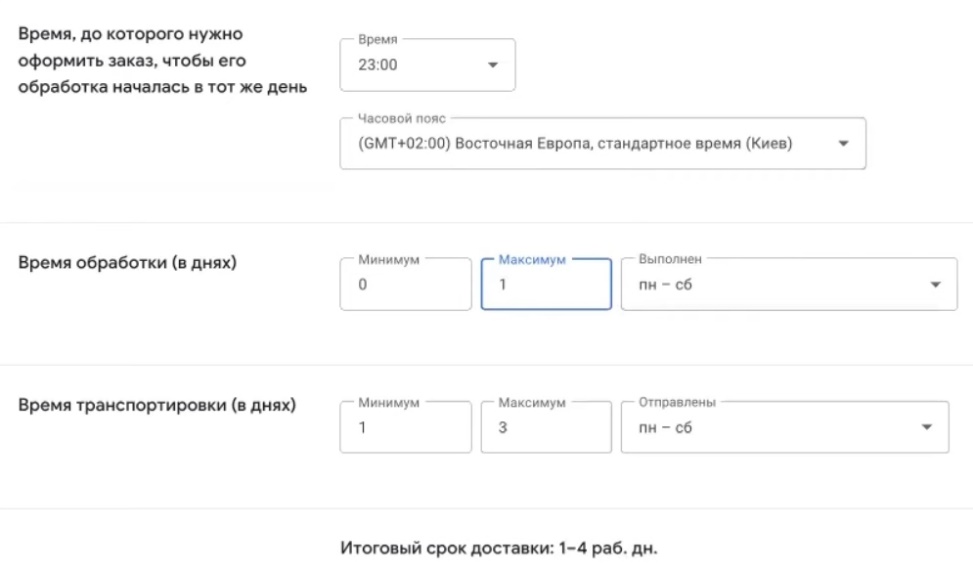
- Specify the order acceptance time — the time until which you process orders daily. Be sure to check the time zone — it should be yours.
- Fill in the order processing time. What does this mean? This is the period from the moment the order is received to the moment it is transferred to the delivery service. For example, if you accept orders until 7 p.m. and ship them on the same day, enter 0 days. If orders placed after 6 p.m. are only processed the next day, enter 0-1 days.
- We specify the delivery time separately — how many days it takes for the parcel to reach the customer. For Nova Poshta, it usually takes 1-3 days, so we write that.
Indication of delivery cost
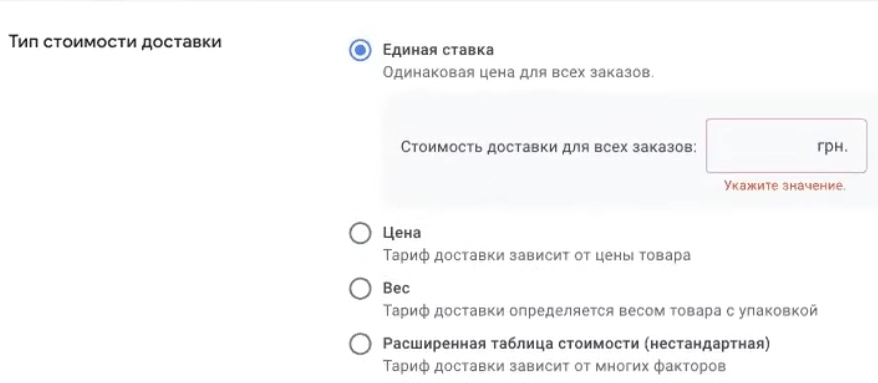
Now you need to set the shipping cost. Google offers three options:
- Free shipping — if you don’t charge for address-specific delivery at all.
- Fixed rate — for example, 80 UAH for any order.
- Free for orders over a certain amount — for example, orders over 5,000 UAH qualify for free delivery, while others incur a delivery charge of 70 UAH.

My advice: choose a flat rate if your website calculates delivery costs based on the order amount. Don’t complicate your life with options based on product weight — this will require you to upload additional attributes to the feed, which is a lot of hassle. There’s no need for this when you’re just starting out.
Filled it out? Save it and move on.
Adding products to Merchant Center
So, almost 90% of the work with Merchant Center is behind us. The last and most important step remains—uploading products. It is after this step that Google will start checking your account. This is the 72-hour moderation I warned you about at the beginning.
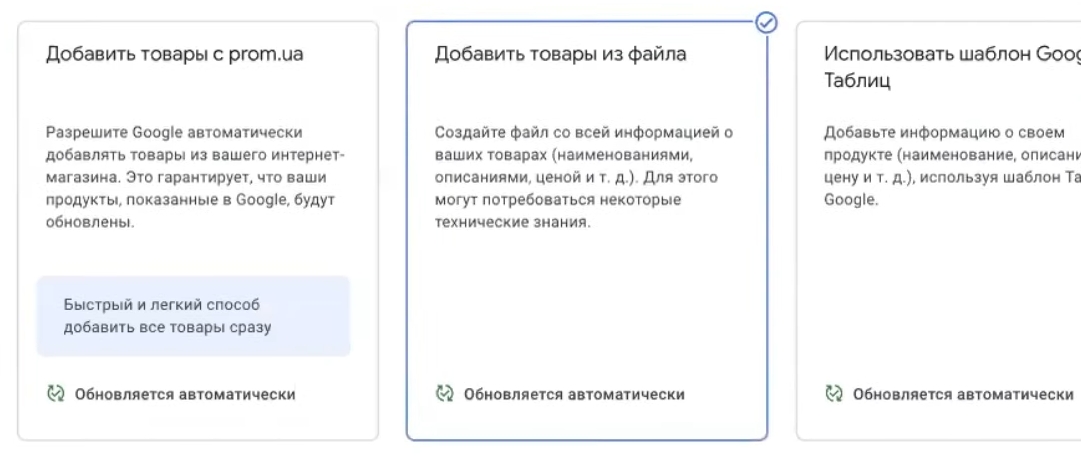
For stores on Prom.ua, the most convenient way to upload is via XML feed. Prom generates a link to the file with products, and all you have to do is copy it and paste it into Merchant Center.
How to generate a feed on Prom.ua?
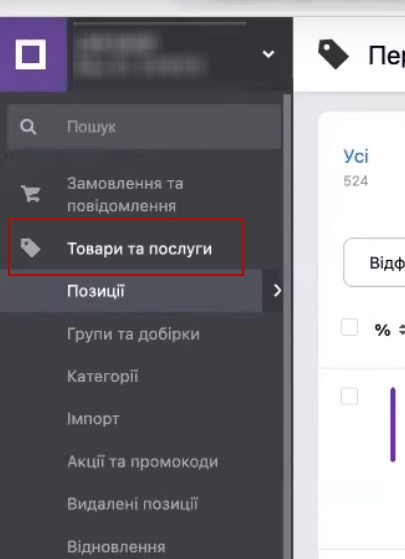
- Go to the store’s admin panel, section “Products and services”.
- Click “Export.” Select what to export—the entire range or individual categories. It’s up to you: you can test advertising on some of the products first, or you can export everything at once.
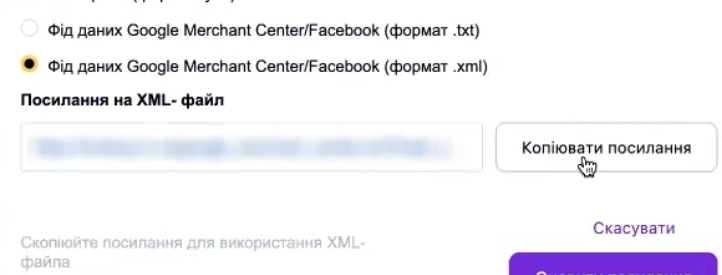
- In the data format, be sure to specify XML — this is the standard for Google Merchant Center.
- Click “Generate link” and copy the URL you receive.
Uploading a feed to Merchant Center
- Return to Merchant Center and locate the section for adding products.
- Paste the copied link to the feed and click “Continue.”
- We wait for Google to start processing the products — this usually takes a few minutes.
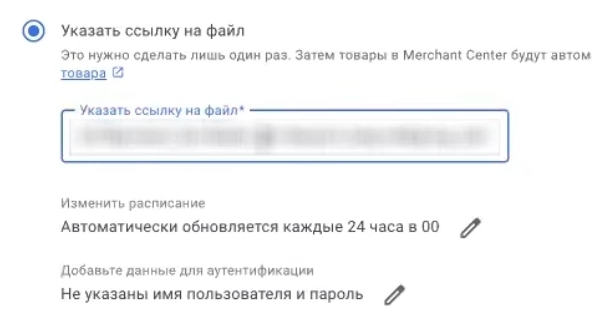
Important life hack. Immediately after downloading, change the feed update frequency to “Monthly.” Why? While moderation is in progress, frequent updates are unnecessary—they only create unnecessary load. After successfully passing the check, return the setting to daily updates.
In the status section, you will see how the verification is progressing: everything is fine, there are warnings, or — in the worst-case scenario — the account is blocked. If the moderation was successful within 72 hours, congratulations, you can proceed to creating Performance Max advertising campaigns. Everything is much easier and faster there.
Installing Google Analytics 4 on Prom.ua
To connect the fourth analytics tool to your store on Prom.ua, you only need to do two things: open your store’s admin panel and create a Google Analytics 4 account. Let’s break down the whole process step by step.
Creating a Google Analytics 4 account
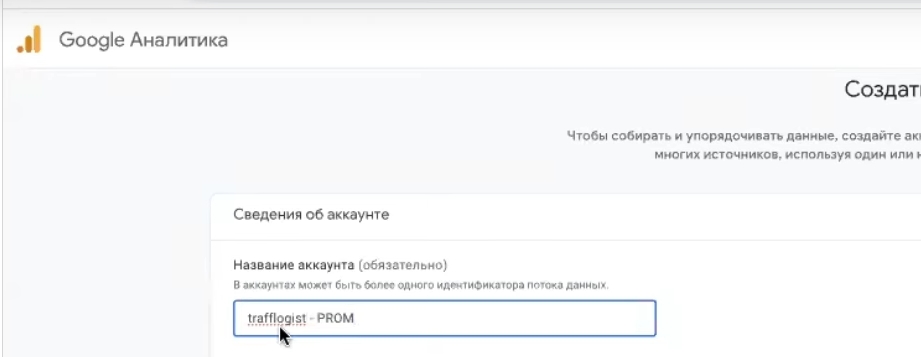
Go to the Google Analytics page and start creating a new account.
- Account name. Use part of your domain name — this makes it easier to find the right account in the list. Previously, you could search by numerical identifier, but now you can only search by name. For example, if your store is called “moda-shop.prom.ua,” name the account “moda-shop.”
- Data collection settings. You can check all the boxes provided—this will not critically affect the analytics.
- Resource name. Again, use something meaningful that is related to your domain. This will come in handy when you have several websites in one account.
- Country and currency. Select Ukraine and hryvnia — this way, reports will display data in the usual format.
- Company information. Fill in as desired — this is a form for Google and does not affect functionality.
- We accept the terms of service and move on.
- Platform type. Be sure to select “Web” — we are setting up analytics for an online store.
- Enter your store’s domain name and come up with a name for the data stream. Click “Create stream.”
After creating the stream, a window will open with instructions on how to install the tag. All you really need from here is the data stream ID (it looks like G-XXXXXXXXXX). Copy it.
Connecting analytics to Prom.ua
Now for the best part — everything is as simple as possible on Prom.ua:
- Go to the store’s admin panel, section “Analytics” → “Web analytics tools”.
- Find the field for Google Analytics.
- Paste the copied ID into the “Confirmation code for Google Analytics” field.
- Save changes.
Done! Advanced e-commerce for your store is now set up. No more messing around with code, no manual event settings — Prom.ua takes care of all the technical stuff. It’s kind of like Shopify used to be: paste the code, and everything works. Convenient, fast, and headache-free.
Creating a Google Ads advertising account
Before launching advertising campaigns, you need to create a Google Ads account. After that, connect dynamic remarketing to it, and you can proceed directly to setting up Performance Max. Let’s take a look at how to do this.

- The first method is through Merchant Center. If you have already set up Google Merchant Center, find the “Create a new advertising account” or “Link” button there. This is convenient because the link between the services will be established automatically.
- The second way is direct. Type “Google Ads” into the search bar, go to the official website, click “Get Started,” and you will be taken to the registration interface.
Google will immediately offer you to create an advertising campaign. You can create any campaign you want—it doesn’t matter, as you can delete it later. The main task at this stage is to get to the payment details section.
Why is this important? A lot depends on how you fill in your payment information:
- you will pay by card or by invoice;
- whether VAT will be charged;
- how easily you will pass the advertiser identity verification.
The last point is a real stumbling block for many. Advertisers make a lot of mistakes during verification: they enter incorrect data, upload the wrong documents, and confuse formats. I have separate videos on how to correctly enter payment details for legal entities, sole proprietors, and individuals — watch them before registering to save yourself time and hassle.
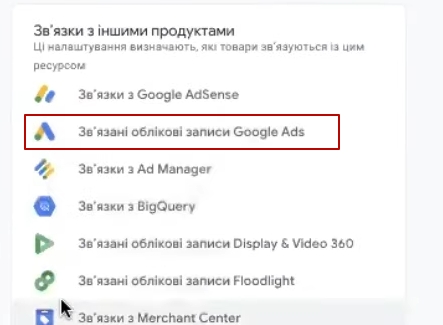
How do I link Google Ads to Merchant Center?
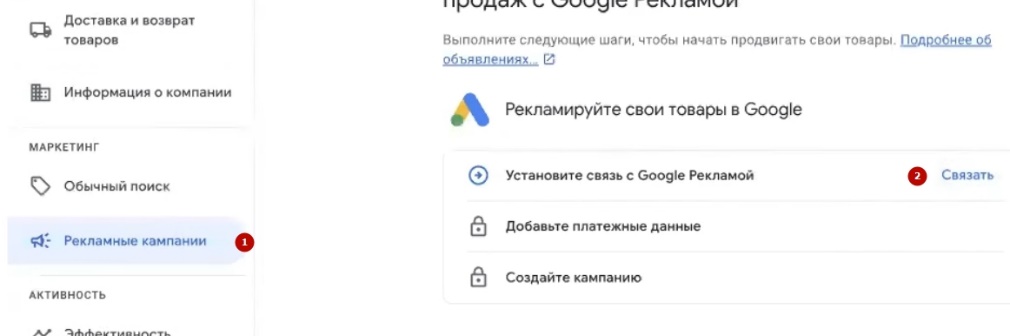
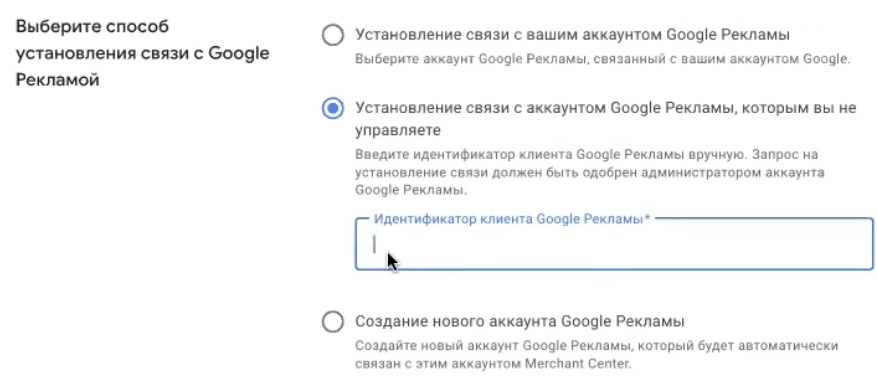
If you created an advertising account separately, you need to link it to Merchant Center. Go to the advertising campaigns section and select one of the options:
- Link an existing account — you will need your ten-digit Google Ads code (found in the upper right corner of the interface).
- Create a new account if you haven’t registered with Google Ads yet.
Remember the single email address? Here it comes in handy again. If all services are created under one account, the linking will happen almost instantly. Click “Link accounts” and you’re done.
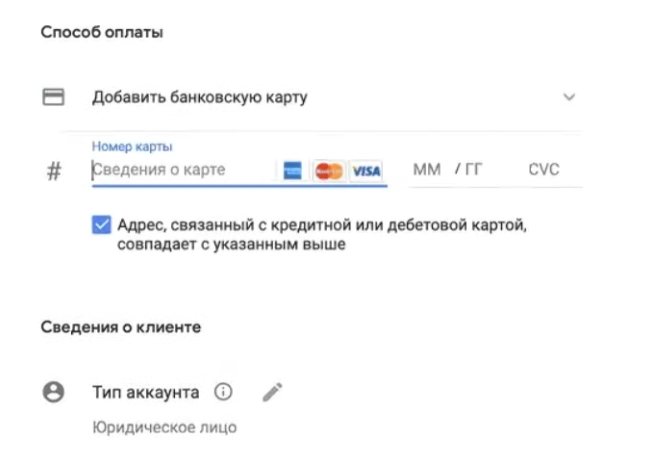
Enter payment details in Google Ads
After creating an account, proceed immediately to filling in your payment details—this is the stage where most advertisers stumble.
What payment options does Google offer?
- Prepayment — first you top up your balance, then you spend.
- Automatic payments — Google debits money from your card as your budget is spent.
- Invoicing via IBAN — suitable for legal entities, but please note that 20% VAT will be added to the amount.
Account type is a separate issue. There are three options here: legal entity, sole proprietor, or individual. And this is where it gets interesting.
The information you provide during registration must match the documents used to verify the advertiser. For example, if you are registering as a sole proprietor, enter the name and address exactly as they appear in the extract from the Unified State Register. If you are registering as an individual, the information must match your passport.
A common mistake: a person registers as an individual and then tries to verify their identity using documents for a sole proprietorship. Or vice versa. Google will not let this slide, and you will either have to create a new account or engage in lengthy correspondence with support.
My advice: before filling in your payment details, prepare the documents that you will submit for verification. Open them and enter the information letter by letter. This will save you a lot of time in the future.
Have you filled everything in correctly? Click “Continue” — your advertising account will be created, a link to Merchant Center will be established, and you can move on.
Creating Google Ads without Merchant Center

If you are unable to link your accounts through Merchant Center, you can take a different approach—create a Google Ads advertising account directly. It will take a few more clicks, but the result will be the same.
When creating an account, Google will insistently offer to set up an advertising campaign right away. Don’t be alarmed — this is just a mandatory step you need to go through to get to your payment details. You can delete the campaign later; you won’t need it.
Some practical tips:
- Select “Other types of goals” — otherwise Google will redirect you to a simplified interface that is not suitable for normal operation.
- Campaign type — “Shopping,” then “Maximum effectiveness.” Allow the system to generate objects — agree.
- Fill in the fields with whatever you want. Headings? Write “11,” “22,” “33.” Descriptions? Any text. Images? Upload anything just for the sake of it — even a screenshot of your desktop. This campaign is a temporary placeholder, destined to be deleted.
- Set the minimum budget — 1 hryvnia. Why spend more on a campaign that you won’t be launching anyway?
After that, the system will redirect you to fill in your payment details. This is an important step — please complete it carefully, as I described above.
What should I do after registering?
Once your Google Ads account has been created and your payment details have been filled in, delete the test campaign without regret. Next, we will create a normal Performance Max advertising campaign that will really work and generate sales.
By the way, if you are working in the new Merchant Center Next interface and want to switch to the classic one, the algorithm is the same: gear icon → “General account settings” → “Delete Merchant Center” → “Switch to classic version.” The process of creating advertising campaigns is identical in both interfaces, so choose the one that is more convenient for you.
Setting up dynamic remarketing on the Prom.ua website

Before creating advertising campaigns in Google Ads, I strongly recommend setting up dynamic remarketing on your website. Without it, Performance Max will work blindly — it will not be able to “catch up” with visitors with personalized ads featuring products they have already viewed.
How to enable dynamic remarketing on Prom.ua?
Prom.ua has a special application that simplifies integration. Here’s how to find it:
- In the store admin panel, go to the “Market” section or find the “Add app from Market” item.
- Enter “Google Ads” in the search bar—the only app with that name will appear. Click on it.
Setting up tags in Google Ads
Now let’s move on to the Google Ads advertising account itself:
- Open “Tools and Settings” (the wrench icon in the top menu).
- Go to Audience Manager → Your Data Sources.
- Find the “Google Tag” block. If you see the “Set up” button, click it; the tag has not yet been configured.
- In the settings, select the type of data collection: “Collect data on specific user actions” is the second option in the list.
- Select “Retail” as the business type. Save and move on.
- Go to “Details,” scroll down to the “Tag setup” section, and select “Use Google Tag Manager.”
- Copy the digital ID displayed there.
The final step — linking to Prom.ua
Return to the Google Ads app on Prometheus:
- Paste the copied number into the appropriate field;
- Be sure to check the “Event tag” box;
- Click “Save.”
What have we done now? We have set up data collection on visitor actions on the website — product views, additions to the cart, purchases. All this information is now automatically transferred to your Google Ads advertising account. The system will know which products each visitor was interested in and will be able to show them relevant ads.
That’s all for dynamic remarketing. Let’s move on to the most interesting part — creating an advertising campaign.
Linked accounts in Google Analytics 4
Remember the single email for all services? Now this rule will work in your favor again. You need to link analytics to your Google Ads advertising account so that user behavior data is transferred to the advertising system.
How to link Google Analytics 4 with Google Ads:
- Go to Google Analytics 4, open the “Admin” section (the gear icon in the lower left corner).
- Scroll down and find “Linked accounts.”
- If there are no links yet, the list will be empty. Click “Link.”
- Select “Google Ads accounts” and search for the desired account by ID. Ensure that this is the same Google Ads account in which you will be running advertising campaigns — the IDs must match.
- Check the box next to the desired account, confirm, and complete the link.
Done. Now Analytics and Google Ads exchange data — information about conversions, audiences, and user behavior will be available in your advertising account.
Creating audiences
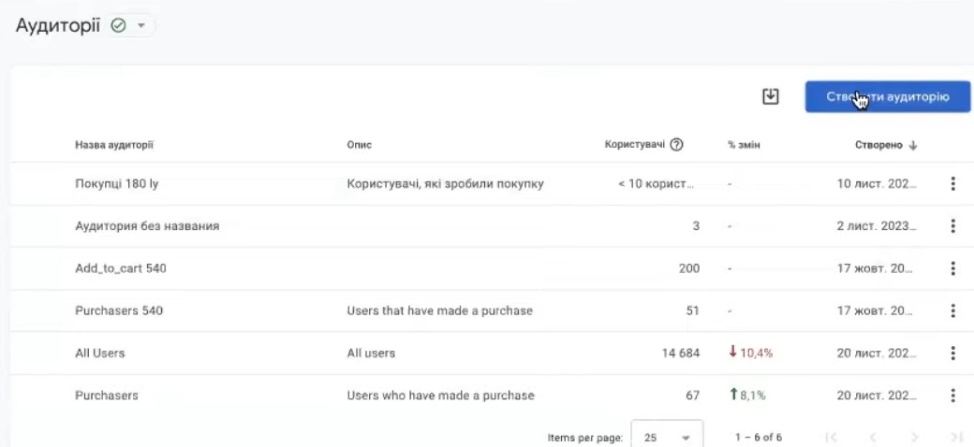
Another important step is to create an audience of buyers. Why? So that Performance Max can use this data to find similar users and optimize impressions.
How to build an audience:
- In Google Analytics 4, go to the “Audiences” section.
- Click “Create Audience.”
- From the suggested templates, select “Purchasers.”
- In the settings, specify the period — I recommend setting it to 180 days or more. The longer the period, the more data the system will collect for training.
- Give the audience a clear name, such as “180-day buyers,” and save it.
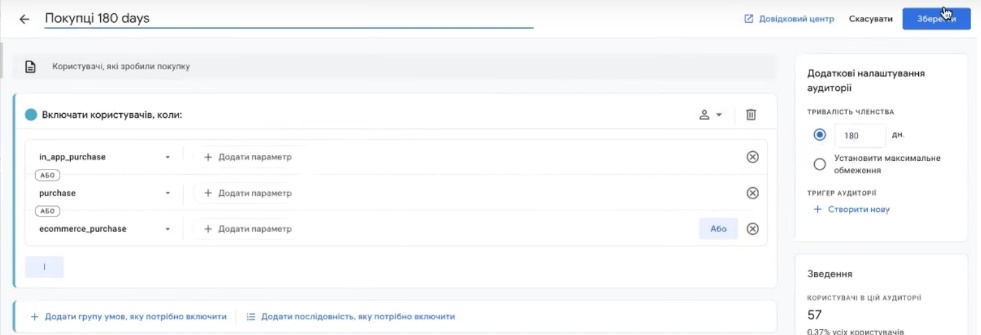
That’s it, your audience has been created. It will automatically be populated with new users who make purchases on your website.
Importing conversions from Google Analytics 4
Another important point is Purchase conversion. It is automatically created in all Google Analytics 4 accounts and tracks purchases on the website. Our task is to import it into Google Ads so that the advertising system understands which clicks lead to actual sales.
How to import conversions:
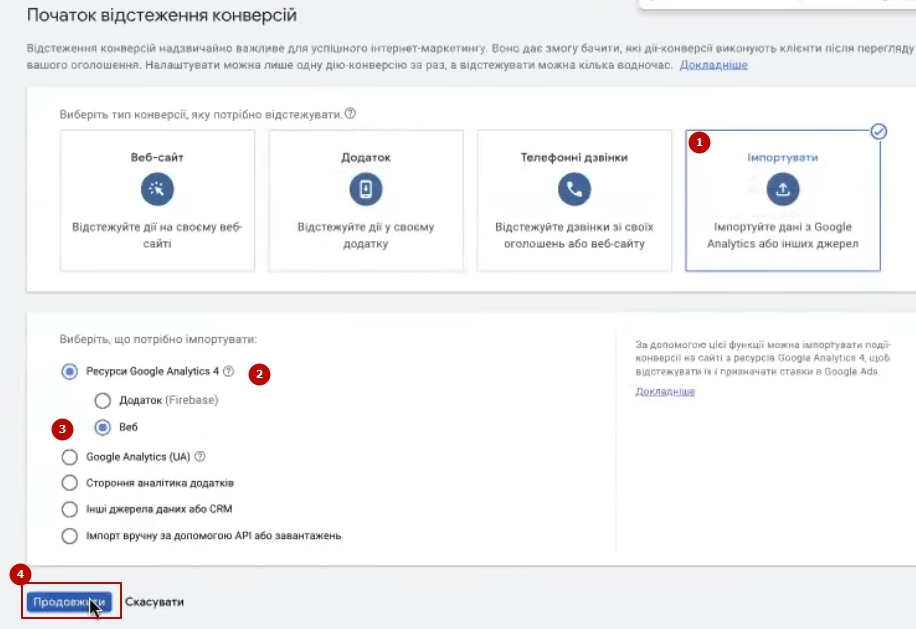
- Go to Google Ads, open “Tools and settings” → “Conversions” section.
- Click “New Action-Conversion” → “Import.”
- Select the source — Google Analytics 4 (GA4), then “Web.” Click “Continue.”
- Find purchase in the list, check the box, and click Import and Continue.
A small caveat: the fourth analytics tool does not always instantly transfer data to Google Ads. If the purchase conversion does not immediately appear in the list, do not panic. Wait until the next day and try again.
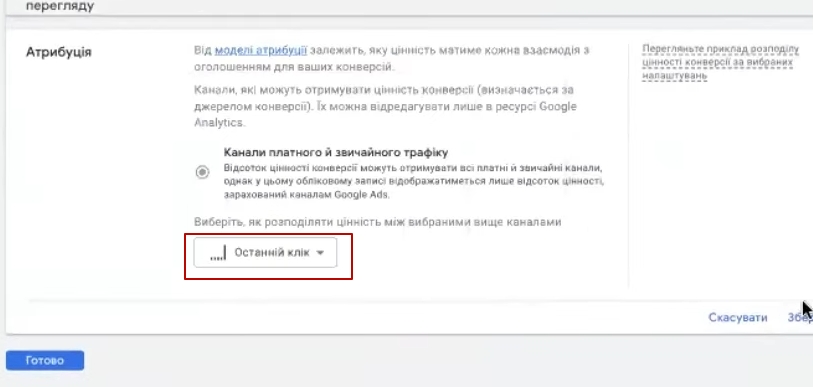
After importing, find this conversion in the general list and change the attribution model to “Last Click.” This is the only adjustment you need to make. Now the system will correctly track sales and optimize advertising based on actual purchases.
Creating advertising campaigns in Merchant Center
Finally, we move on to the most interesting part—creating a Performance Max advertising campaign. We will do this through Merchant Center—it’s faster and easier that way.
Step-by-step instructions:
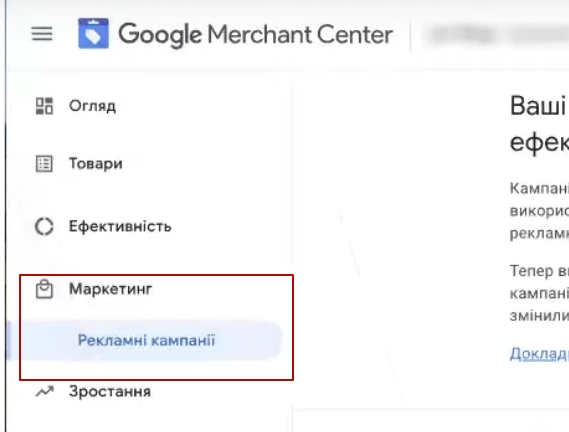
- Go to Google Merchant Center (or Merchant Center Next). Find the section “Marketing” → “Advertising campaigns.”
- Click “Create Campaign” (or “New Campaign”).
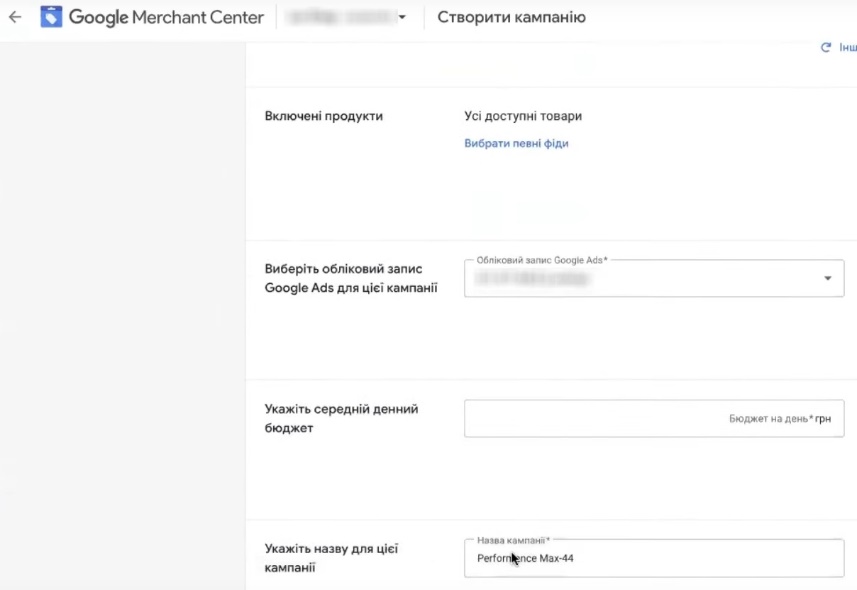
- Fill in four fields:

- Included products — if you have one feed (as we uploaded at the beginning), leave the default setting. All products will be included in the ad automatically. You can segment them by category later in Google Ads. Google Ads account — select the one you need from the drop-down list. If you have multiple accounts, check the ID (it is displayed in the upper right corner of the Google Ads interface).
- Average daily budget — set it to 1 hryvnia. This is a temporary value, we will change it later.
- Campaign name — give it a clear name. For example, “All Items Test” if you are launching all products, or “PMax Clothing” if only clothing.
- Click “Create campaign.”
What to do after creation?
Go to Google Ads and refresh the page. Look for the newly created campaign. If you have many campaigns, filter by Performance Max type or use the search by name.
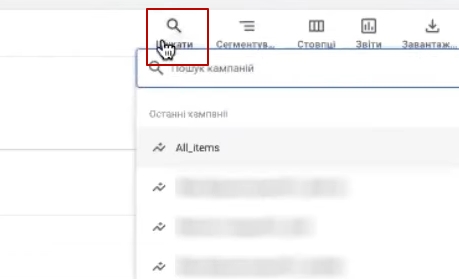
My advice: pause the campaign immediately, set the correct settings (budget, bids, targeting), and only then launch it. This way, you will avoid accidentally wasting your budget on unoptimized advertising.
Setting up an advertising campaign
The campaign has been created — now you need to configure it correctly before launching it. Let’s take a look at the key parameters.
Campaign objectives
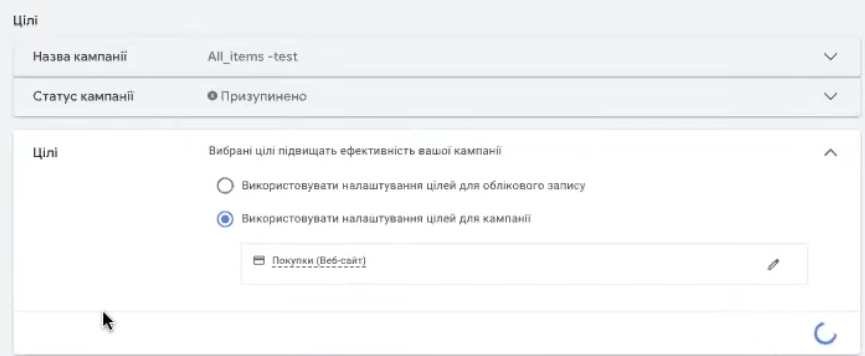
First, check the goals. I recommend selecting “Purchase” — this way, Performance Max will be optimized specifically for sales, rather than clicks or views. This is not strictly necessary, but it is highly desirable for an online store.
Location
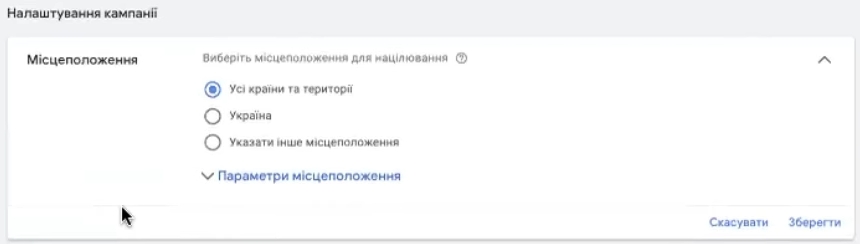
Important note: if you created a campaign through Merchant Center, it is set to display in all countries by default. This needs to be corrected.
Choose your geography based on your business opportunities. Most stores on Prom.ua target Ukraine. But keep in mind that it is technically impossible to exclude certain areas (e.g., temporarily occupied territories). If you only deliver to certain regions, select them manually.
Languages

Should you leave all languages or select specific ones? My recommendation is to leave “All languages.” Why?
Due to the situation in the country, a significant portion of the Ukrainian audience is currently abroad. These people may have switched their browser interface to English, German, or Polish, but they are still looking for products in Ukrainian stores. If you limit the languages to Ukrainian and Russian only, you will lose these potential buyers.
Add at least three languages: Ukrainian, Russian, and English. But for Ukraine, selecting “All languages” would definitely not be a mistake. If you were targeting, say, Poland, then it would be worth considering. For the Ukrainian market, feel free to leave everything as it is.
Automatically created objects
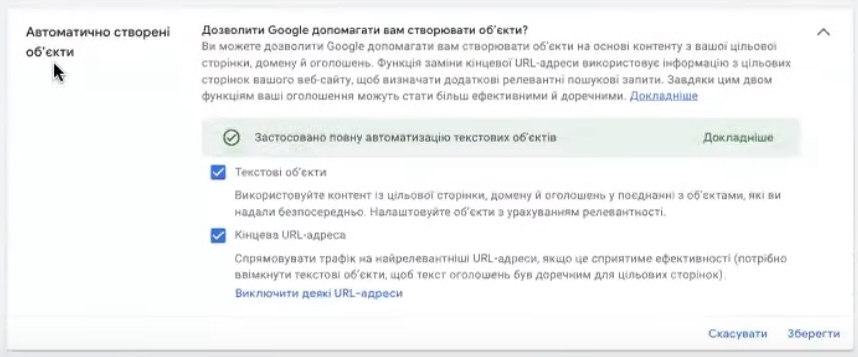
This parameter is responsible for dynamic search ads — Google itself generates headlines and descriptions based on the content of your website.
My advice for getting started: don’t enable this feature during the first month. It requires additional configuration — you need to exclude blog pages, “About Us” and “Contact Us” sections, and other informational content so that the system doesn’t pull irrelevant semantics from there.
If you accidentally leave it on, nothing terrible will happen, but for the sake of the experiment, it’s better to turn it off and come back to it later, when the Performance Max campaign has gathered statistics.
Determining the budget and specifying rates
Now let’s figure out the money — how much to spend and what betting strategy to choose.
What budget should you set at the start?
There is no universal answer — it all depends on your product range, average check, and business scale. But if we talk about average values that will suit most stores on Prom.ua:
The starting daily budget is 120 hryvnia and above. The optimal value is about $10 (approximately 370-400 hryvnia at the current exchange rate). This is enough for Performance Max to start collecting data and learning, provided that you set limits in your bidding strategy.
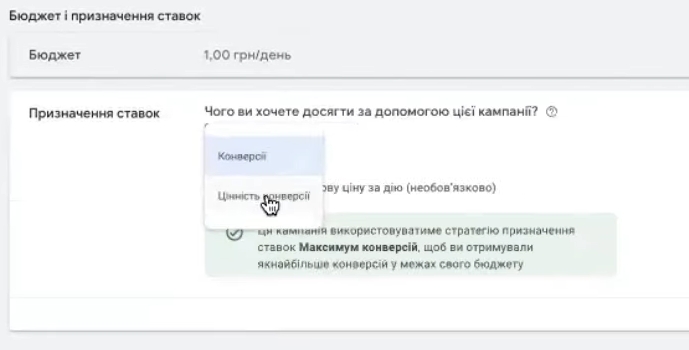
Choosing a betting strategy
There are two main strategies available in Performance Max:
- Maximum conversions — the system aims to get as many purchases as possible within the budget.
- Maximum conversion value — the system is optimized for maximum revenue, not just the number of orders.
If you created your campaign through Merchant Center, it will automatically be set to the second strategy, “Increase conversion value.” Stay with this one, as it makes sense for an online store with e-commerce set up.
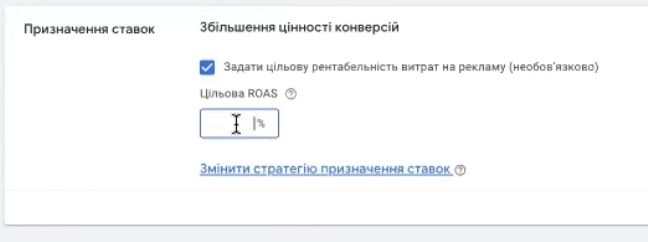
Setting the target return on ad spend (Target ROAS)
Be sure to set a target ROAS — this is a limit that will prevent the system from wasting your budget on unprofitable impressions.
What value should you start with? The average starting figures for the Ukrainian market are 500-700%. This means that for every hryvnia spent, you can expect to receive 5-7 hryvnia in income.
It is important to understand that target ROAS is not a guarantee, but rather a benchmark for the system. Google will not necessarily achieve this exact figure, especially at the beginning. Treat it as a starting point from which you can experiment.
How to adjust ROAS in practice:
- We launched a campaign with a ROAS of 500%. Check the expenses in a week.
- If the budget is hardly being spent, the system cannot find an audience with such profitability. Reduce it to 400-450%.
- If money is flying away too quickly and sales are low, increase it to 600-700%.
Tip! These recommendations are average for the market. If you have a specific average check (very low, for example, $50, or very high, from $50,000), the approach will be different. In such cases, setting up an advertising campaign requires an individual calculation of bidding strategies and budgets.
Benefits of creating Performance Max from Merchant Center
Why do I recommend creating Performance Max campaigns through Merchant Center rather than directly in the Google Ads interface? There are several reasons, all of which relate to control and predictability of results.
When you create a campaign through Merchant Center, it comes out “clean” — without any creative assets. Take a look at your newly created campaign: the assets section will be empty. This is not a bug, but an advantage.
What does this mean in practice?
- More control. You know for sure that Performance Max ads will only be displayed in product format — either in search results among product cards or in the form of dynamic remarketing (those “catch-up” ads with viewed products).
- Fewer surprises. Without objects, the system will not run your ads on the CMS (contextual media network), will not generate videos, and will not climb into search ads that may not convert at all for your niche.
- Clear analytics. You can immediately see whether your product feed is working and whether your product ads are converting. No need to guess which format brought in the sale.
I use this method all the time, regardless of whether I’m running ads in Ukraine, Germany, France, the UK, the US, or Australia. Performance Max without objects launches consistently and predictably everywhere. It’s immediately clear that if there are no sales, the problem lies in the feed or the product itself, not in the system wasting the budget on banners in KMS.
It’s never too late to add creative elements. Once the campaign has gathered statistics and you are sure that product advertising works, you can experiment with objects. But at the start, extra variables only get in the way.
If you decide to add objects right away, keep an eye out for “leaks.” How can you spot them? Go to the campaign table and compare clicks at the object group level and at the information group level (product listing). If there are significantly more clicks at the object level, congratulations, you’ve got some untargeted spending going on somewhere. Money is being wasted on media formats instead of product advertising.
Essentially, creating Performance Max through Merchant Center is a way to get something as close as possible to the good old Smart Shopping campaigns. It’s quick, simple, and requires minimal setup: you go in, create a campaign, set a budget, tweak the geography and bids, and your ad is up and running. Everything else is fine-tuning depending on the situation.
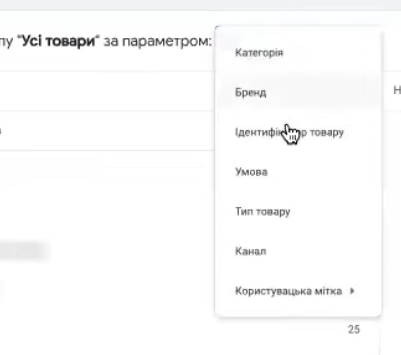
Selecting products in a Google Ads campaign
If you need to run ads not for your entire product range, but only for certain items, you can do this in Google Ads on the “Information Groups” tab. Click the plus sign and filter products by the desired parameters: product type, name, brand, category — anything you want.
For example, if you want to advertise only Samsung smartphones, select by brand. Or if you want to advertise only products costing more than 1,000 UAH, filter by price.
Is it necessary to set signals in campaigns?
There is one important principle here: the better organized your feed is, the less likely you are to need signals. With a high-quality feed, they may not be necessary at all.
What is a good feed?
This is when you don’t just have 4,000 products with names like “Picture for the living room” or “Product 12345.” It’s when each item has an informative title. For example:
- Instead of “Bottle” → “750 ml plastic fitness bottle for sports, running, cycling.”
- Instead of “Phone” → “iPhone 14 Pro 256 GB Space Black”.
The system needs to understand what exactly you are selling. Then it will find the right audience on its own without any additional prompts.

When are signals actually needed?
Signals are hints for the algorithm that help it find the target audience faster. They can consist of:
- Remarketing lists. The most basic thing is to add an audience of former buyers. We already created it when we set up dynamic remarketing and audiences in Google Analytics 4.
- Search topics. This feature has recently come out of beta. You can specify key queries that people use to search for your products. But don’t get carried away — don’t add too many.
Important point: if you have a very diverse product range (lots of categories, each with a couple of items — a typical situation for home goods stores), search topics are unlikely to be suitable. In this case, stick to remarketing lists or launch without signals altogether.
Adding signals is already a story about optimization: reducing the price per conversion, increasing the return on investment for individual categories. At the start, you can do without them.
Conclusions
If you are launching your first Performance Max campaign for Prom.ua, the above is more than enough. Many online stores run a single campaign, generate stable sales, and are happy with the results. There is no need to build complex structures right away.
Do you need to launch a regular shopping campaign first, and then switch to Performance Max? No. You can start with PMax right away—it’s the smartest shopping campaign that takes data from your website and feed. The better organized your feed is, the clearer the system sees your products, and the more effective your advertising will be.
So, we’ve gone through the entire process: setting up Google Analytics 4, creating an advertising account, registering with Merchant Center, uploading products, and launching Performance Max. Once you’ve made all the settings, don’t forget to activate the campaign — and you can start seeing the first results.
Happy selling!


