
Hello, everyone. My name is Yana and I’m a Google logistician. I’m in charge of delivering the right target audience to the right business. And I scale your online sales mainly with the help of Google’s AI tools. And the main, or rather, so far the only AI functionality with artificial intelligence is Performance Max in the Google Ads account.
Today, I will show you step by step, of course, with a little context, so that you don’t just follow me, repeat the buttons, but understand what’s what, how, why, the simplest but most effective instructions on how to set up Performance Max on Prom.ua so that it generates sales for you in the future. Everything will be as simple and easy as possible, there will be nothing complicated or abstruse. The most simple, proven methodology.
General plan of action
So, before we get started, the timecodes are all down below, I’d like to clarify a few things. In order to launch Performance Max, we’ll need to go through about three, four stages at most. They are not complicated. Unfortunately, at the moment, Google and Prom do not have any direct API integration. So that you can press one button and have everything downloaded, confirmed, and so on. But here, too, everything is organized as simply as possible.
Where do we start? The first stage is the creation of the Merchant Center office. This is the most important stage. Without it, we won’t be able to launch our Performance Maxes. But what is the Merchant Center? Merchant Center is a separate service created by Google for us to add information about our store. This is literal information, basic information: logos, colors, address, and information about our products. And they will be checked separately, in this account. Unfortunately, Google has not figured out how to do this in Google Ads, so there is a separate service. I think it’s even more convenient. This will be the longest of all the stages, because the verification itself usually takes about three days, up to 72 hours.
The next, second stage is setting up goals or analytics for Performance Max. You could say that this is also the basic setup for Performance. At Prom, this is very easily organized, we won’t have any difficulties with it. But what would I like to emphasize? I wanted to emphasize the fact that goals are fundamentally important for Performance, because AI needs to understand what result it is producing in your advertising account. Because all the strategies organized by Google for this tool are, so to speak, KPI-oriented, they want to know whether they are targeting correctly or incorrectly in order to change the mechanics of your ad impressions. So this is also an important stage.
The third stage, perhaps one of the most important, is actually creating a Google Ads account and creating an advertising campaign. In fact, these two stages will take up to 10 minutes, because they are the easiest stages. Maybe a little bit more, because I’ll talk through why I’m doing this or why I’m doing that, so you understand the context of these settings. But this is the easiest part. All you can do is follow the easiest steps, and the longest one is creating a Merchant Center.
Create a Merchant Center account
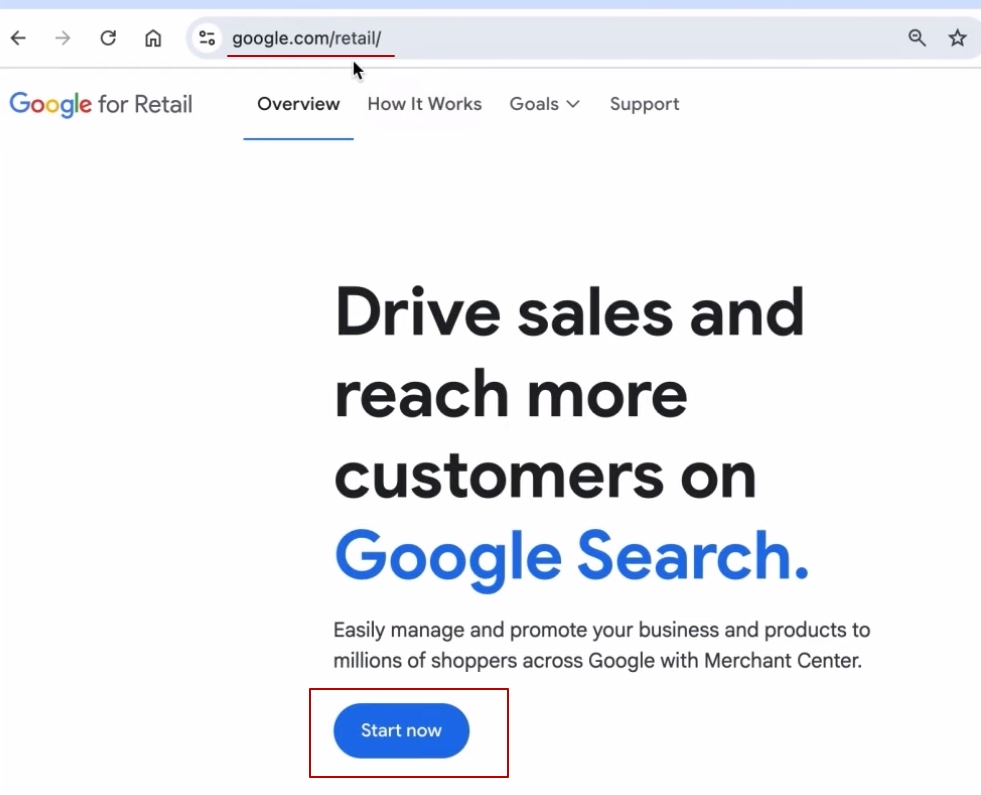
Where do we start? Let’s start setting up our Performance Maxes by creating a Merchant Center account. What do you need to do this? You need to follow this link. I’ll give it to you in the description of the video. And then we start pressing either the “Start now” button or the “Start now” button, as I did.
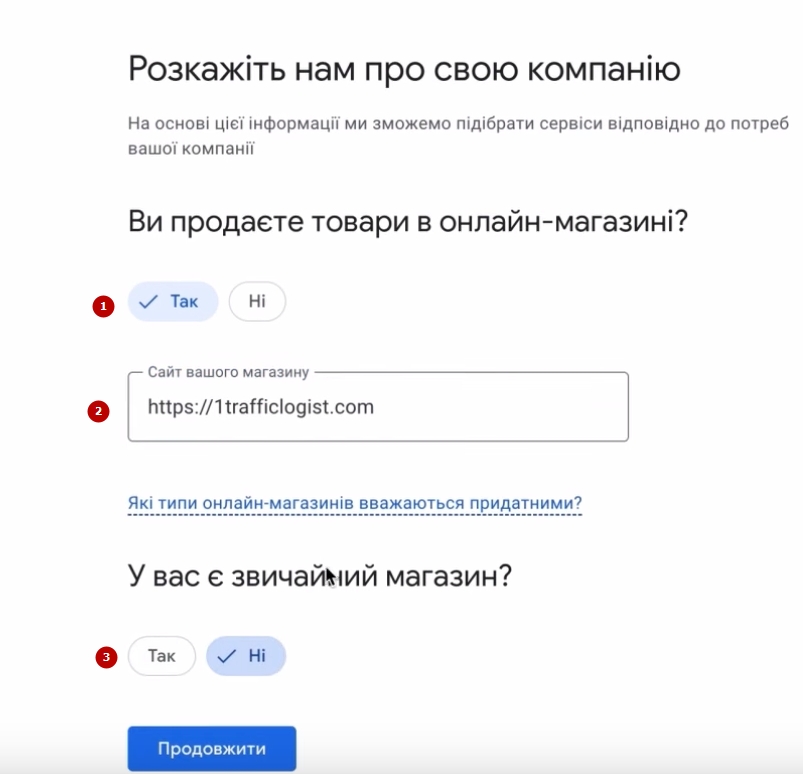
Setting up the Merchant Center account is not difficult. We answer the question whether we sell any products. Yes, we do. Here is the website of our store. “An ordinary store”. No, we don’t have one. Click “Continue”.
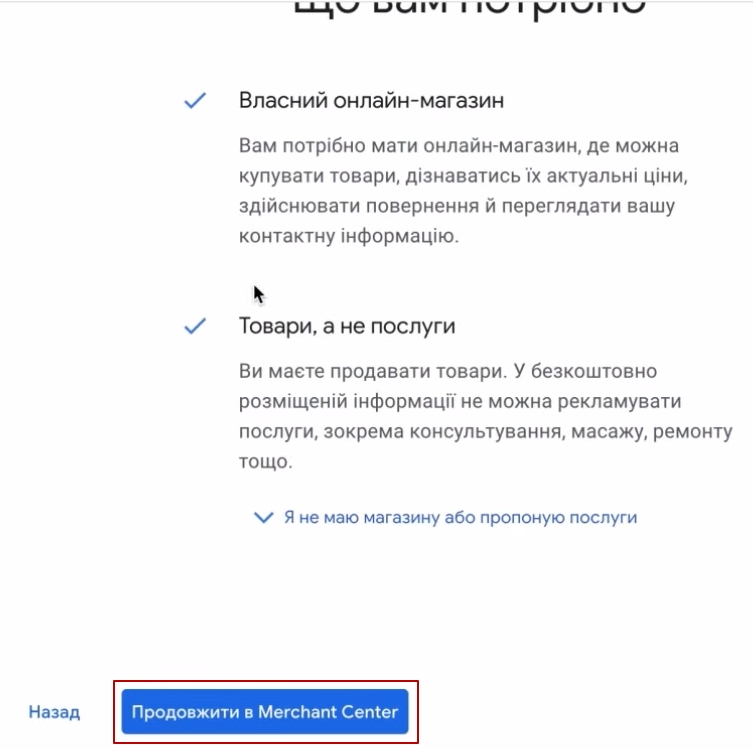
Next, scroll through this block. There is nothing particularly important here. Click “Continue”.
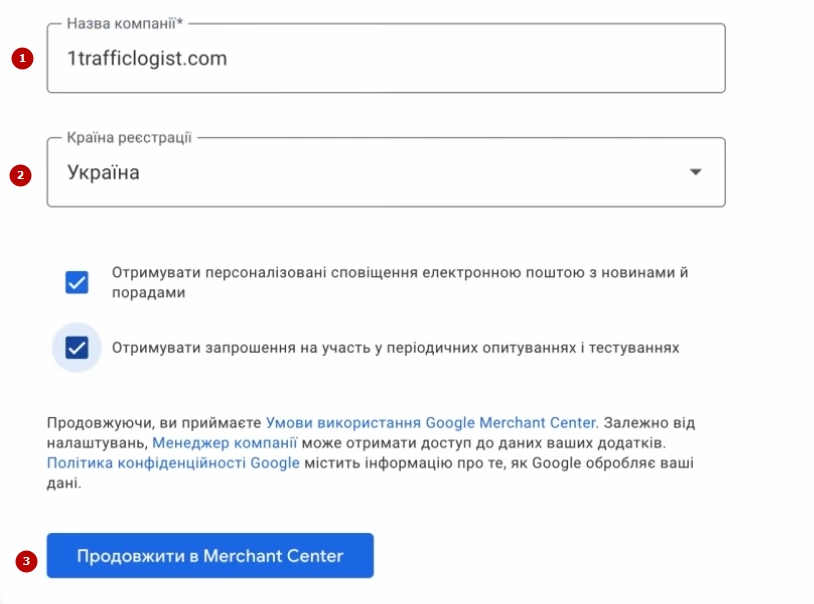
Enter the name of our campaign. See, the campaign name is the name that will be displayed in the ads here at the bottom. There will be an example like this. So think about what you would like it to say. The most proven option is to leave the domain name that you have or to be creative. Because this is what users, your customers, will see in the ads. You can change the name of the campaign later, if you want. It will not be a mistake if you leave something in some format. You won’t be able to change the country later, so choose it carefully. Suddenly, one of you creates an ad account from another country. Then another country can join in. Click “Continue”.
Store confirmation in Merchant Center
Next, we will create the Merchant Center account itself. You will immediately be offered a list of things that we need to do in order to verify the store. Not to confirm, but to upload goods and pass verification.
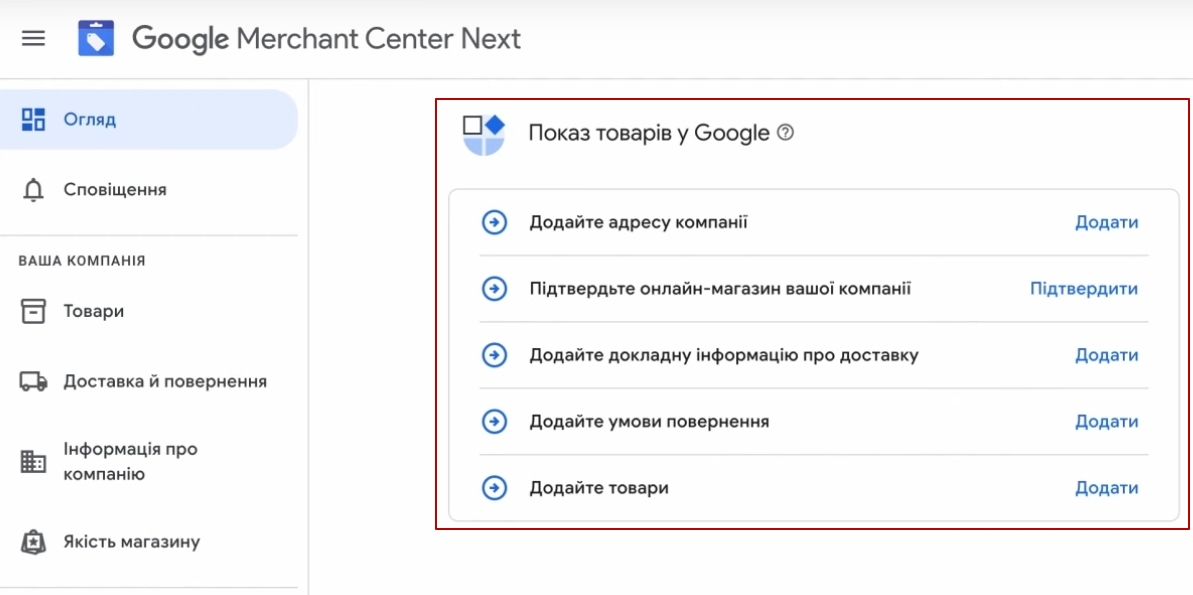
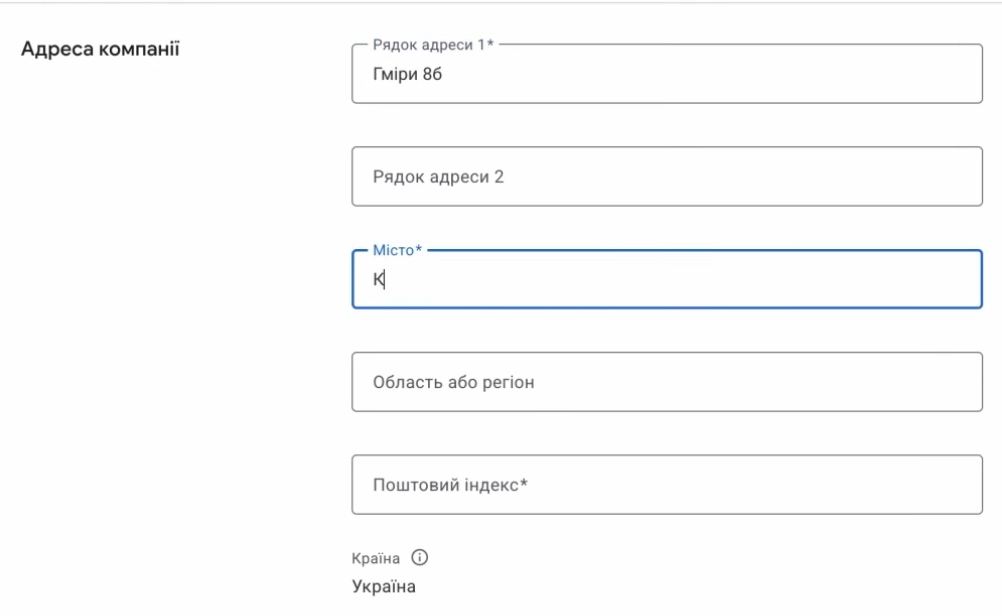
Where do we start? We will follow these instructions. It’s not complicated, but the following steps are important. Company address. I hope you can transfer everything you have on your website. Yes, remember that Kyiv is a separate administrative region. “Continue”. We have the address ready.
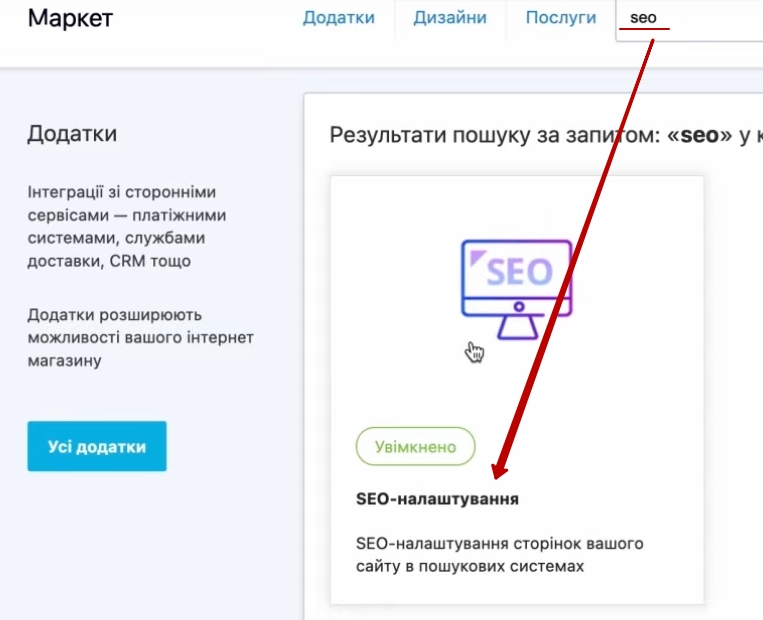
Next, we are asked to confirm your company’s online store. And this will also be as easy as possible on Prom. Why? Because I’m going to show you how it will work. We need to go to our site admin, find this block called “Webmaster and SEO Tools”. If you don’t see it, you go to the marketplace and click on “Add an app”. Here you enter “SEO”, it will be the only one.
You just go in and save it. You can mark these links, you can not mark them. Usually, you can mark them. This is for those who understand the story. To create a merchant center, I’m not sure that you need a very deep understanding of how it will work or not work. So, let’s come back here. We have Webmaster Tools. After that, we go to Webmaster Tools and now we will create a service called Search Console.
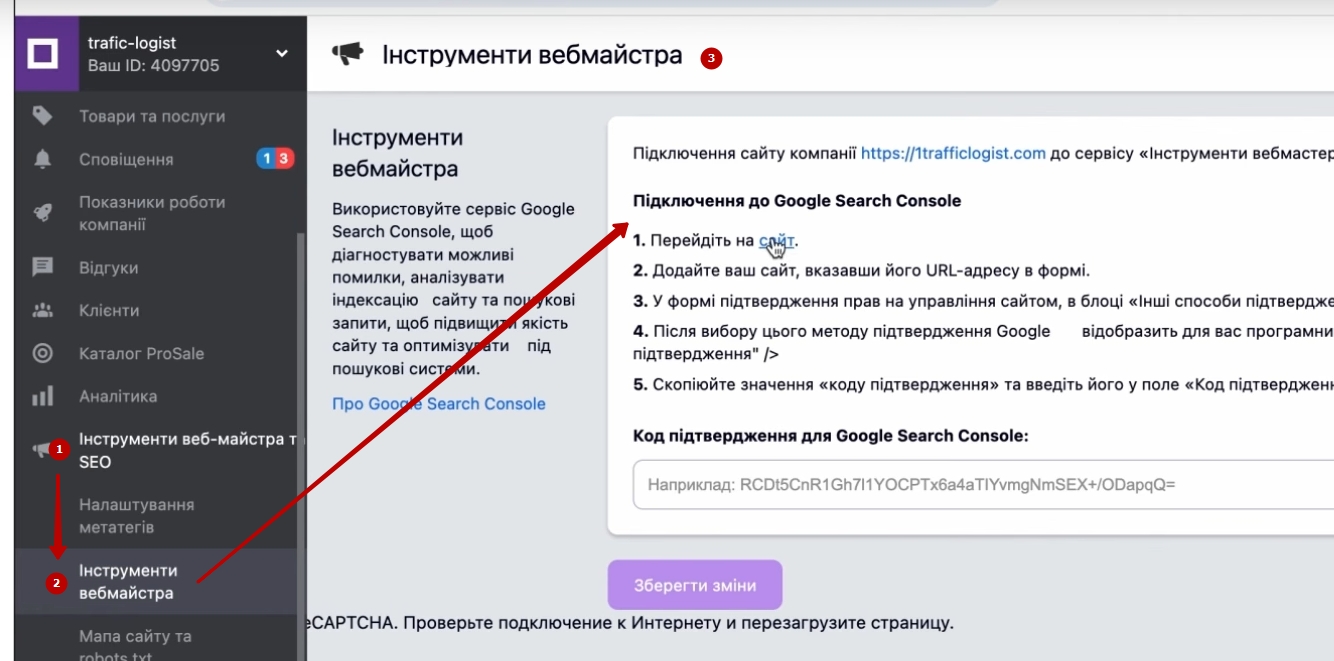
What is Search console? You may use it for some other purposes in the future. We will use it here to verify the rights to the site. What do we do?
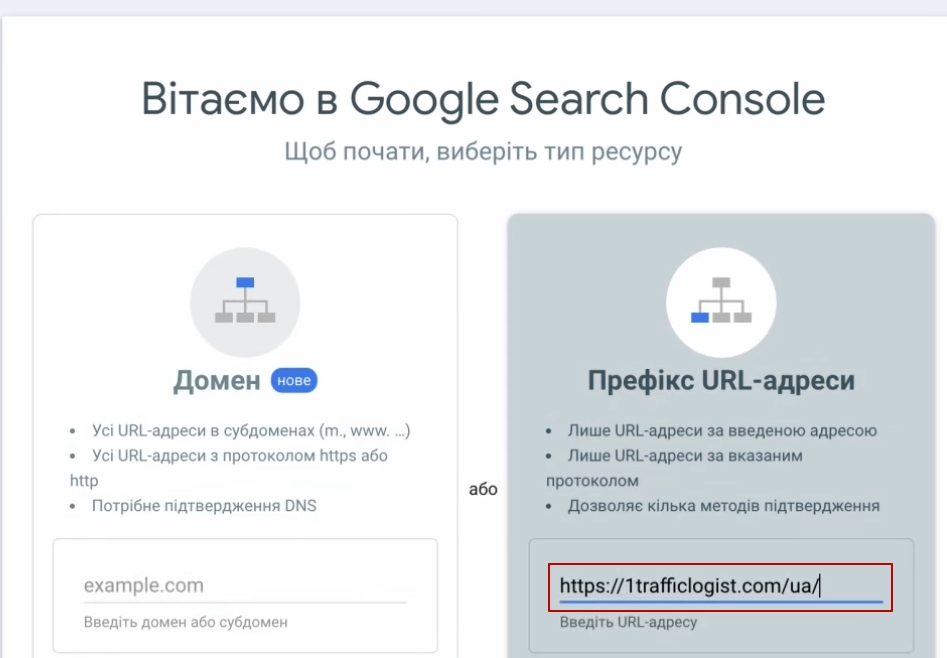
In the prefix of the URL, we enter our domain, click “Verify Confirmation”. Then we scroll here, where there is an HTML tag.
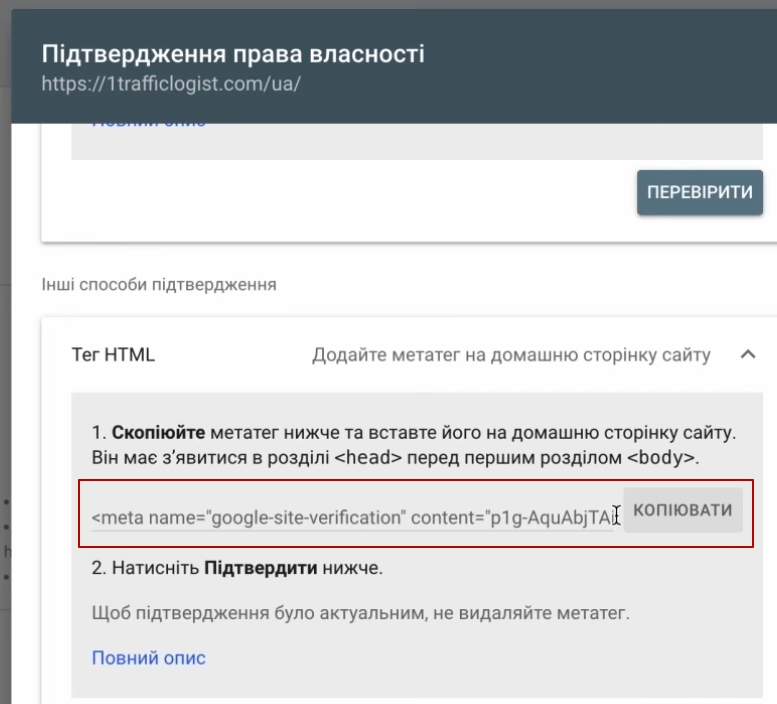
Copy this tab and paste everything here. “Save changes”. We saved it.
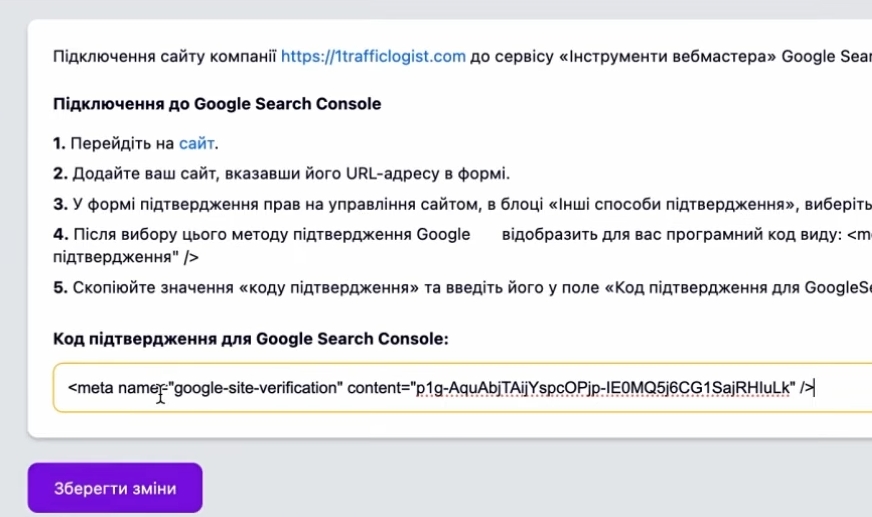
It will even update this information later. It will substitute only these characters, the confirmation code that was there between this character is equal. And that’s it. After that, we return to the Search console. Click “Verify”.
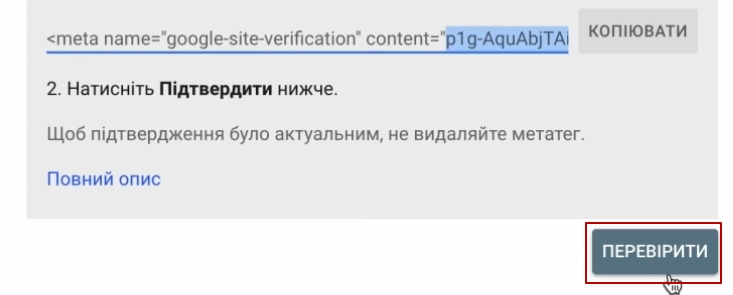
Confirmation occurs.
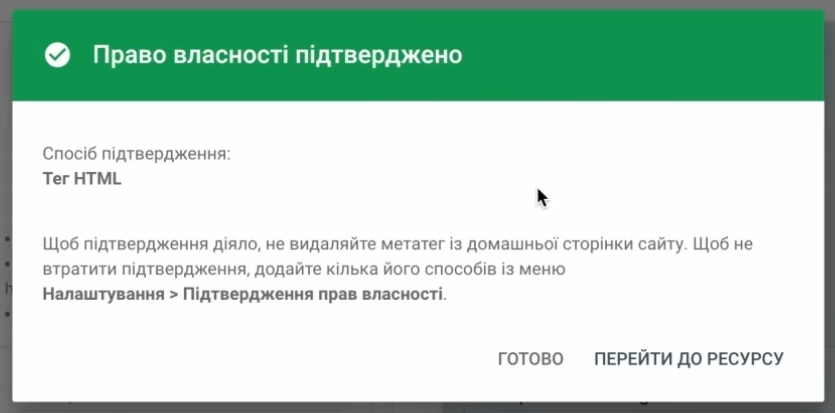
After that, go to the resource and that’s it. We have created a search console. Then you can use it or not. This is at your discretion. But we need this in order to confirm the rights to the site very easily
Now I delete this “co” and click “Save”. Here I just change the site. It will automatically confirm everything for me even now.
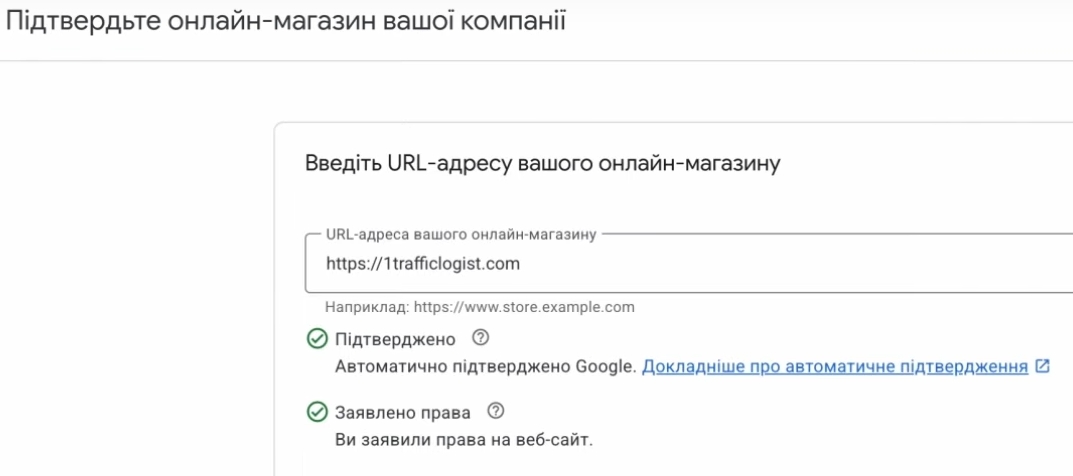
Confirmed. You’ll also have a button called “Claim rights”. I don’t have it, because I’m re-recording this video, because I wanted to make a better sound. “Rights claimed”. If you don’t have this box checked, you click “Assert rights” and “Continue”. There’s nothing complicated here, just click on the blue buttons, it’s not difficult. We claimed our rights. Here we are. Online store confirmed.
Delivery settings
Next, we need to fill in some more settings, they are not complicated. One of them is required for sure. We need to add a delivery setting. It won’t be too difficult. I will explain all the steps. As for the return policy, I don’t have an exchange/refund page on my website right now, but you can add it later. It’s not necessary to add these return conditions right now, but it would be advisable. What does it affect? It does not affect the verification process in any way, but it may affect the quality of the store in the future, because it will show you a graph or a comparative characteristic of your delivery conditions, your return conditions in comparison with competitors. Therefore, it is more of a rating/scoring system. This can be added later.
One important thing, just remember that the return conditions themselves are checked by individual moderators, manually. Unfortunately, Google has not automated this yet. The return policy does not affect the blocking of your mercantile center, the fact that these return policies are entered inside the mercantile center does not affect it. If you are suddenly scared that Google blocks stores for various reasons… If you need a separate video on what is the reason for blocking, write to me, but now not implementing these conditions will not negatively affect you. We are adding shipping now and will move on to adding products later.
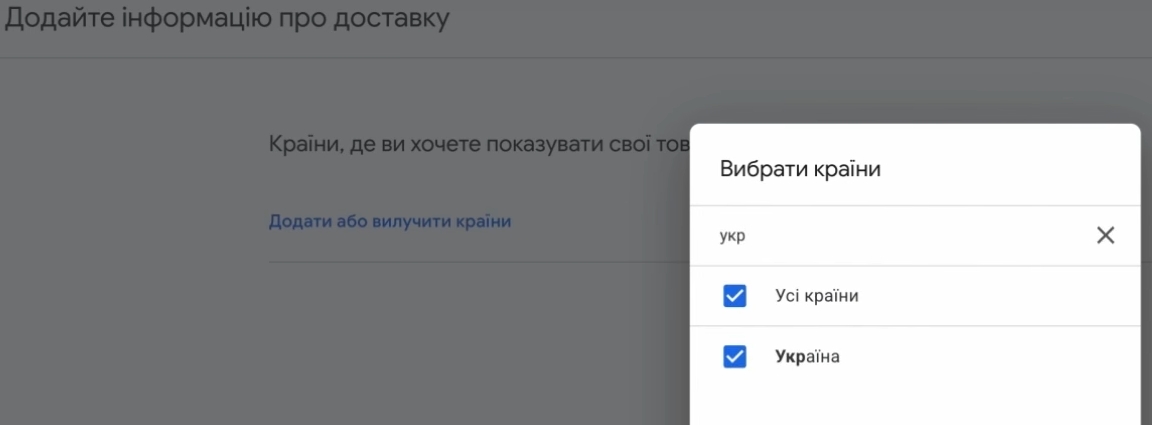
Add or remove countries. The country in which we sell. We choose Ukraine. Click “Continue”. You can enter any delivery name you want.
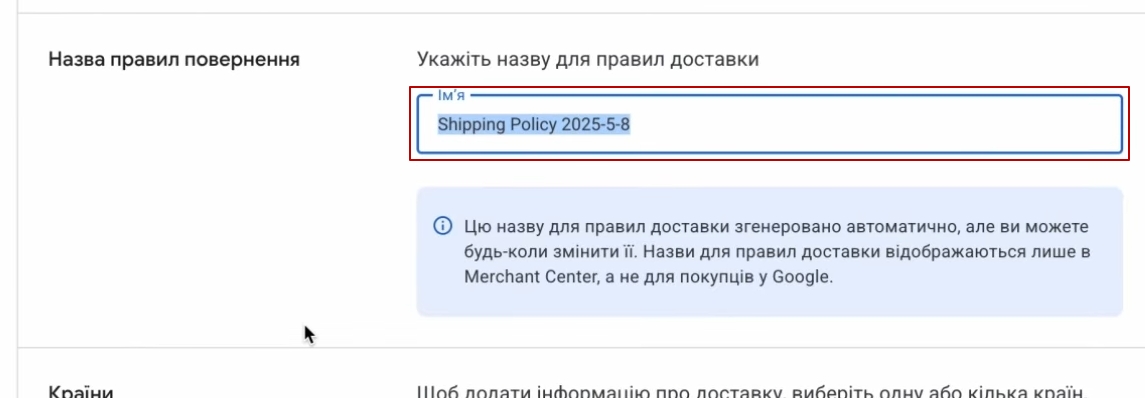
You can call it “Nova Poshta”, “Ukrposhta”, whatever you want. The only caveat is that we don’t set up this delivery service for all delivery services. This is important. We’re doing this for the cheapest (key!) option of targeted delivery. This is the key – the cheapest option for targeted delivery. Because if you specify delivery options, one of them must be “Addressed delivery” and you can carry it out by Ukrposhta, Nova Poshta, some other carrier, it doesn’t matter, but it is for this option. Therefore, you do not need to specify other delivery options here. Choose Ukraine.
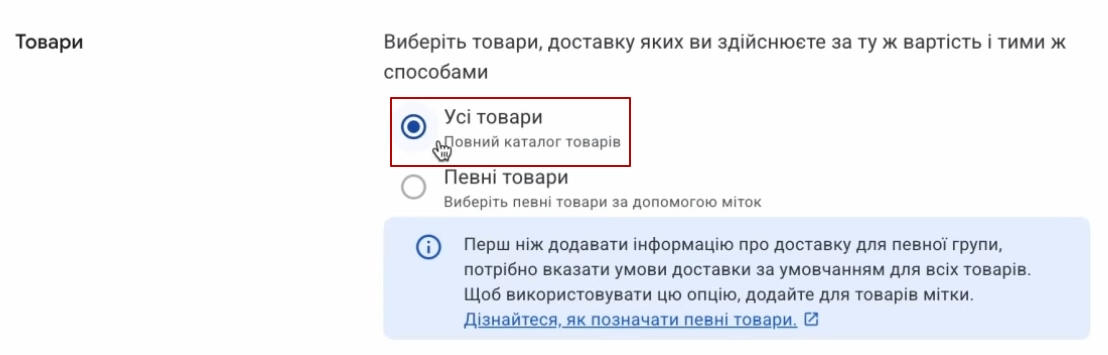
Please note that we are selecting all products, and now we are going to set up this block of settings. They should ideally match what you have on your website, because this information will be partially displayed even to your customers. What does this paragraph mean? What time should I place an order to have it processed on the same day? I think most likely none of you will have any problems. Be sure to check that the time zone is correct.

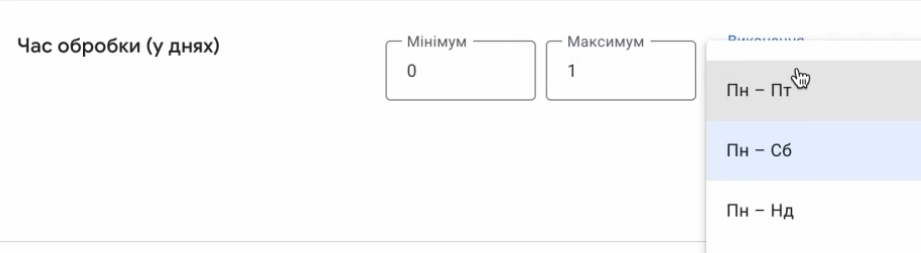
Processing in days is how many days you spend processing orders. For some, it’s literally a day, two days, for others, it takes 5 days. That’s why you mark it as it is in reality. For example, if I were to process orders around the clock, then I could enter 00:00 here.

If, as in my previous case, I set the time to 7 p.m. and after 7 p.m. my managers will process orders the next day, then I set 0, 1. As the days go by, I think you’ll figure out which days you process orders and which days you don’t.
The duration of the delivery is the period of this delivery. If we have orders that ship day to day, we leave a zero. If we have delivery up to three days, we can write 0, 2 and it will be correct. New mail usually delivers the fastest in 1-3 days.
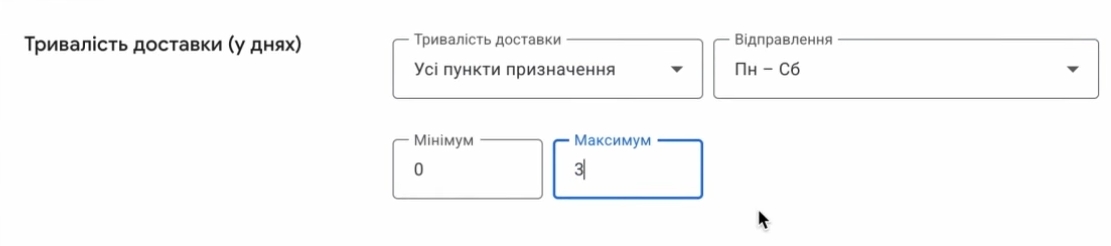
You can add three days, up to four days in total. For example, if we take into account Nova Poshta, if I am a standard store that sends goods quickly, then I will have something like this picture. That is why we prescribe the cheapest and fastest option. In our case, Nova Poshta will always be the fastest option.
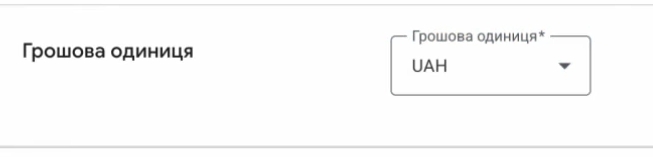
Currency. Be careful, the monetary unit must match the currency that you will launch, or rather load in your feed. If you are on Prom, you will sell in Ukraine, you will not make a mistake here, there will be a hryvnia. Next.
Regarding the cost of the order. You all may have a very different situation. For some, it may depend on a certain minimum check, on a minimum number of goods. Someone has a fixed, not fixed. I will now describe an option that is suitable for almost everyone for the initial check of the Marchant Center. Especially when you write that the address delivery is carried out by the courier service Nova Poshta or Ukrposhta or DHL, it doesn’t matter who. And you usually write the price “from…” because you can’t know the final price that Nova Poshta will set, because we don’t have such a super cool integration yet that it would work for both Merchant and Prom. Therefore, if you have a delivery fee of a certain amount, you can write, for example, 80 UAH, and this will be enough to pass the check. If you have free shipping, then you won’t have any problems.

If something depends on the price, it is also very convenient to customize. For example, you can deliver goods up to UAH 500 for UAH 120, if you need more or need 500 and a half, you can go ahead and deliver them.
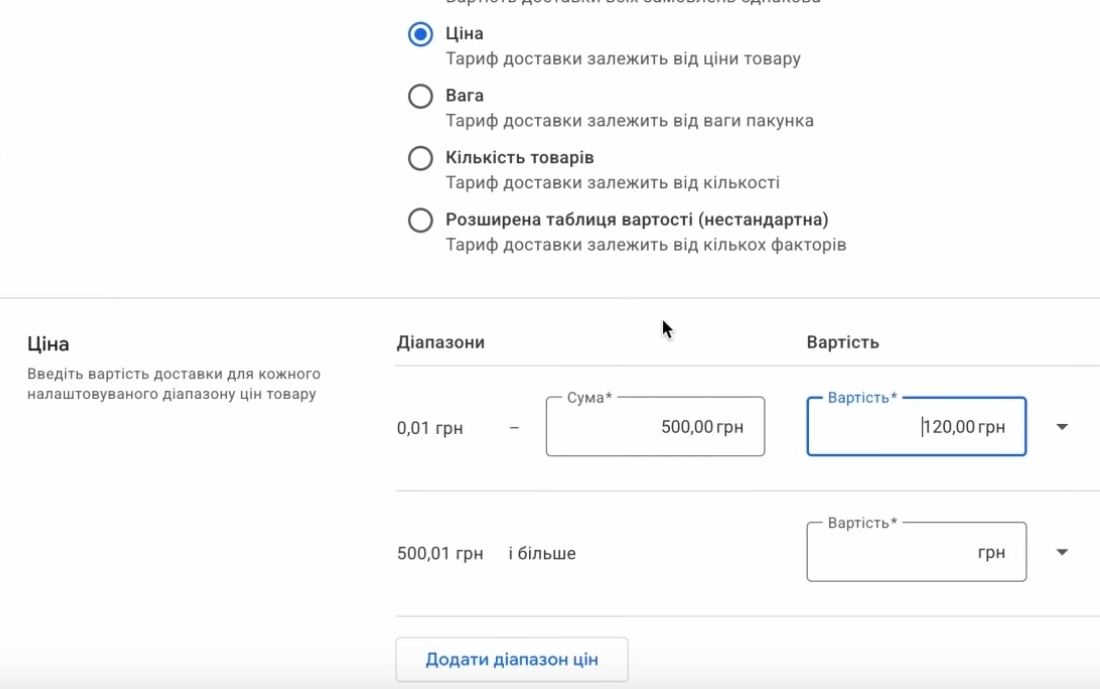
You can customize it this way, or you can depend on the number of goods. There is general, there is not general. The only thing is what?

You won’t be able to customize the weight, because for weight, you need to upload the weight parameters to your feed Merchant Center. I’m not sure if these attributes are available on the Promo site.

Therefore, if we take the easiest option, the most proven one, which raises fewer questions from Google’s verification, we set this fixed rate, if you have paid shipping, if you have free shipping, we set “free2,” and save this entire history. That’s it, you’re done. The delivery has been made.
I remind you once again that you do not need to register all possible delivery options. This is only required for targeted delivery. Usually, the cheapest option is set, because here also in the quality of the store, when you compare, it will also show whether your delivery is better or worse in comparison with competitors in terms of time or cost.
Return conditions
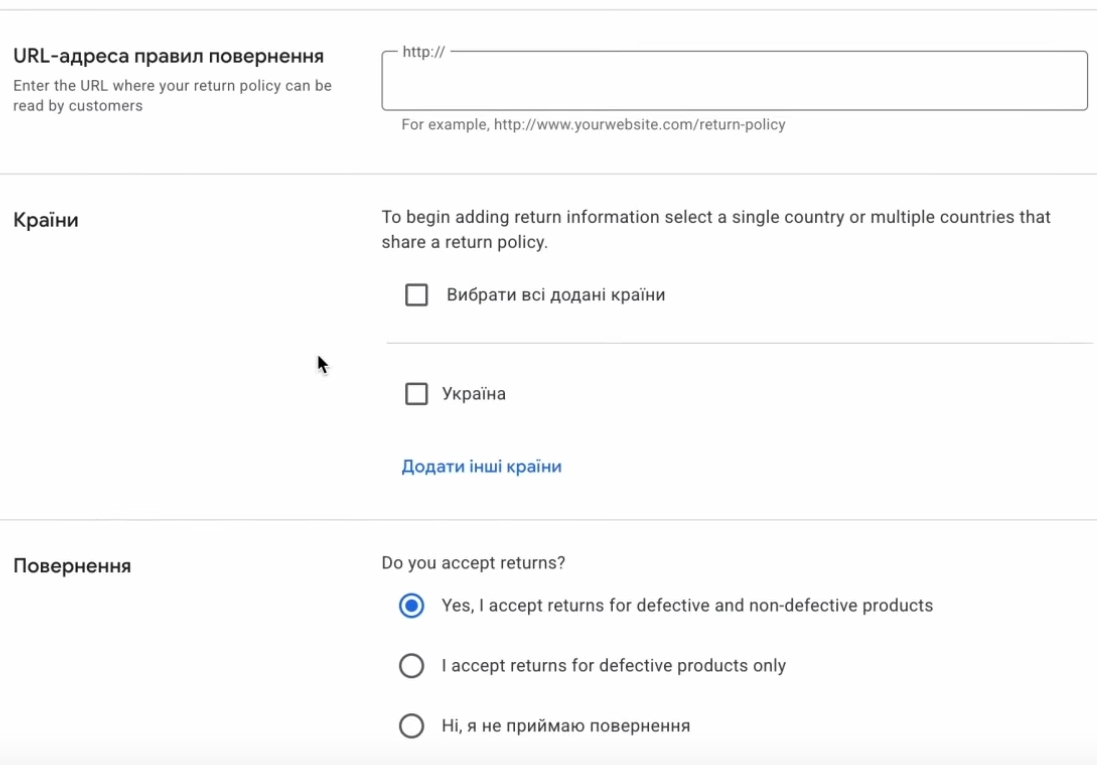
Return conditions. See, they are not complicated either. You can add them later. I recommend adding them later. Here you need the refund URL. It’s easy to select the countries where you receive or do not receive these refunds. You can handle it. I will not even dwell on this. Let’s move on.
Adding products to Merchant Center and generating an XML feed
Add products. How will we add products? We will add products. Not even like that. How can you add products, fill in the feed for the merchant center on prom.ua? It’s very easy, friends. We will share with you the link to the file. The format will be xml.
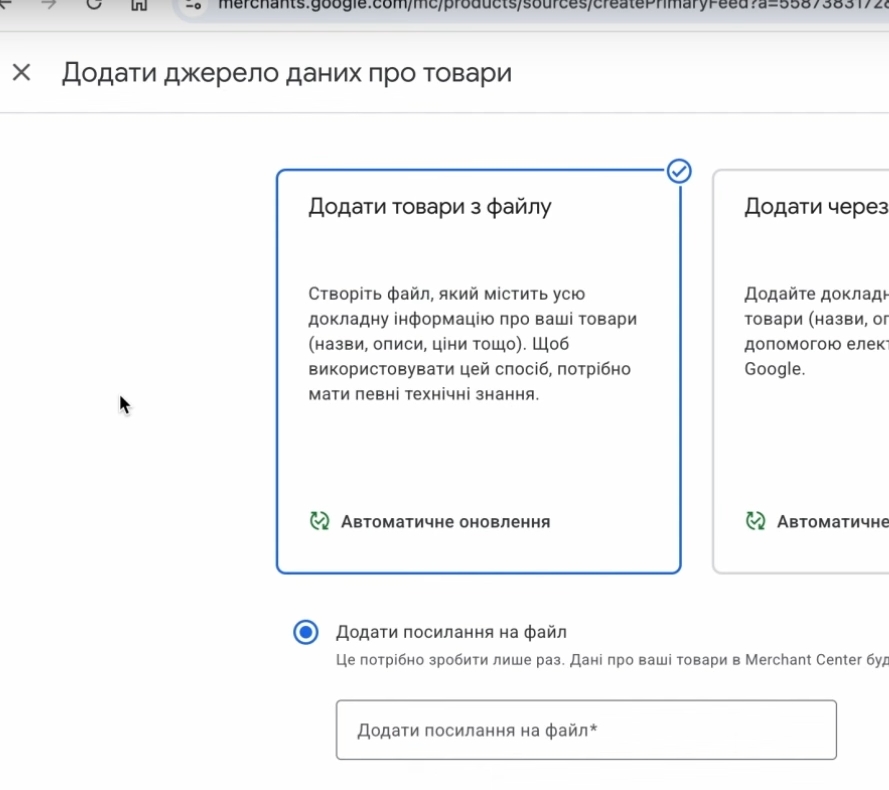
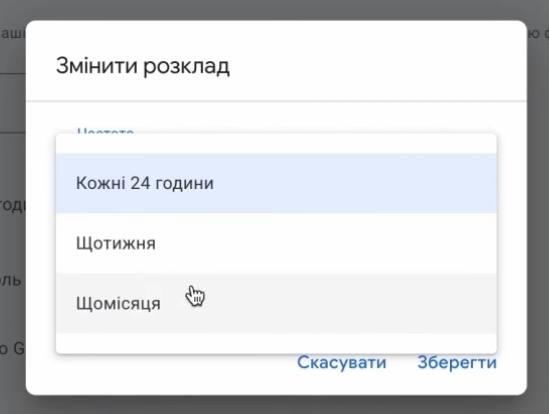
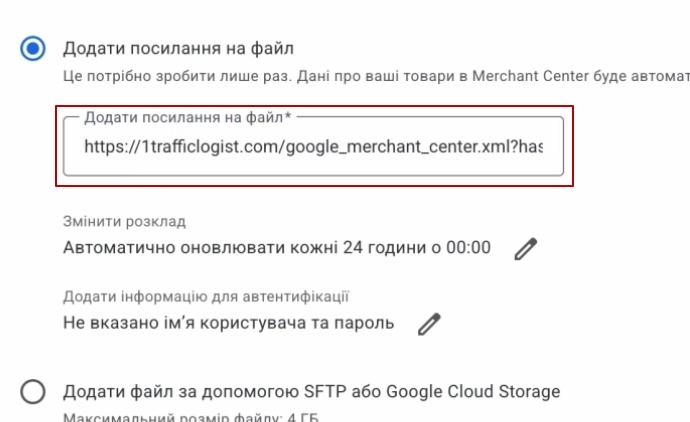
Everything is conveniently organized on the same Promo site. Why are we going to upload via a link and not through Google Sheets? Will we add these products manually? The API for Promo is not yet available in automatic integration. It will be as easy and convenient for you as possible. Why: If you update the prices of goods on the site, they will be updated in the feed, in the Merchant Center, and in advertising. If you add a product, remove a product, something goes out of stock, arrives, is in stock, everything will be done quickly enough. The only disadvantage of uploading goods from a file, as opposed to the API, but the API is not yet available on the Promo site, is that if something changes during the day, you need to manually update it in the Merchant Center, because most often the system can automatically update this data every 24 hours. You can, of course, update less frequently, weekly, monthly, but the fastest is 24 hours. Next.
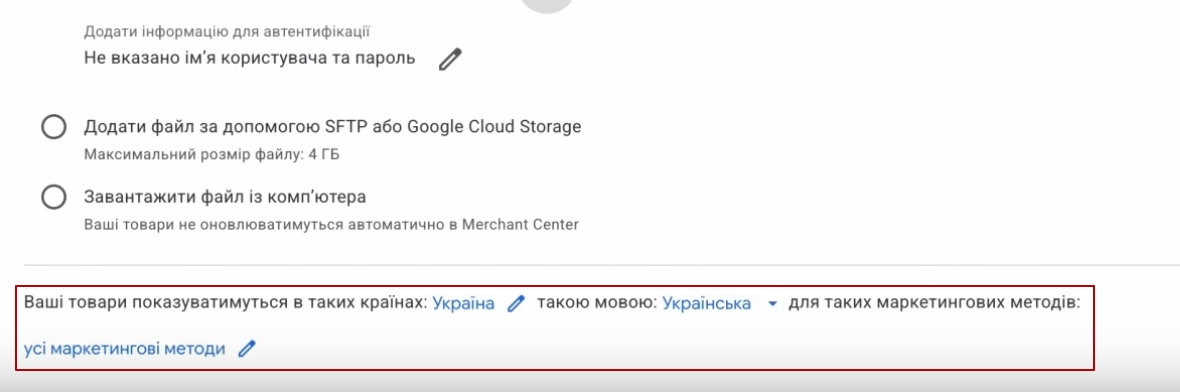
Be sure to check that the country is correct. Here at the bottom is the Ukrainian language. Our marketing methods are still standard.
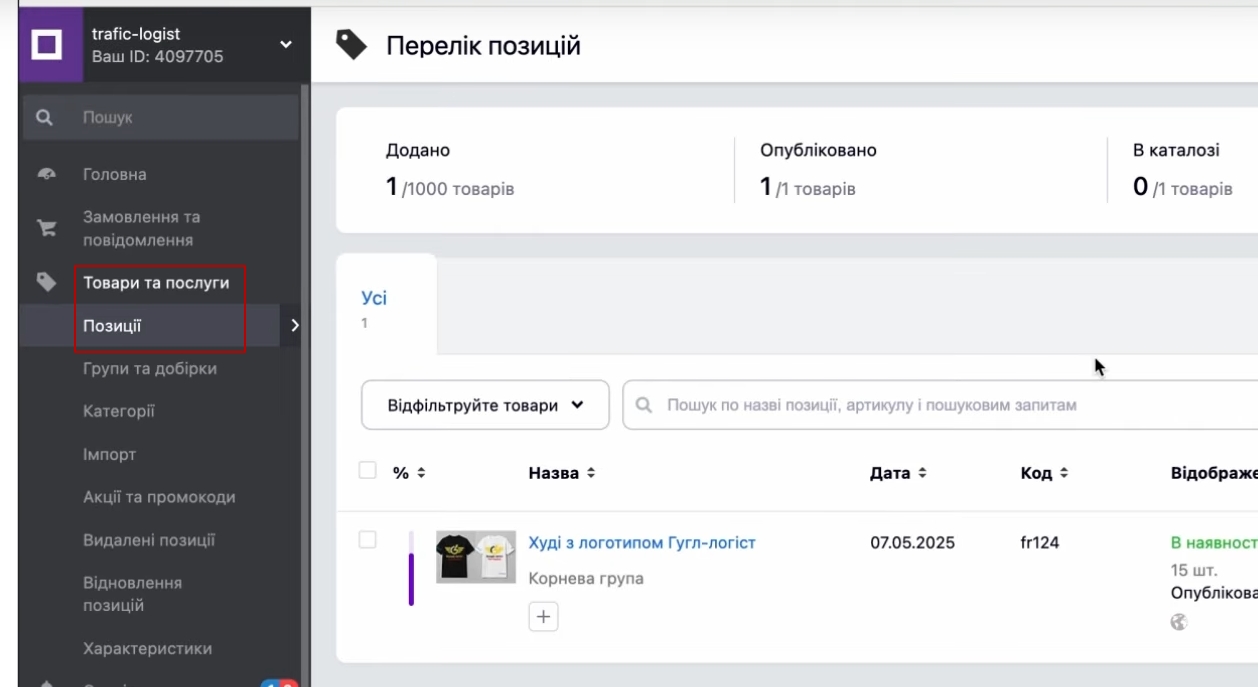
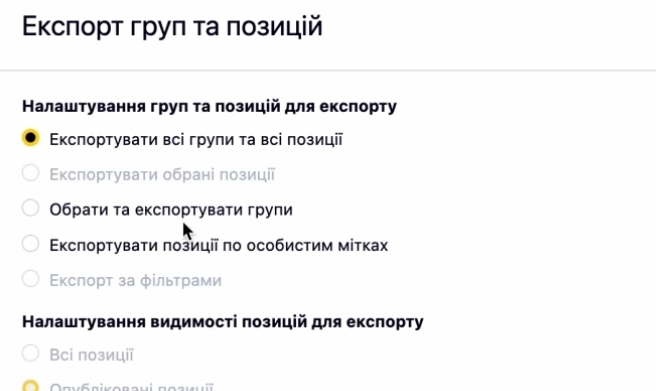
We just need to get that link. Where do we get it? We go to “Products”, our “Items”. I have only one unhappy item, but you may have many. Click on the “Export” button.
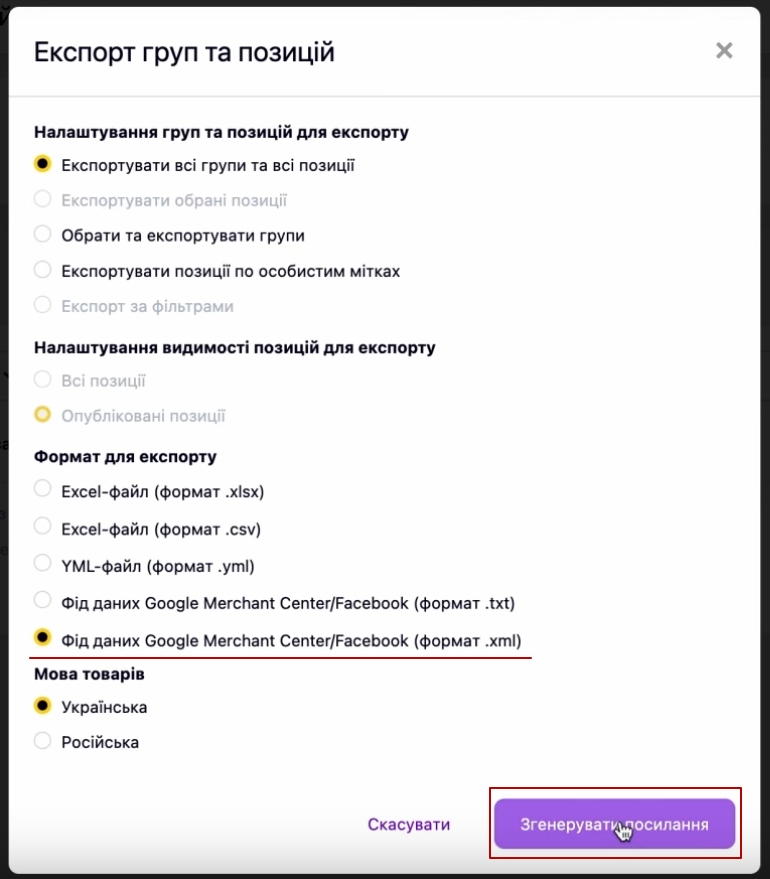
Select the Merchant XML data feed. Select the language version of the goods. If you have two language versions, you can upload two language versions. If you’re not sure whether you need Russian or don’t have it at all, don’t worry, Ukrainian will be enough for now. Your advertising account will work perfectly. Click “Generate link”.
It is ready. The link is copied.
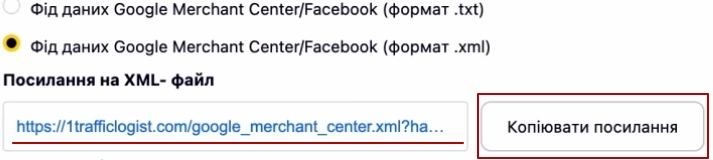
I still recommend checking it, entering it into the browser and seeing if the information about my products is displayed or not.
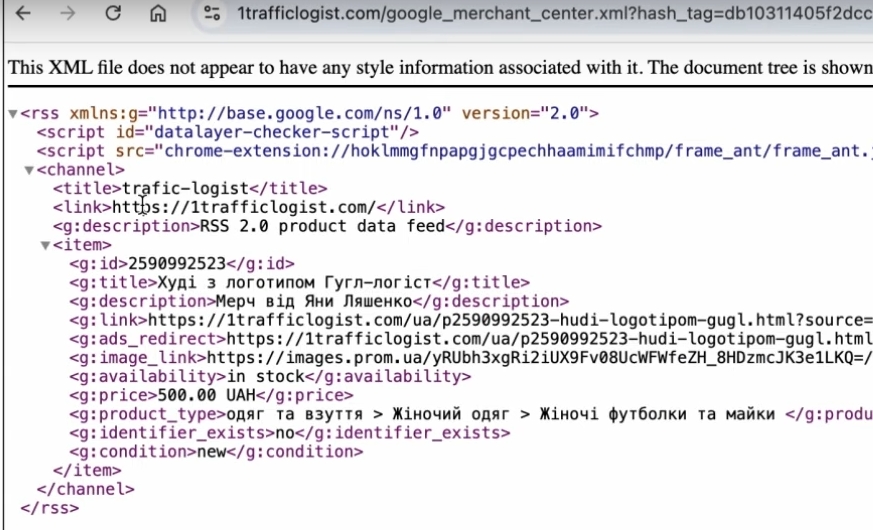
Prom is very good at forming this data set. It has the entire database you need.
Uploading a feed to Merchant Center
Return to our Merchant Center. Paste our link in the form that Prom made for us. Click “Continue”.
By the way, if you need to export some specific selected items or make several feeds, you can do it on Prom, but since I have one single product, I can’t show you how to do it. You can update the links. Here you go.
What do we have? First, we wait literally two or three minutes for all the products to be uploaded. Of course, if you have a lot of products, several tens of thousands, it may take a little longer, up to 10-15 minutes. Our task is to check the “Last Update” section to make sure that everything is okay here. That the products have been added.
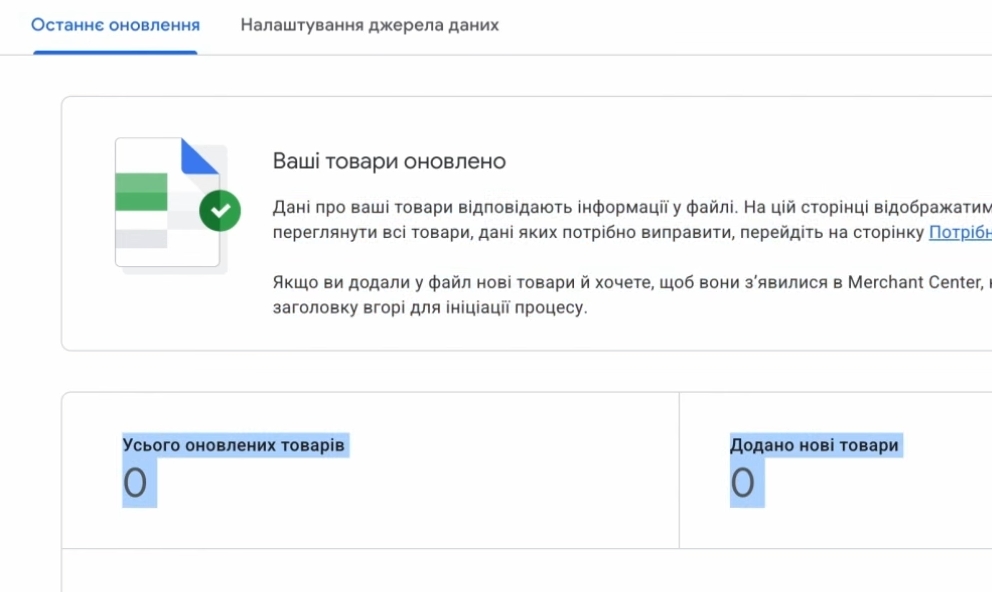
We have no red errors. If there are red errors, they need to be corrected. Why? First, we need to have a great ranking of our product ads for Google, so that Google would like to show us. Secondly, we need to ensure that all our products can appear in the search results. Thirdly, it is imperative that you do not worry that some of your best-selling products will not be displayed. It takes just a few minutes.
If you suddenly exit this block and need to go back to see if any products have been added, click on the gear on the top right, “Data Sources”. And here you will see this feed or a set of feeds that you have downloaded. So far, I have zero displayed here.
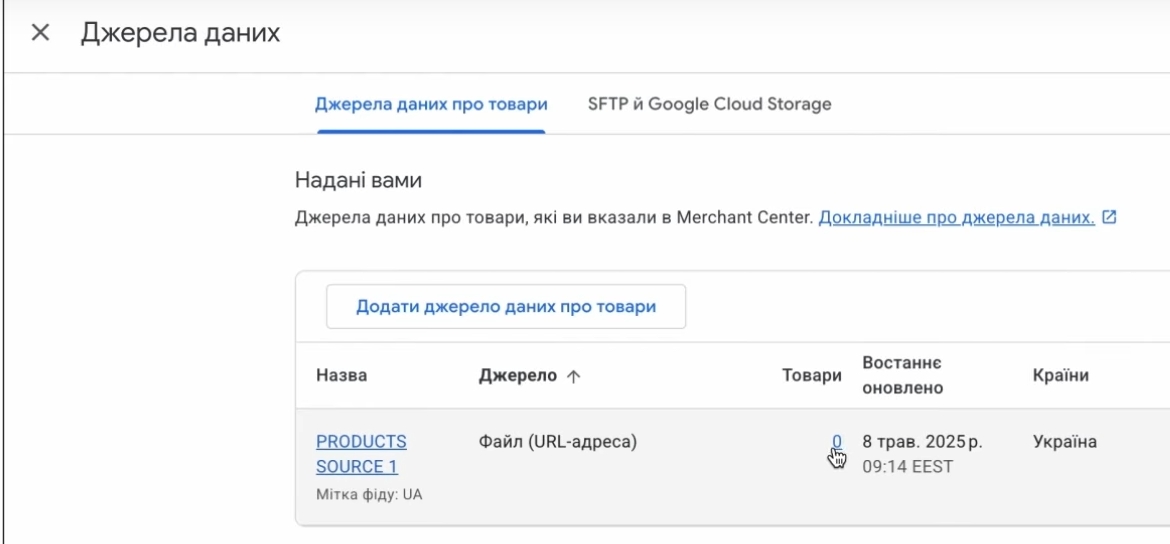
I click on this feed. You can see that I already have the updated products displayed. I added one product because I have only one. It is important that this number “One” appears here. Then we can consider this product upload really successful. Now let’s wait for me to show you that the product has appeared, what statuses it has, and so on.

Additional Merchant Center settings
But while the products are being uploaded, I suggest adding a few more important settings to your Merchant Center. They will definitely not make you worse. We are adding dynamic remarketing, this block.

What is it for? For product remarketing, so that the system can use it in the form of products that catch up with users. What products will catch up with users? Those that they have viewed in the catalog or on certain events. It doesn’t matter, it won’t do any harm. The only thing is that this dynamic remarketing may often be unavailable. It doesn’t make sense to add it if you have a theme: health, dietary supplements, medicines, vitamins, even jewelry crosses are sometimes blocked. There are certain niches where dynamic remarketing is usually not allowed. So if this is your niche, you don’t have to add it at all. I sell T-shirts, so I add it. That’s it, one button “Add”. I don’t need to do anything else. “Review.” I’m coming back again.
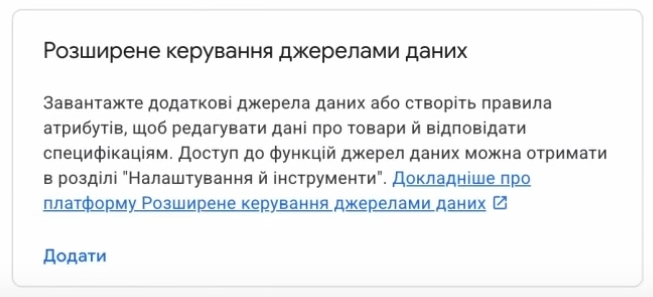
I also want to add advanced management of these sources. This will most likely be useful to you in the future. I want you to have a basic set so that if you google something on the Internet, you will have everything ready with instructions on what to do.
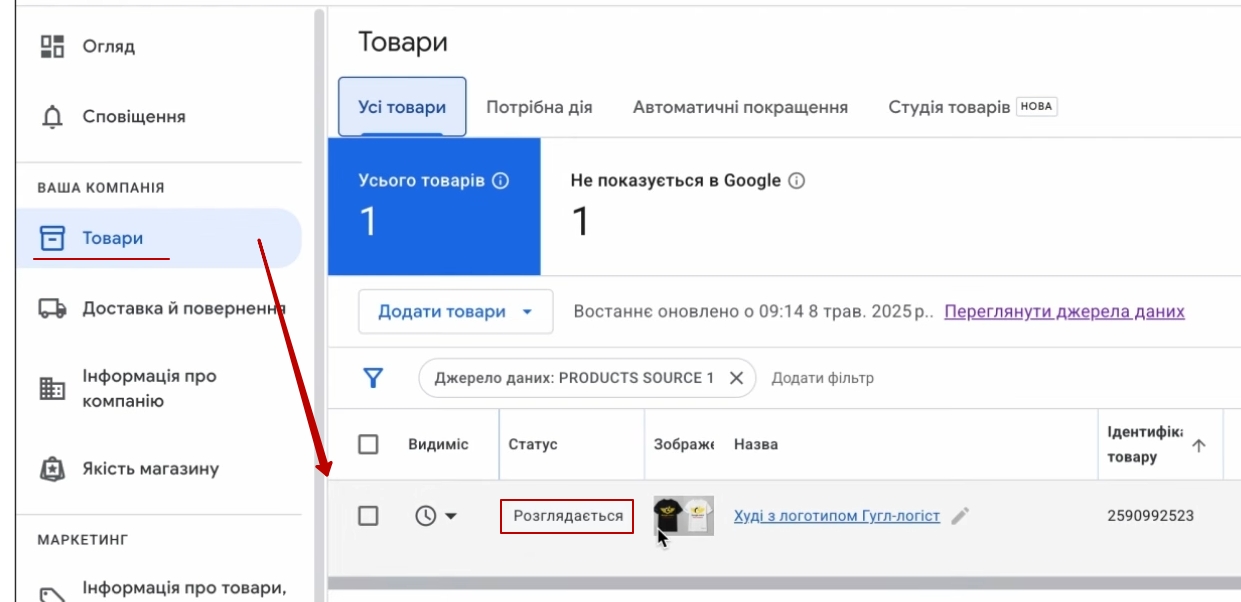
Let’s go back to our Data Sources. We already see one product. We click on it. It appears on the Products tab. You can see that the status is still “Pending”.
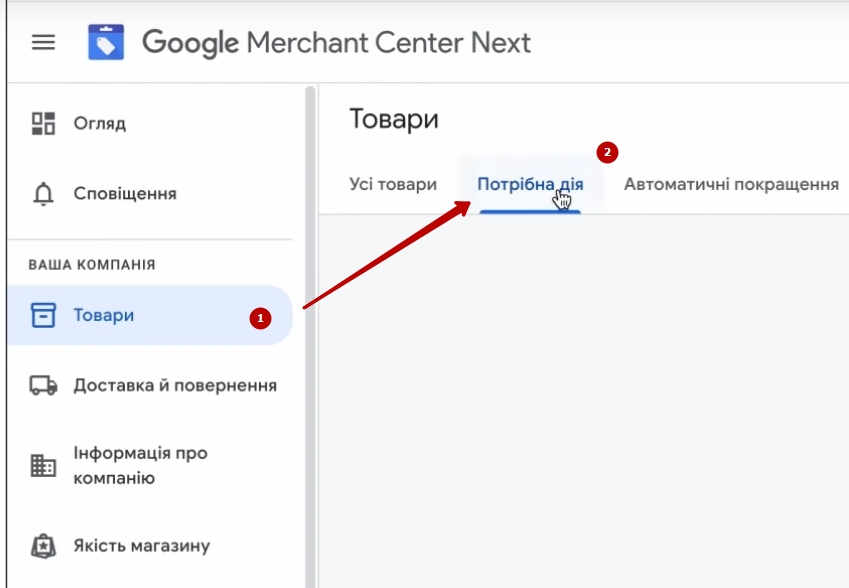
We need to keep an eye on it. If we suddenly have problems, we have a large product range, we want to see the dynamics, checked/not checked, how many products have been checked, we go to “Action required” – “View history”.
A nice visual graph will be built here. Of course, I can’t choose any other. It doesn’t show me yet, but if anything, the dynamics will be shown there. The yellow color indicates what is restricted for some reason.
By the way, the most common problem with restrictions is when you write a description or name of a product in caps. Therefore, it is better to write it in regular letters. Some goods may be rejected, and we will have to deal with this separately. So far, we are considering these products.
The results of what we have done
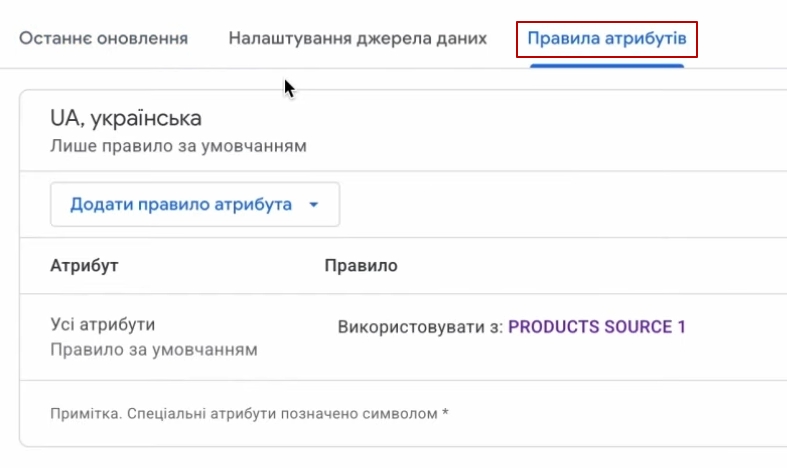
What have we done with you now? We have set up the merchant center, added almost all the basic information about our site, confirmed the rights to the site, uploaded products, and not only that, but added several functionalities for you. Where will they be displayed? You will have the opportunity to see in which products they are currently being tested. You will have products displayed now for now: dynamic remarketing, free ads, paid ads will appear in the functionality when we move on to creating our goals. I will explain everything step by step. We have also added a few additional settings. That is, you have additional feeds. I don’t know whether you will use them in the future or not. And thanks to the fact that while we were waiting for the goods to be uploaded, we also got additional settings in the form of rules for converting the merchandise feed. I understand that I may be loading you with something, it doesn’t matter. We just added a tab called “Attribute Rules”. Everything is great. Let’s move on.
We have finished with Merchant. As you can see, it was not too difficult. Thanks to Prom for organizing the unloading of the goods very conveniently. Confirmation of rights to the site is very convenient. The next step is to create goals, without which Performance Max will not work.


