Hello, everyone! My name is Yana Lyashenko, and I am a Google logistician. Today, we will discuss how to set up Google Ads purchase and conversion tags on the Prom.ua platform. The task itself is not difficult, but before we get started, I would like to draw your attention to a couple of important points.
What has changed in the conversion settings on Prometheus?
Let’s first figure out how the new approach differs from what came before.
Conversions are the target actions of visitors to your website. For example, a person placed an order or added a product to their cart. Why track them? First, to understand the effectiveness of advertising: how much you spent and how much you earned. Second, conversion data is needed to optimize advertising campaigns, especially if you use automatic bidding strategies.
Previously, Prom allowed you to set up conversions exclusively through Google Analytics 4. Now, however, there is a purchase tag feature—this is a “native” conversion that belongs directly to the Google Ads advertising account.
Why GA4 and Google Ads conversions exist separately from each other is a separate issue, which we will not delve into here. Suffice it to say that in 2024, Google is actively changing the rules of the game: new privacy requirements are being introduced, and approaches to collecting user data are changing. There are many nuances involved.
What do Google employees themselves recommend right now? Switch to the Google Ads tag and set conversions through it. GA4 is still in the process of being finalized, so for stable operation, it is better to use Google Ads conversions directly.
That’s what we’ll be doing today.
Setting up the purchase tag on the Google Ads side
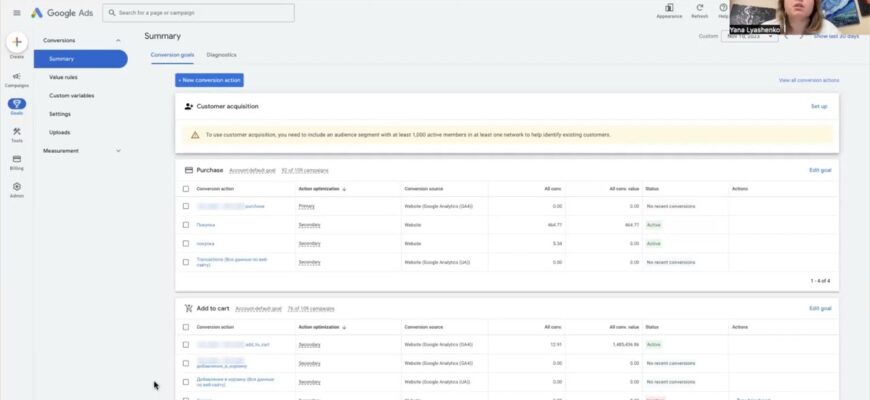
Now let’s move on to practice. Open your advertising account and you will see either a new light interface or the old dark (black and gray) one. In the old version, the navigation bar is at the top, and in the new one, it is on the left. But the logic of the actions is the same.

First, you need to create a conversion. In the old interface, look for the wrench icon at the top, then go to Tools → Settings → Conversions. In the new interface, this section is also called Conversions — you can find it in the left menu.
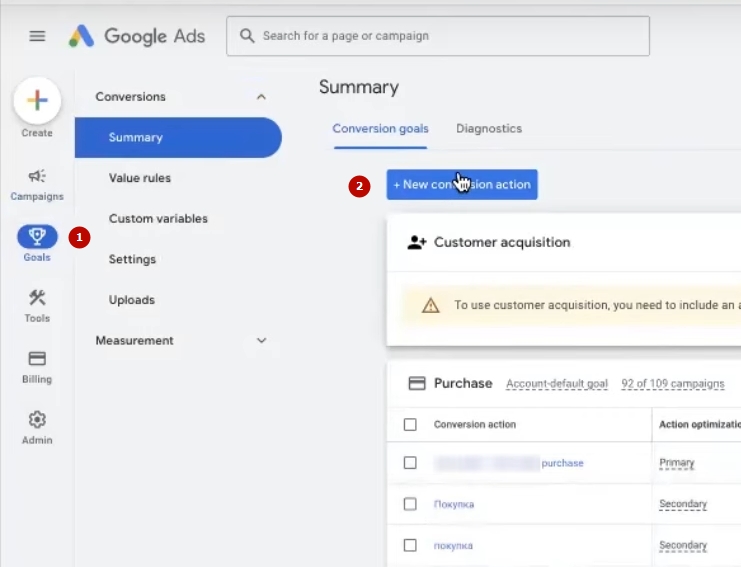
Click “New Action-Conversion.”
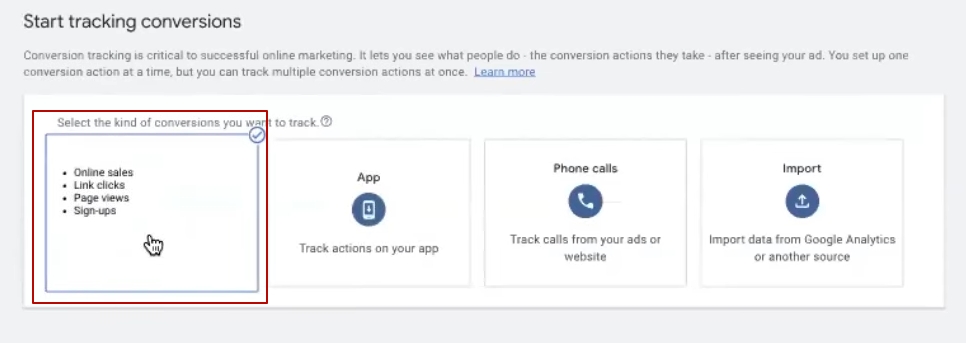
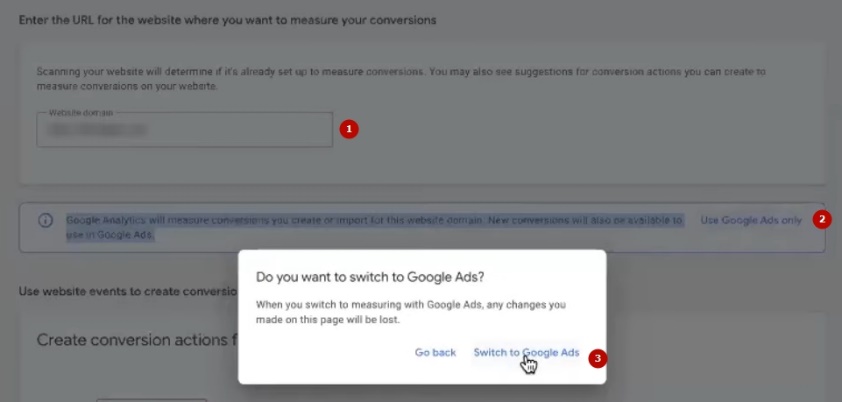
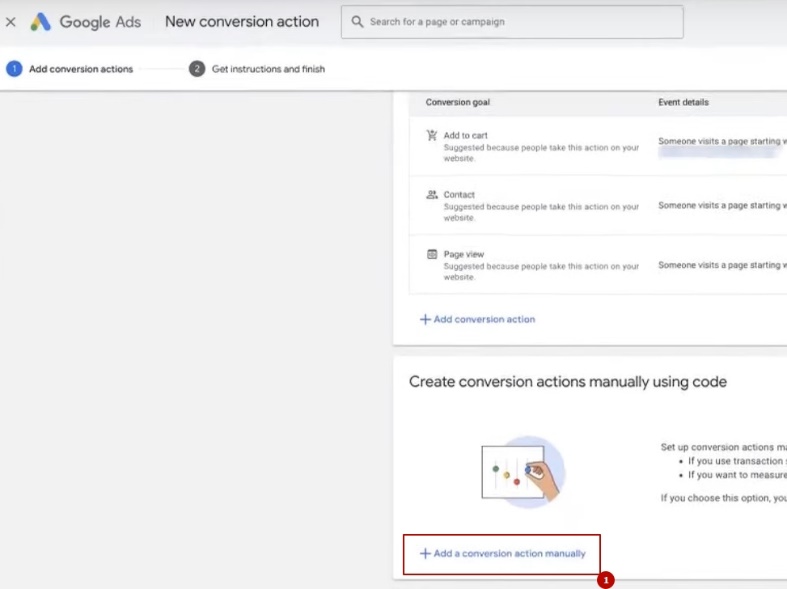
Select the “Website” type and enter your store’s domain name on Prom. Click “Scan.” The system may suggest using Google Analytics to measure conversions. This is not suitable for us—we want to set up Google Ads conversions. Therefore, switch to the “Google Ads Only” option.
Next, select “Add a conversion action manually.”
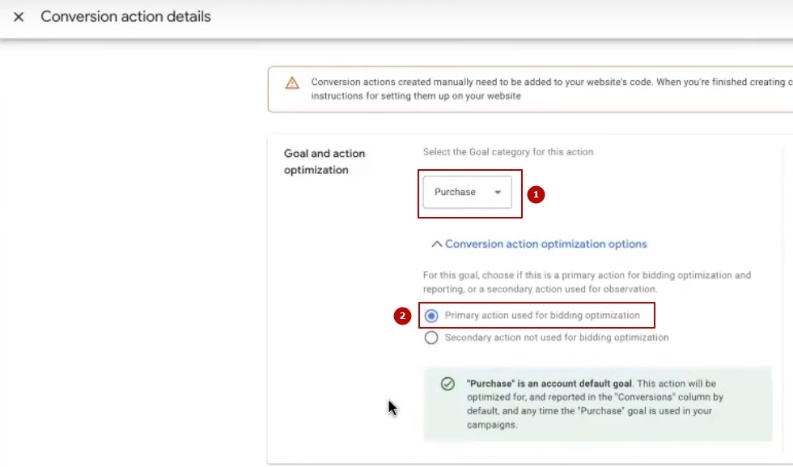
In the category, be sure to select “Purchase.” Pay attention to the “Primary” or “Secondary” action parameter. What is the difference? If you leave the conversion as Primary, it will be counted in the base conversions column and used to optimize bidding strategies across all campaigns. Secondary actions are more for observation purposes and do not affect optimization. I recommend leaving it as primary.
We call the conversion, for example, “Google Ads Purchase.”
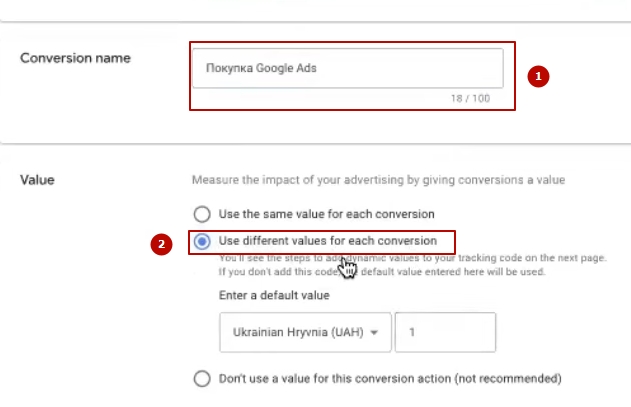
In the value field, select “Use a different value for each conversion.” This is important: this way, the system will dynamically pull up the actual order amount depending on the cost and quantity of goods.
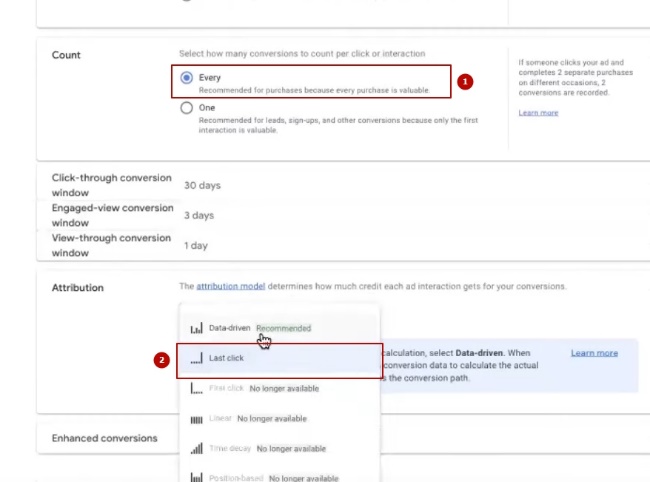
We set the calculation to “Every conversion” — because every sale is important to us.
Now let’s talk about the attribution model. By default, “Data-driven” is enabled, but I recommend choosing “Last click” at the beginning. Why? Until you have accumulated at least 200–500 conversions, data-driven models simply won’t have enough information to work correctly.
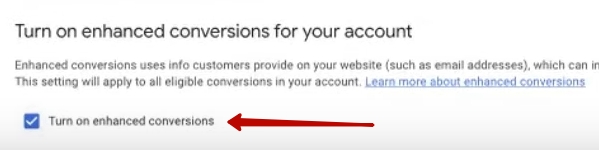
Check the box “Turn on enhanced conversions” — we’ll talk about this a little later.
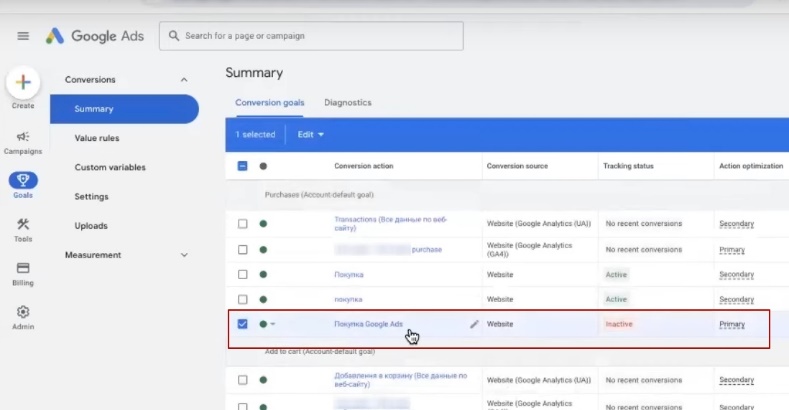
Click “Done.” The conversion has been created, but it is currently displayed as inactive — this is normal.
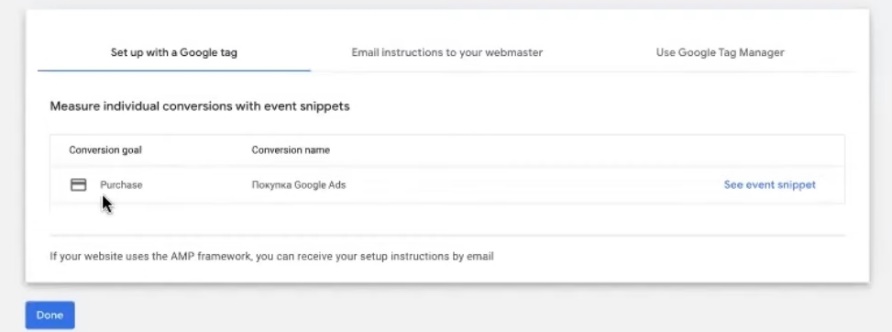
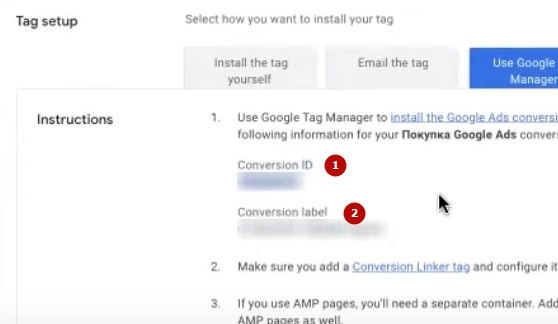
Go to the conversion you created and open the settings block. Select Google Tag Manager as the installation method. Here you will see the conversion label — copy it, as you will need it in the next step.

Setting up the purchase tag on the Prom.ua side
The conversion in Google Ads has been created — now you need to link it to your store on Prom.ua. Go to the Prom admin panel.
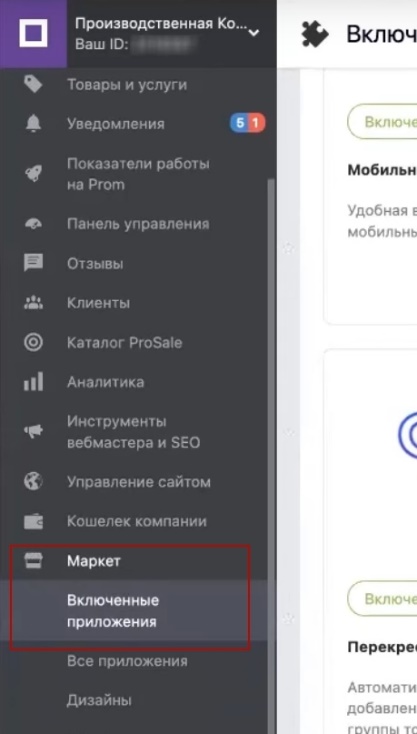
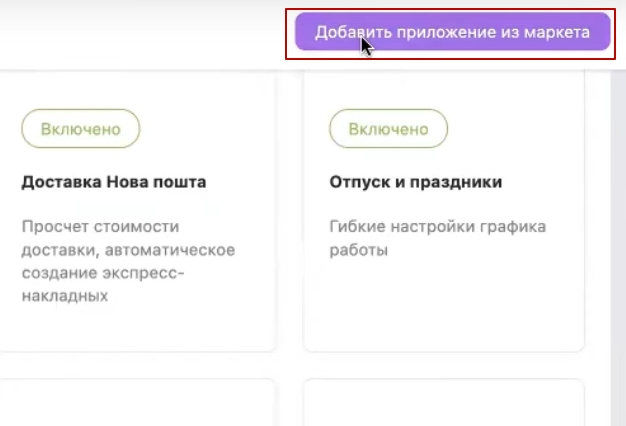
In your personal account, find the “Market” section → “Enabled applications.” The Google Ads application should be here.

Can’t find it in the list? Then click the purple “Add app from Market” button at the top right.
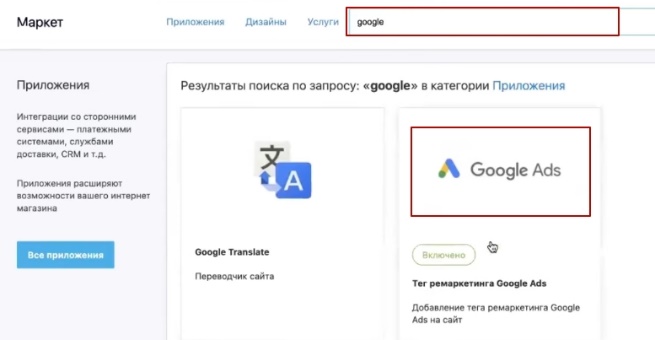
A search bar will open — just type in “Google” and find “Google Ads remarketing tag” in the results. Add it to your store.
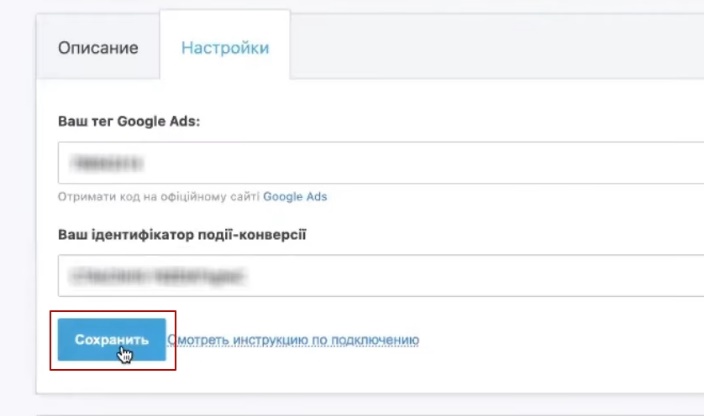
Click on this application. A window will appear with two fields that need to be filled in:
- Google Ads tag — insert the Conversion ID here (the same conversion ID from the previous step, a numerical value such as 70XXXXXXX)
- Conversion event ID — copy the entire conversion label that we copied in Google Ads here
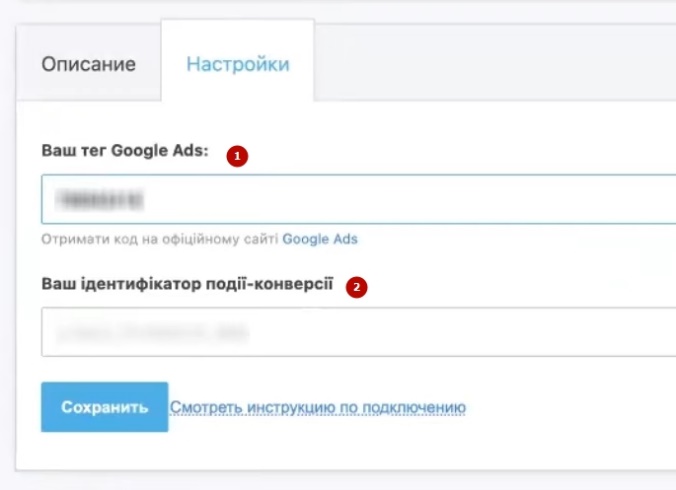
Where can you find this information? Return to Google Ads, open the conversion you created, and expand the settings—there you will find the Conversion ID and Conversion label. Copy them one by one and paste them into the corresponding fields on Prometheus.
Click “Save.” That’s it—the “Purchase” conversion setup on the Prom side is complete.
Checking the result: placing a test order
The setup is complete, but it’s too early to relax — you need to make sure that the conversion is actually working. To do this, place a test order and check whether the data is being transferred to Google Ads.
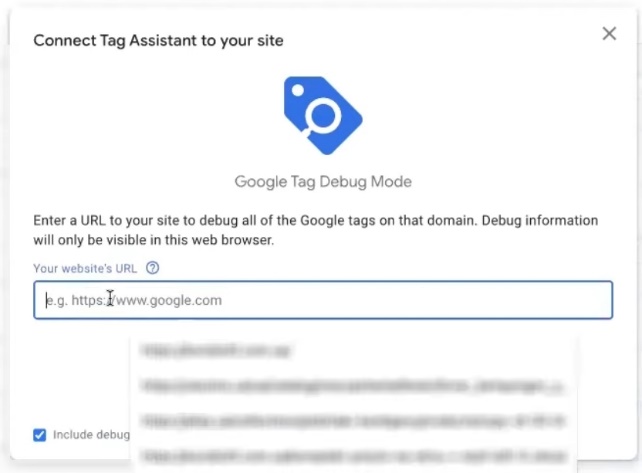
You will need a browser extension to check this. You can use Google Tag Assistant Legacy, but I recommend Tag Assistant Companion — it’s easy to find in the Chrome extension store, and it’s not going anywhere anytime soon.
Install the extension, go to your store’s website on Prom.ua, click on the extension icon, and add the domain (Add domain). I usually add the product card page right away — it’s more convenient that way.
Now let’s place a test order. Select an inexpensive item, go through the entire process: add it to your cart, select a delivery method (for example, pickup or cash on delivery), and write “Test order” in the comments so you don’t forget to cancel it later. Click “Place order” and wait for the “Thank you for your order” page to appear.
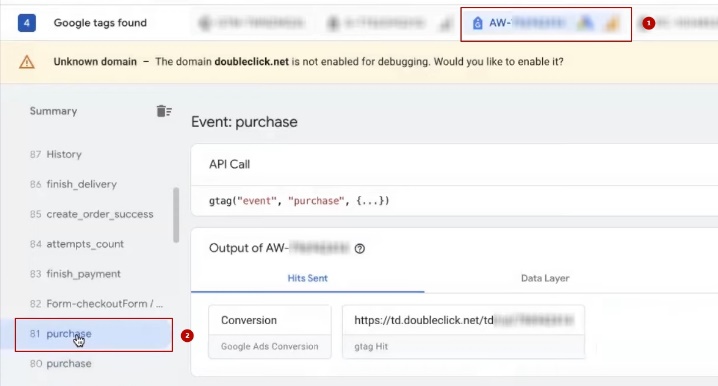
This is where it gets interesting. Go back to Tag Assistant Companion and look for a tag with code that starts with AW- and contains your Conversion ID (the numbers we copied from Google Ads). Where does this AW- come from? If you look at the manual installation code, you will see a “send_to” parameter with this identifier.

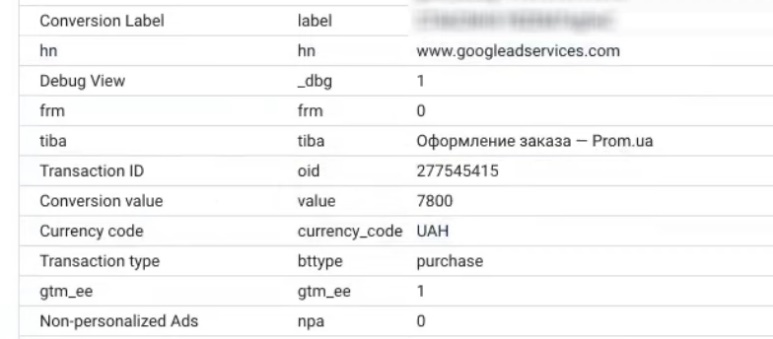
Found the right tag? Great. Now let’s find the event called purchase — that’s our purchase. Click on it and check that Google Ads is specified in the details, not GA4. Check the Conversion Label — it should match the one in the conversion settings exactly.
What data should be transferred? Here is the basic set:
- value — order amount (revenue)
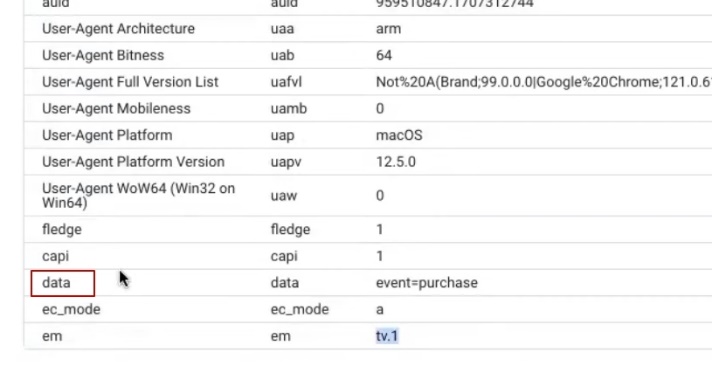
- event — тип события (purchase)
- transaction ID — unique order identifier
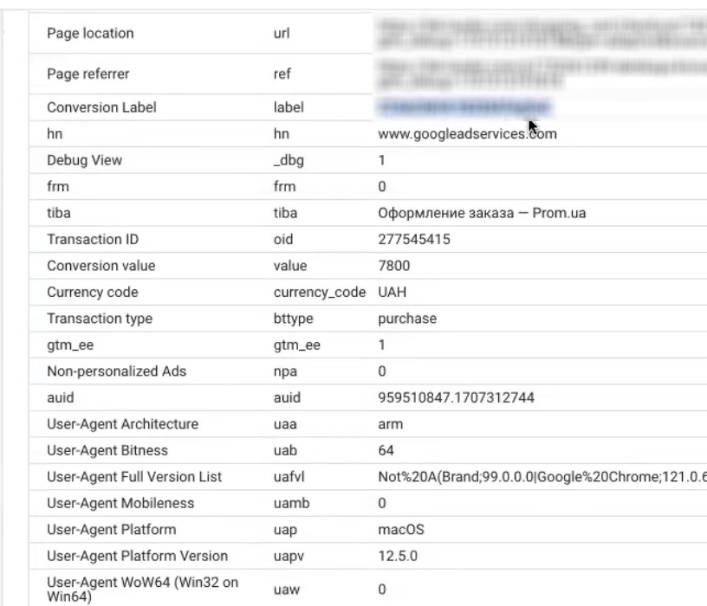
This is sufficient for operation. The only feature currently lacking on Prom (but available on Khoroshop, for example) is the transfer of order details: which specific products were purchased, in what quantity, and at what price. Such detail would enable the system to generate product-specific analytics. But even without this, the basic data set is quite functional — you can launch advertising campaigns and track conversions on Prom.ua.
Test order from an advertisement in search results
Checking beforehand with Tag Assistant Companion is good, but there is another important step. After launching your ad, find it in Google Ads search results, click on it, and place a test order. Yes, that’s right — become your own customer for a minute.
Why is this necessary? There are several reasons.
First, you can be 100% sure that conversions are recorded correctly. We have chosen the “Last Click” attribution model, which means that purchase data should appear in Google Ads reports within 48 hours (sometimes as early as the next day). In general, remember this rule: virtually all Google analytics are compiled at least 48 hours in advance, and final data may take even longer to update.
Secondly, check that the order amount (value) matches what you actually “spent” during the test purchase. If an incorrect value is transmitted, look for an error in the settings.
Thirdly, if you have a new advertising account, a test conversion will help you get rid of annoying warnings in the “Recommendations” section. Google likes to remind you that “conversions are not set up” or “data is not coming in” — after the first recorded purchase, these messages will disappear.
Conclusion
Let’s summarize. We set up purchase conversion on the Prom.ua platform and linked it to Google Ads. Using Tag Assistant Companion, we made sure that everything was working: the conversion tag was in place, the order number was being transferred, and the amount and currency were being recorded. This data set is sufficient for launching and optimizing advertising campaigns.
What’s next? We launch the ad campaign and monitor the results.
The only thing that remains “in the pipeline” is extended data transfer (for example, the buyer’s email address for extended conversions). I am still testing this feature on Prom. If it works consistently, I will post separate instructions. If not, we will wait until Prom itself refines this functionality.
That’s it. The purchase tag on Prom.ua is set up — you’re ready to go!


