Let’s say you’ve opened an online store. The products are excellent with reasonable prices, the website is decent too. But there are few customers. Sound familiar? One of the fastest ways to fix this is to launch Google Shopping.
In this article, we’ll break down step by step how to set up Google Shopping — from account registration to launching your first campaigns. No fluff, with specific recommendations and examples for the Ukrainian market.
Why is Google Shopping setup important for any online store?
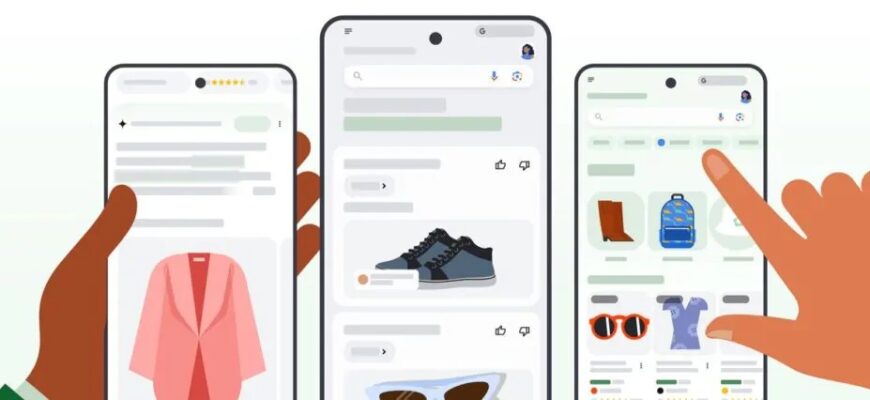
Imagine: a person types “buy Xiaomi robot vacuum” into their browser. And instead of regular text links, they see an entire showcase — with photos, prices, and store names. This is Google Shopping advertising. It appears at the top of search results, as well as in the “Shopping” tab, and looks like a mini-catalog right in the search results.
Why is Google Shopping setup more effective than regular banners? Because the buyer makes a conscious decision to click. They’ve already seen the price, photo, and online store name. If everything suits them — they click through. If not — they don’t click, and you don’t pay for an empty visit.
For an online business owner, this means one thing: “warm” customers come to them. The person has seen everything necessary and, if satisfied with what they saw, clicks. Non-targeted visits are significantly fewer than with regular search advertising. Which means the budget is spent more efficiently.
In the Ukrainian market, competition in Google Ads grows every year, and with it — the cost per click. In this regard, product ads have a strong advantage — you’re competing not just with text, but with a visual card. The user immediately compares offers and chooses the best. And if you have a competitive price and good photo — your chances of a sale increase significantly.
Plus, this advertising is easy to scale. You don’t need to manually create a separate ad for each offer. Just properly prepare the feed, and Google will generate them for the entire catalog itself. A store with 50 items and a store with 5,000 — the time spent launching a campaign is almost identical. The only difference is the volume of data being processed.
Attention: product ads are not shown based on keywords that you manually set. Google itself determines relevance based on data from your feed — name, description, category, etc.
What do you need to launch advertising in Google Shopping?
Before launching advertising in Google Shopping, make sure you’ve prepared everything necessary. Otherwise, you risk wasting time, getting products rejected, or worse — account suspension.
Requirements for the online store
Google checks online resources from which products are loaded quite strictly. Here’s what needs to be in order:
- The website must have pages with delivery terms, payment, return policy, and contact information. This isn’t a formality — without them, the account simply won’t pass moderation.
- Prices on the website and in the feed must match. If the bot detects a discrepancy — the product will be rejected.
- Online payment and delivery to the customer’s address are mandatory conditions. A store that only works with self-pickup and cash on delivery may encounter problems.
- SSL certificate (https) — without it, it’s not even worth starting.
By the way, many CMS platforms popular in the Ukrainian market (Horoshop, Prom, OpenCart) can already automatically generate feeds for Merchant Center. This saves a lot of time.
Accounts you’ll need
To launch shopping advertising, you’ll need two accounts:
- Merchant Center (GMC) — this is where the necessary data is uploaded;
- Google Ads — this is where the advertising campaign is created and further management takes place.
How to set up Google Shopping: step-by-step instructions
Let’s move to practice. We’ve compiled a step-by-step guide to setting up advertising in Google Shopping, using which even a beginner can launch their first campaign. Try to follow in order — this reduces the chances of missing something.
Step 1. Creating and setting up a Google Merchant Center account
This platform is essentially the “warehouse” for your feed. This is where you upload it, and Google uses this information to form advertising cards.
Registration
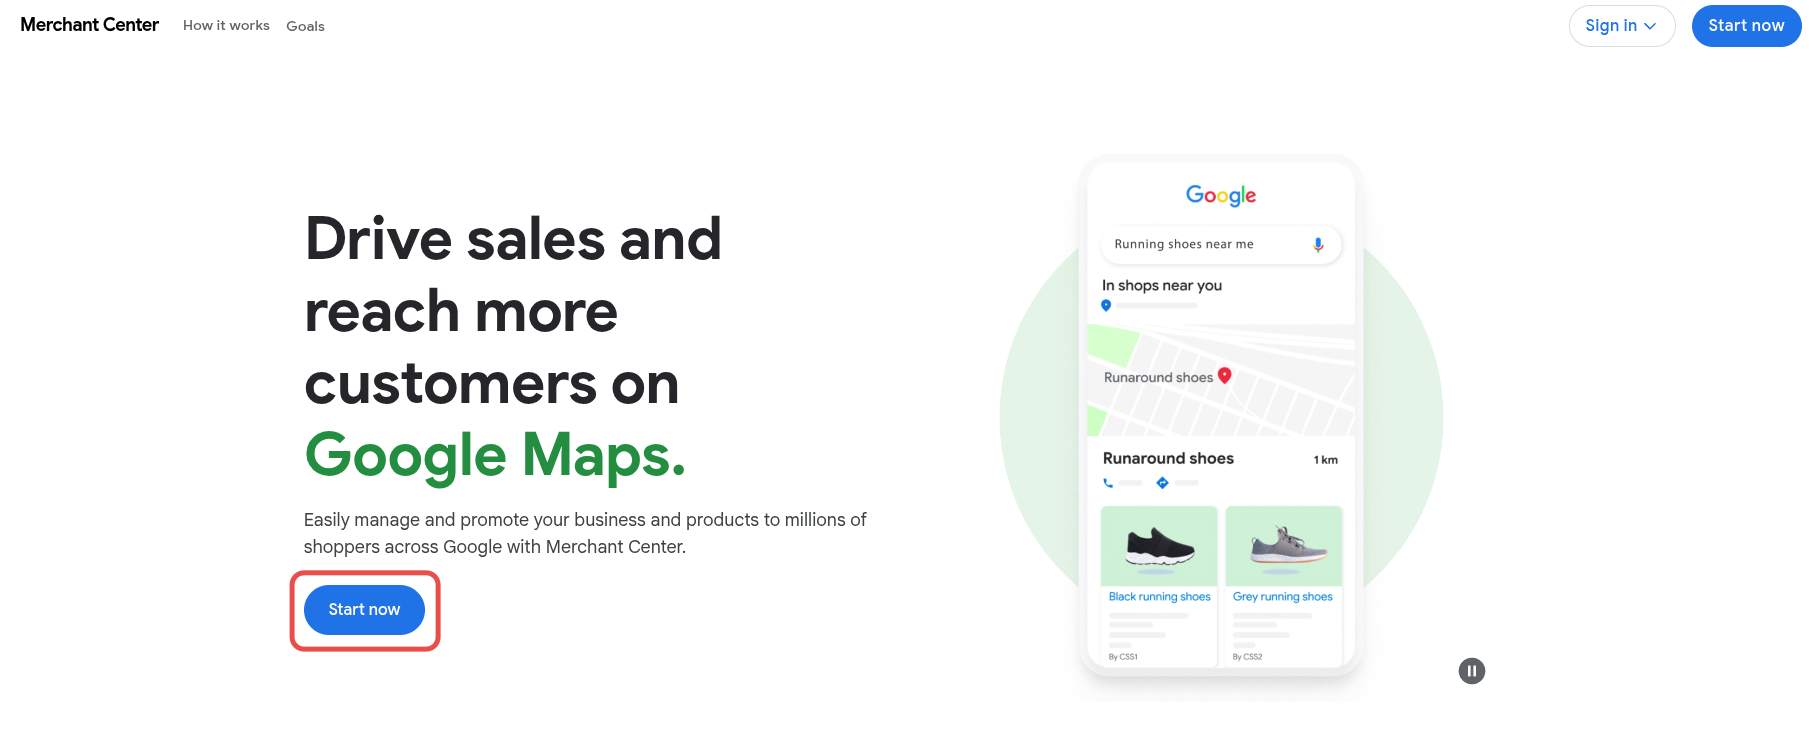
Go to the Merchant Center website and click “Get started.” Sign in with your Google account — it’s better to use a work account, not a personal one. Enter your company name, country (Ukraine), and your online store URL.
Important: an account for one store is created only once. You cannot change the domain after registration, so carefully check all fields before clicking “Done.”
Website verification and domain confirmation
The next stage is domain confirmation. Google needs to verify that the website actually belongs to you. There are several ways to do this:
- Add a meta tag to the homepage code;
- Upload an HTML file to the root directory of the website;
- Confirm through Tag Manager or Google Analytics;
- Use a DNS record.
Choose the option that’s technically simpler. If you already have Google Analytics connected — this method is probably the fastest.
Step 2. Creating a product feed
This is the heart of the entire system. Without it, Google Shopping setup is simply impossible. A feed is a structured file where each row describes one product using special attributes.
Mandatory attributes
Here are the attributes that must be filled in:
- id — unique identifier.
- title — name. This is what Google uses to match with search queries. Write specifically: not just “sneakers,” but “men’s sneakers Nike Air Max 90 black.”
- description — description. Include key characteristics: material, purpose, features.
- link — URL of the product card on the website.
- image_link — link to the main image. Background — white or light, without watermarks and logos.
- price — price in “1299.00 UAH” format. Must exactly match the amount on the website.
- availability — stock status: in_stock, out_of_stock, or preorder.
- brand — brand.
- gtin or mpn — global number or manufacturer code. If the product doesn’t have a GTIN, specify MPN and brand.
- condition — condition: new, refurbished, or used.
This is the minimum set. But the more information you provide, the more accurately the system can match your product with buyer queries.
Additional attributes worth using
- sale_price — discounted price. If you’re running a promotion, be sure to specify this attribute. Google will show the crossed-out old price and the new one — this increases clickability.
- product_type — your own product categorization.
- google_product_category — category from Google’s classifier.
- custom_labels (custom_label_0 — custom_label_4) — custom labels. Perhaps one of the most underrated tools. With them, you can segment offers by margin, seasonality, popularity — however you like. For example, custom_label_0 = “high margin,” custom_label_1 = “summer 2026.” These labels are then used when creating campaigns for more precise bid management.
- shipping — delivery information.
- color, size, material, gender, age_group — for clothing and shoes, these attributes are mandatory.
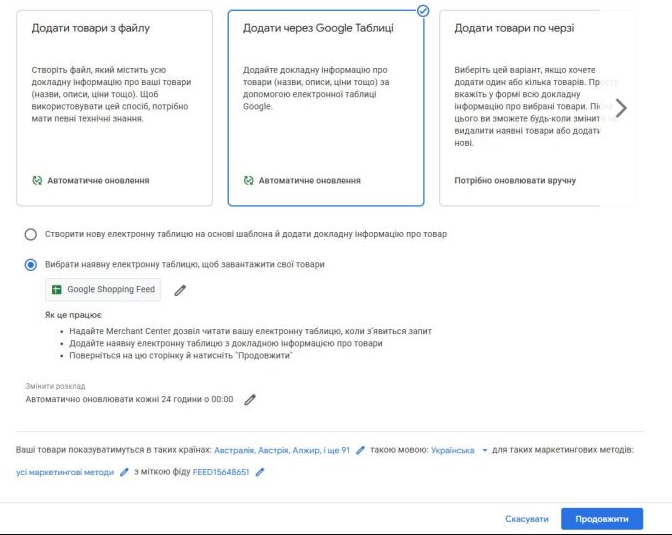
Ways to upload the data feed
The feed can be transferred to Merchant Center in several ways:
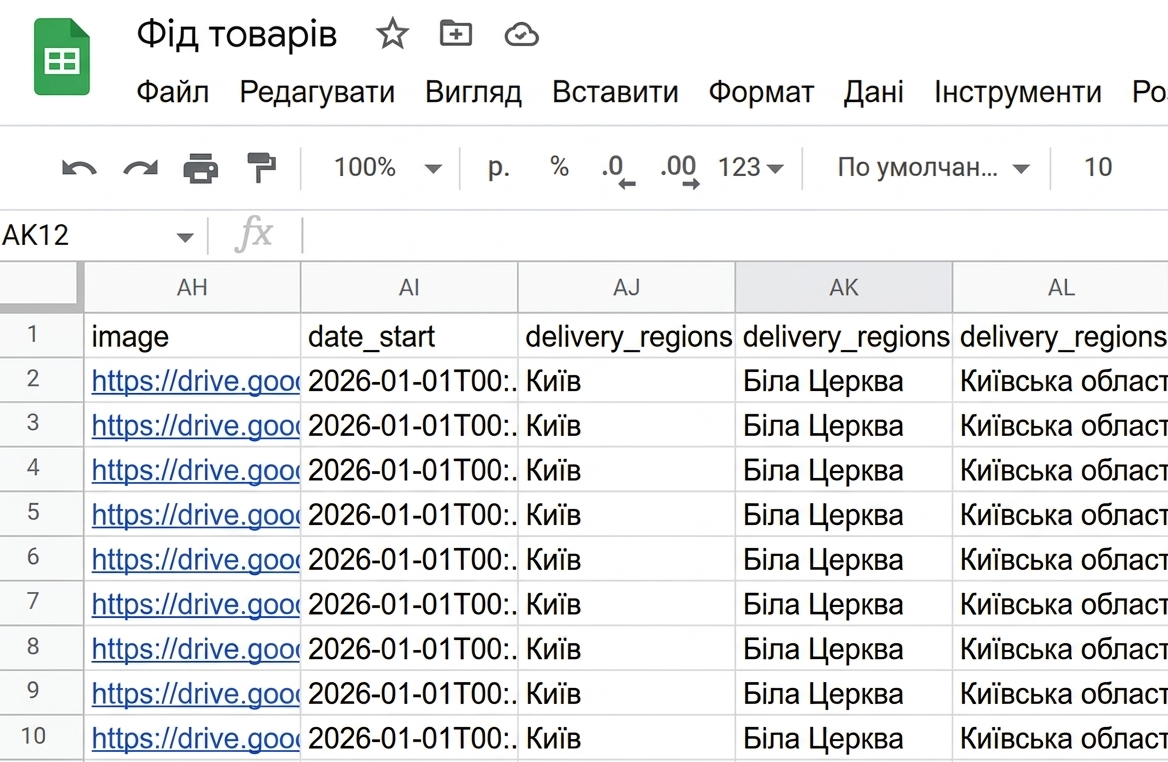
- Through Google Sheets — convenient for small stores with 20–50 items. Create a spreadsheet on the same Google account, fill in the attribute columns, connect to GMC.
- File upload (XML/TXT) — classic option for medium and large stores. The file is generated automatically by CMS or plugin.
- Automatic transfer via URL — you specify a link to the file, and Google fetches it on a schedule (for example, once a day).
- Content API — for large projects with thousands of product positions and frequent price and availability updates.
Tip: if prices or assortment change frequently on your website, be sure to set up automatic data updates — at least once a day. This will help avoid product rejection due to price discrepancies.
Step 3. Linking Merchant Center and Google Ads accounts
Without linking accounts, you won’t be able to create a shopping campaign. The process is simple, but often forgotten.
In Merchant Center, go to settings → “Linked accounts” → find Google Ads and send a linking request. Then log into the second service and confirm the request. That’s it, accounts are linked.
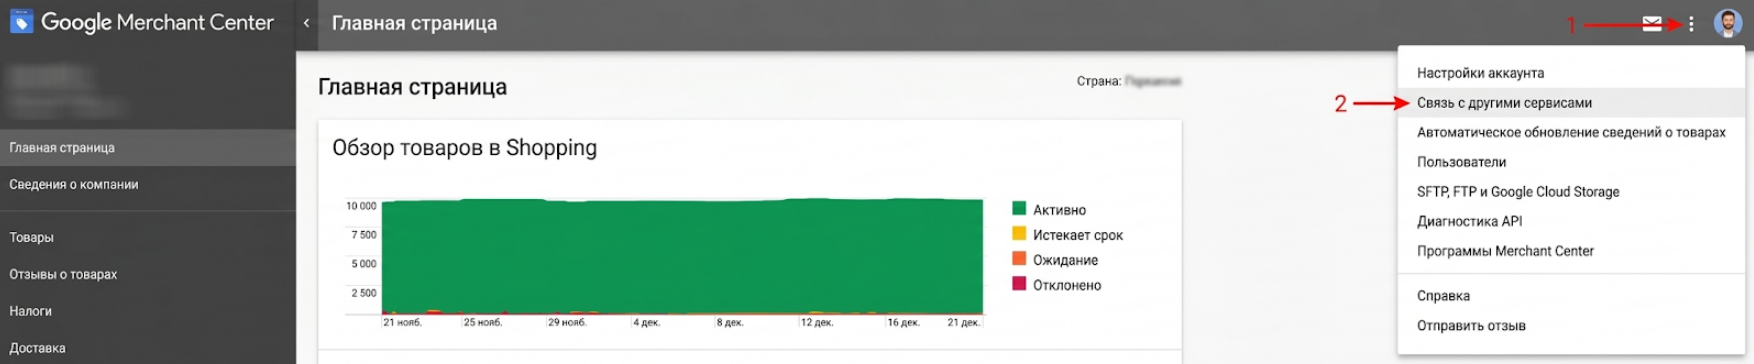
After linking, information from your feed will become available in Google Ads, and you’ll be able to use it to create campaigns.
To be honest, this is one of the simplest steps. But if something doesn’t work — make sure you’re using the same Google profile (or have administrator rights in both services).
Step 4. Working with rejected products
So, you’ve uploaded your feed. And here comes the “most interesting” part — Google rejected some products. Don’t panic, this is normal, especially on the first upload.
Rejected products are displayed in Merchant Center on the “Diagnostics” tab. The reason for rejection is also indicated there. The most common problems:
- Price mismatch. This is the most common error. Even a difference in cents can lead to rejection.
- Low-quality images — too small, with watermarks or text overlays.
- Missing mandatory attributes (for example, no GTIN specified for branded offers).
- Description or name not matching the actual product on the page.
- Incorrect format — for example, price specified without currency code.
After fixing errors in the file, upload it again. Google will automatically review previously rejected positions.
By the way, if the number of rejected products exceeds a certain threshold, the system may suspend the entire account. So monitor diagnostics regularly — at least once a week.
Step 5. Creating a shopping campaign in Google Ads
Here we are at how to launch advertising. Go to Google Ads, create a new campaign, select the “Sales” goal, and set the type to “Shopping.”
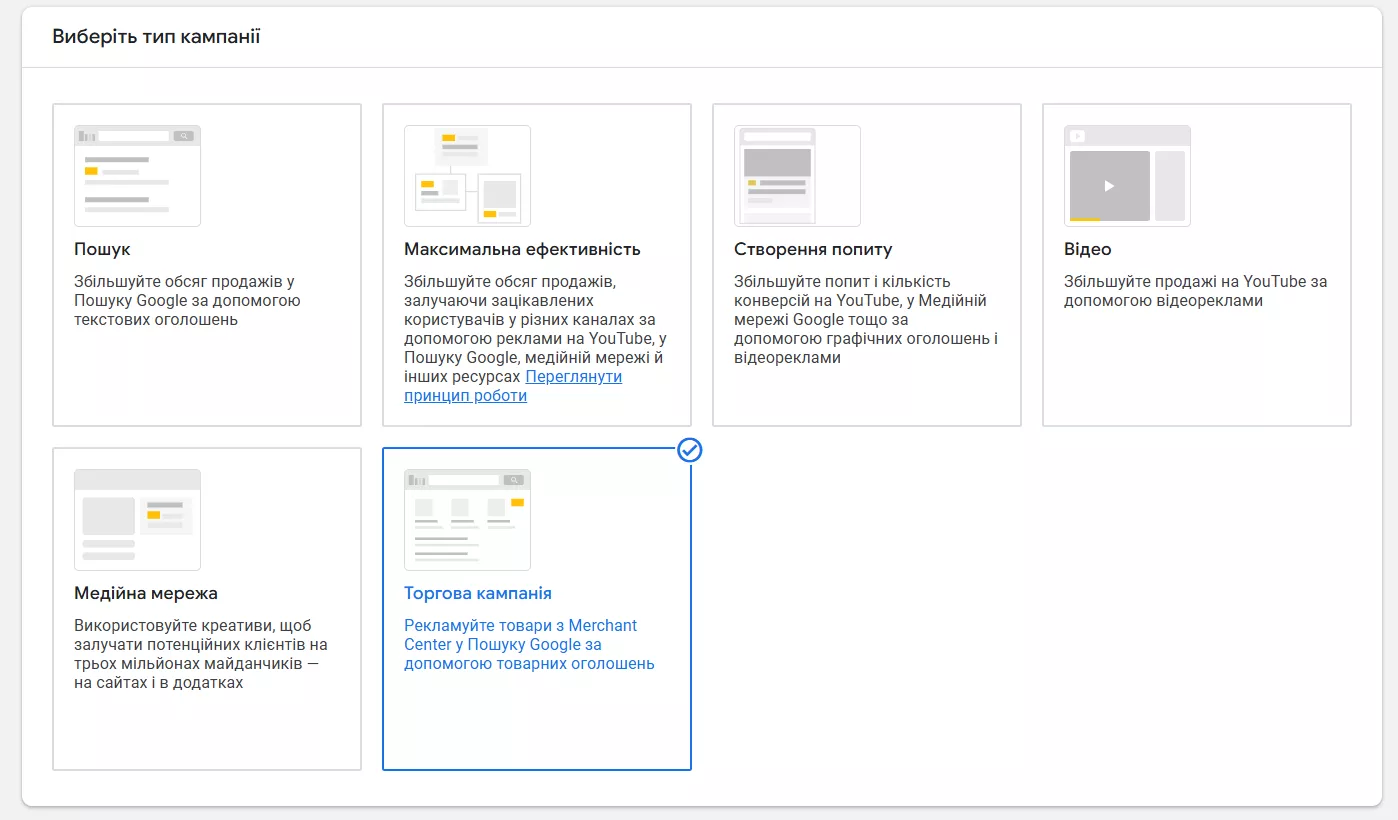
Then you’ll be offered two options.
Standard Shopping campaign
This is the classic. You get full control: you set bids yourself, group products, add negative keywords, analyze search queries. Ads are shown in search results and in the “Shopping” tab.
This format is more suitable for beginners — you see exactly what’s happening: which queries bring customers, which offers work better, where money is being wasted. No automated format will give you such transparency.
When creating a standard campaign, you need to:
- Specify a budget. Start with a comfortable amount. For a small online store in Ukraine, 200–500 UAH per day is quite an adequate start to gather statistics.
- Choose a bidding strategy. To start, “Maximum clicks” with a maximum cost-per-click limit will work. Later, when you accumulate conversion data, you can switch to “Target ROAS.”
- Set up geotargeting. Specify regions where you deliver.
- Create groups. By default, all products fall into one group. But it’s better to segment them immediately — by category, brand, type, or using custom labels.
Important: when segmenting, scroll through the list to the end and make sure all needed groups are checked. Otherwise, Google will apply the breakdown only for the first 50 groups, and disable the rest from showing.
Performance Max
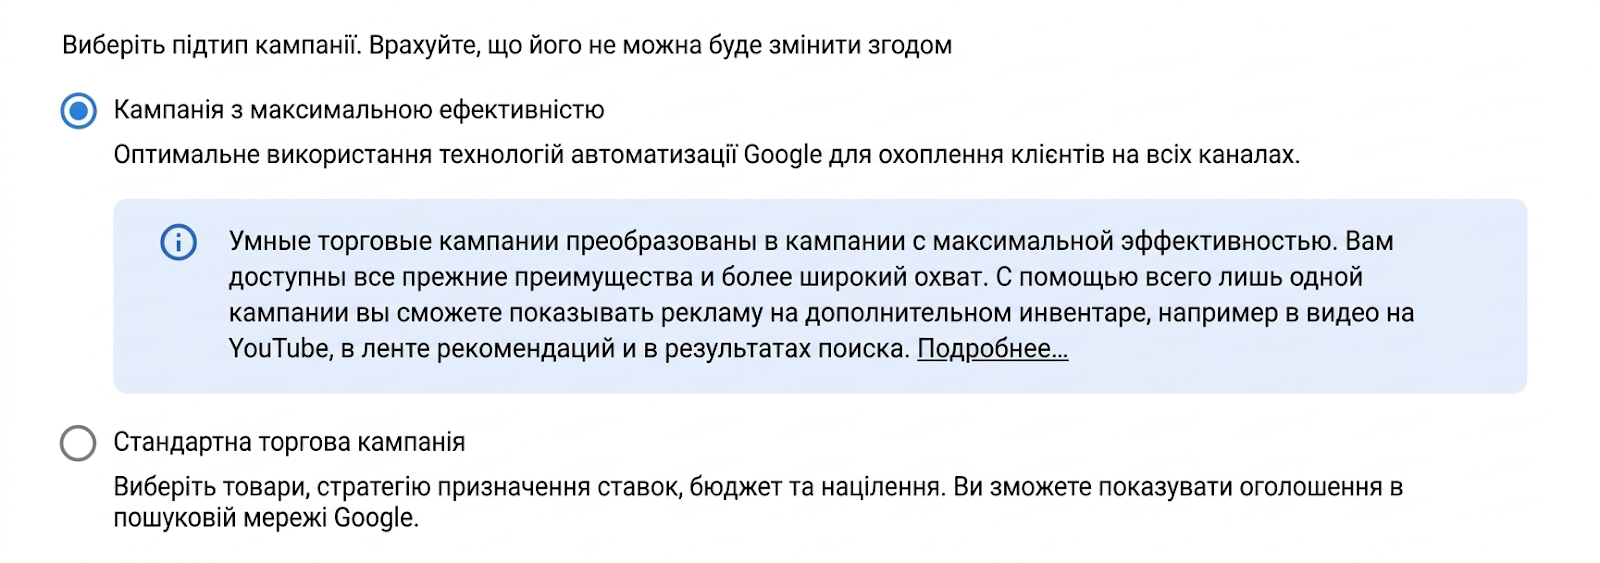
This is a relatively new campaign type with maximum performance that replaced Smart Shopping in 2022. Its essence is maximum automation. Google itself decides where, when, and to whom to show your product. Ads run not only in Shopping, but also in search, on YouTube, in Gmail, in the display network, in Discover, and even on Google Maps.
Sounds tempting? Yes. But there are nuances.
Performance Max is essentially a “black box.” You don’t see which specific search queries your ads are shown for (only aggregated reports are available). You can’t manually manage bids for individual positions. And you don’t always understand which channel is actually bringing sales.
For Performance Max to work effectively, you need:
- Minimum 30 conversions in the last 30 days in your Google Ads account. Without sufficient data volume, the algorithms simply won’t be able to learn.
- Quality resources (assets): images, video, headlines, descriptions, logo.
- Properly filled feed — this is the foundation, just like in standard shopping advertising.
- Audience signals — remarketing lists, customer data. They help the algorithm faster “understand” whom to show ads to.
Which format to choose?
There’s no definitive answer. But here are some guidelines.
If you’re just starting and want to figure things out — start with a standard shopping campaign. It will give you transparent reporting and control. If you already have experience and enough conversions — try Performance Max for scaling.
And you can also use both options simultaneously. Standard shopping — as the main campaign with higher bids. Performance Max — as an additional one, for reaching new audiences and retargeting.
Step 6. Optimization after launch

Launching a shopping campaign is just the beginning. Then comes working with data, and this is what determines whether the marketing activity will be profitable.
What to look at in the first weeks?
After launch, check:
- Product status in Merchant Center. If some positions are rejected — figure out the reasons. Often these are small things: missing GTIN, price mismatch, image problems.
- CTR (click-through rate). If it’s below 1% — perhaps you should improve photos or rewrite titles in the feed.
- Cost per conversion. If it’s higher than planned — consider whether your reach is too broad.
- Search queries (for Standard Shopping). Here you must check which queries your offers are shown for. Some will turn out to be irrelevant. Let’s say you sell branded leather bags, but they’re shown for the query “grocery bag.” Add such phrases to negative keywords — and your budget will be spent more wisely.
What work needs to be done regularly?
- Work with bids. Not all products are equally profitable. If you have high-margin items — increase bids on them. For products with low margin or low conversion — conversely, decrease. This is exactly what custom labels are for: they allow you to split the entire catalog into meaningful groups and manage each separately.
- Improve the feed. This is work that never ends. Change names so they better match search queries. Update descriptions. Make sure images are high-quality and attractive. Add sale_price when running promotions — the crossed-out price in the card really does increase CTR.
- Monitor competitors. In Google Ads, there’s a “Price comparison” report — you can see how your prices compare to competitors. If you’re more expensive on most items, clickability will be lower.
- Don’t change everything at once. Changed the budget — wait a week. Changed the bidding strategy — give it two weeks to learn. Constant changes confuse the algorithm.
Tip: make it a habit to check the “Diagnostics” tab in Merchant once a week. There Google shows all problems — from feed errors to policy violation warnings.
Common problems when launching advertising in Google Shopping
Even if Google Shopping launch was done by professionals, difficulties sometimes arise with this campaign type. Here are the most common:
- Products rejected in Merchant Center. The first thing to do — go to the “Diagnostics” section and see the reason. Usually this is data discrepancy (price, availability), image problems, or lack of mandatory attributes.
- Account blocked. Most often the reason is violation of Merchant Center rules. Check if you have any prohibited categories among your products (weapons, tobacco, medical drugs, gambling). Also, blocking can be caused by missing pages with return conditions and privacy policy on the website.
- Advertising is showing, but no sales. Here the issue may not be with the advertising, but with the website. Check how convenient the product page is: does it load quickly, is there a “Buy” button, does the mobile version work. And also — compare your prices with competitors. If you sell the same product 20% more expensive, there will be clicks, but no purchases.
- Performance Max spends budget, but few conversions. Give the campaign time — at least 2–3 weeks. If after a month the situation doesn’t change, check conversion settings (are purchases being tracked correctly?), review audience signals, and try segmenting products into groups.
How much does Google Shopping advertising setup cost in Ukraine?
Here it’s important to distinguish two things: the cost of setup itself and the advertising budget.
If you do everything yourself — setup is formally free. Registration in Merchant Center and Google Ads doesn’t cost a penny. You only pay for clicks on ads. But “free” is conditional, because you’ll have to spend time preparing the feed, setting up accounts, fixing errors, and optimization. For a person without experience, this can take from several days to a couple of weeks.
If you decide to order Google Shopping advertising setup in Ukraine from a specialist or agency, the cost of a “turnkey” launch starts at approximately 5,000–8,000 UAH (from 15,000 UAH — for Google partner companies). Monthly campaign management — usually from 4,000–10,000 UAH depending on catalog volume and number of campaigns. Some agencies work for a percentage of the advertising budget — typically 10–15%.
As for the advertising budget itself — 5,000–10,000 UAH per month is enough to start, to gather basic statistics and understand which products work. The average cost per click in shopping campaigns for Ukraine is usually lower than in regular search advertising. And conversion is typically higher — because the user has already seen the price and photo before clicking. Then the campaign budget can be scaled based on profitability data.
Tip: don’t chase cheap setup. A poorly prepared feed or incorrect campaign structure can cost more — through wasted advertising budget and a blocked account in Merchant Center.

