
Hello! My name is Yana Lyashenko, and I am a Google logistician. Today, we are launching a series of articles on setting up Performance Max. We will examine how to launch campaigns so that they start working immediately, without any unnecessary complications. The first platform on the list is Khoroshop.
What do you need to do before launching an ad on Horoshop?
Before you click the coveted “Start advertising” button, take care of three things:
- Set up Google Analytics. This isn’t just about GA4 — it also includes conversion tracking in Google Ads. We’ll talk about that a little later.
- Register with Merchant Center and upload your product feed there. Without this step, you won’t be able to proceed.
- Create advertising campaigns in Google Ads.
Why do we need analytics at all? There are three reasons:
- First, you will see the results of each campaign. How many clicks, how many purchases, what is the average check—everything is clear as day.
- Secondly, you can calculate the actual return on investment for advertising. For example, you spent $5,000 and received orders worth $25,000 — you already have something to work with.
- Thirdly, analytics collects data on buyer behavior on the website. Google algorithms use this information to find a similar audience. The more data there is, the more accurate the targeting.
Merchant Center performs a different task: your online store is verified as a unique marketplace. Plus, Google Shopping is launched through this service.
Well, Google Ads is an advertising account where you can create and configure campaigns.
Today, let’s start with analytics. I’ll go over the main points without unnecessary details — briefly and to the point. If you have any questions, we’ll address them separately.
Creating a Google Analytics account
So, where do we start? First, create a Google Analytics account. At the same time, open the Khoroshop admin panel—we’ll need it soon.
How do I create an account? It’s very simple. Go to analytics.google.com and sign up with your Gmail address. There are no hidden catches — the process is intuitive.
Creating a resource in Google Analytics
Now let’s go through the process of creating a resource. There’s nothing complicated about it, but there are a couple of things worth paying attention to.
The first step is to fill in your analytics information. Let me show you an example: let’s say I have a website called trafflogist.myshopify.com, and I’m setting it up as a project on Khoroshop.
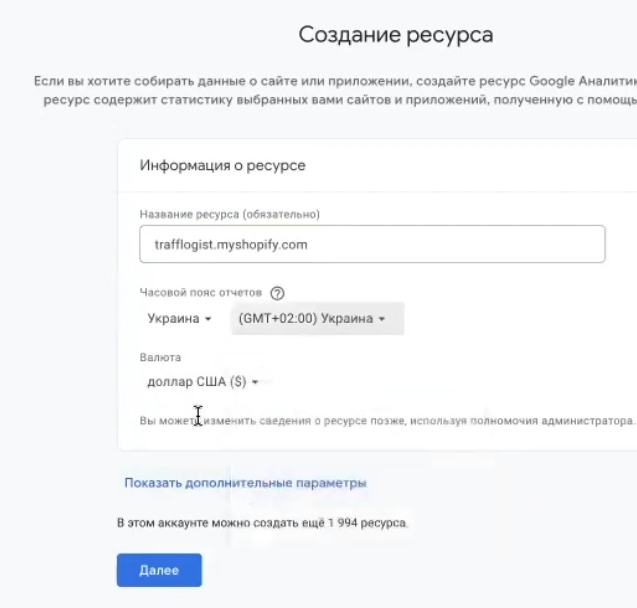
Important tip: always use your domain name in the names of resources, data streams, and other elements. Why is this important? Imagine this situation: you have three online stores. One is called “Prom Make Me Rich,” the second is “My Favorite Little Store,” and the third is simply “Test.” , you’ll have a hard time finding the one you need. But “mypetshop.ua” or “kidstoys.com.ua” immediately make it clear what the project is about. This is especially true for advertising specialists who work with dozens of client accounts.
Next in the settings:
- Select your country (Ukraine or your country)
- Specify the time zone
- Set the currency to hryvnia if you work in the Ukrainian market.
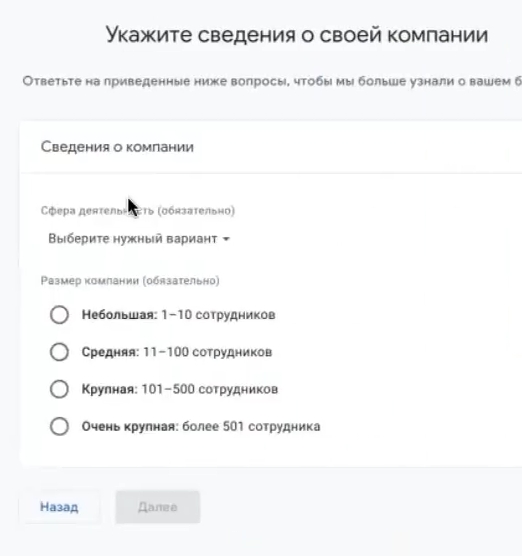
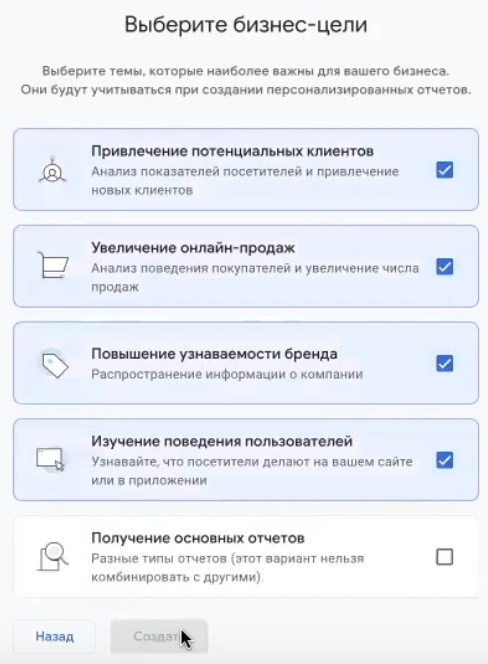
On the next screen, the system will ask about your business. Select “Shopping” and the size of your company — “Small” or “Large.” This information is mainly for Google statistics and does not particularly affect the work of analytics.
The next step is to select the “Web” platform and enter the domain name of the site. In the stream name field, I will write “test-okay” so that it is easy to find later. Click “Create stream.”
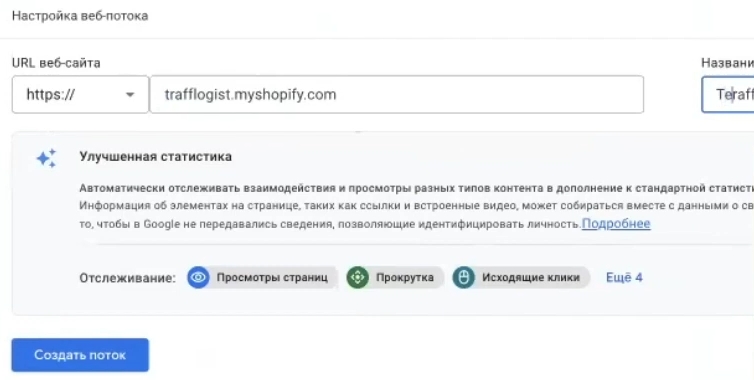
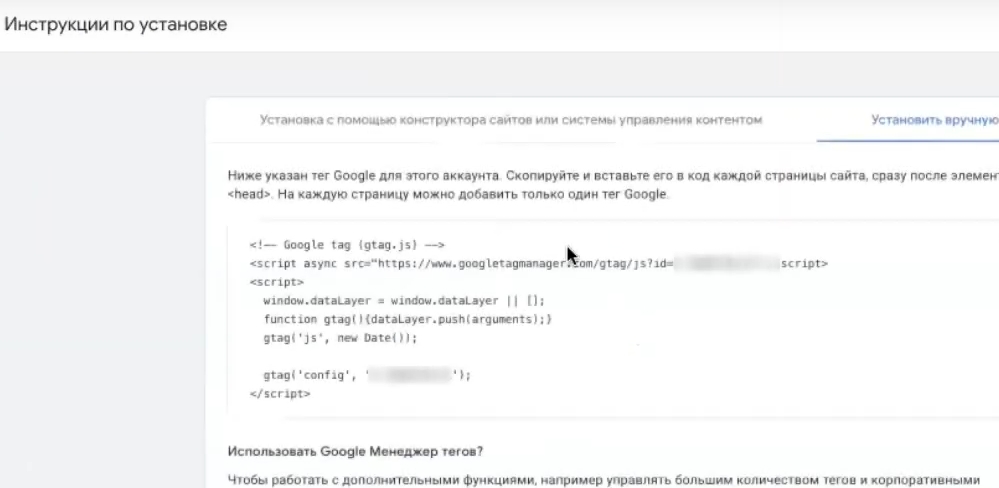
After that, either the installation instructions will appear immediately, or you will need to click on the “Instructions for adding a tag” button — it is located directly in the stream settings.
Inserting analytics code into the website Khoroshop
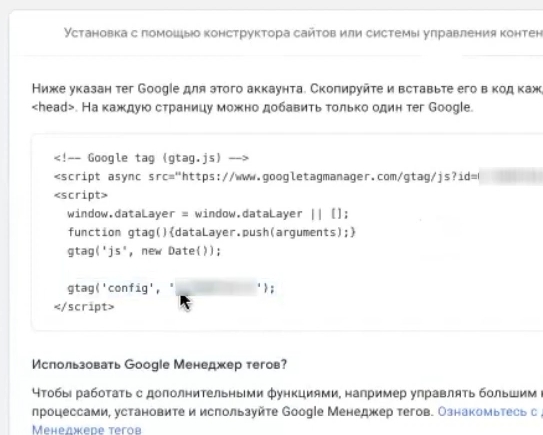
What do we need from these instructions? Essentially, one line of code, or more precisely, its key part—the tracking ID.
I will show you several ways to add code to a website, but first let’s figure out where to do this in the Khoroshop admin panel.
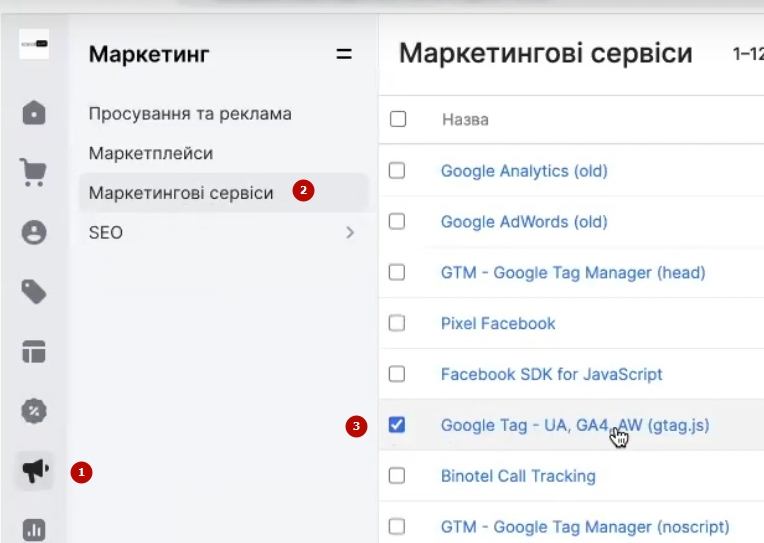
Go to your admin panel and look for the section “Marketing” → “Marketing Services.” There will be a block called Google Tag (also known as UA, GA4, AW (gtag.js)).
What to do next:
- First, you need to insert the tracking ID into the appropriate field. This ID looks like G-XXXXXXXXXX — you can find it in the data stream settings in GA4. Copy and paste it into the field.
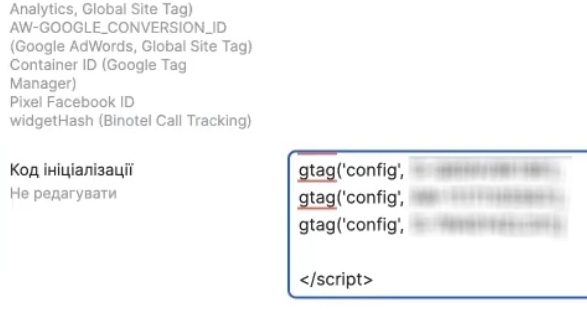
- The second step—and I highly recommend it—is to duplicate the code in the advanced settings. Find the place in the code after the comma, place the cursor there, and press Enter. Now go back to Google Analytics, copy the line with gtag (it starts with gtag(‘config’…), paste it in the right place, and save.
This is the first and mandatory step when setting up analytics on Khoroshop. Without it, data simply will not be transferred to GA4.
Viewing results in analytics
What did we just do? In just a couple of minutes, we installed GA4 on Khoroshop and activated advanced e-commerce at the same time. You have to admit, everything on this platform is implemented quite conveniently.
Now let’s check if everything is working. Go to Google Analytics and look at the “Data Streams” section. Your analytics should look something like this: the list of streams displays the name you specified when creating the resource. If you see your stream, it means that the analytics setup was successful.
Be sure to check that the stream name matches the one you entered during creation. This will help avoid confusion in the future, especially if you have multiple projects.
Where can I find the analytics code to insert?
Sometimes the code gets lost or you accidentally close the window with the instructions. Don’t worry — you can find it at any time.
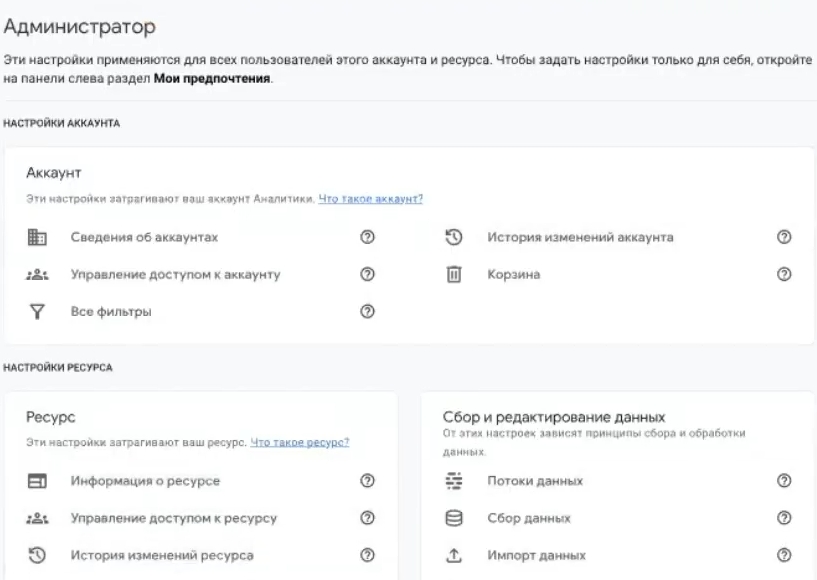
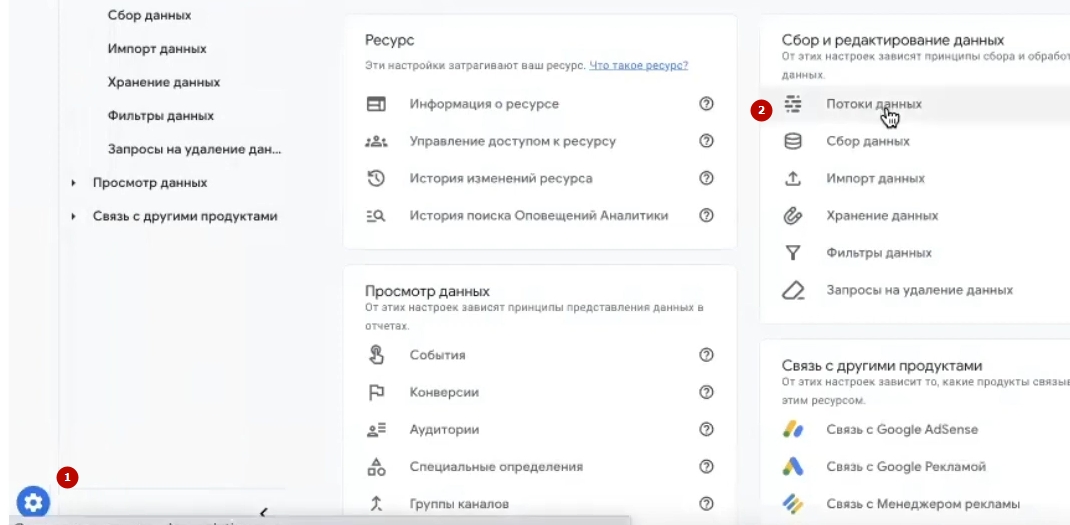
Here’s how to do it: go to “Administrator” (the gear icon at the bottom left) → “Data streams” → select the desired stream → “Tag settings” → “Installation instructions.” There is also a tab with installation instructions for various integrators, such as Shopify and other platforms. Unfortunately, Khoroshop is not yet included in this list directly, but we hope that it will appear in the future.
So, if you suddenly forget your tracking ID — gear icon, data streams, click on the desired stream. All the information is there.
Verification of mandatory event recording
So, we have completed the basic setup. Now we need to make sure that e-commerce events are transmitted correctly and contain all the necessary information. This is a mandatory step — without verification, you cannot be sure that purchase data is actually being sent to analytics.
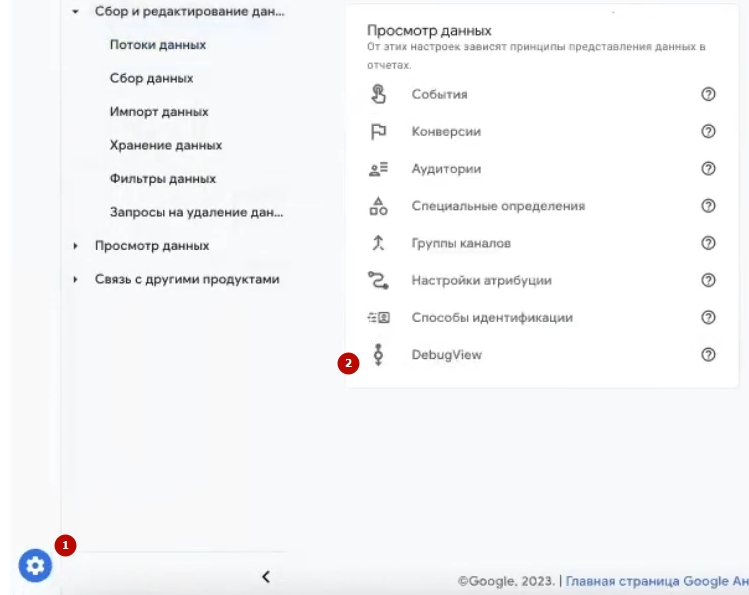
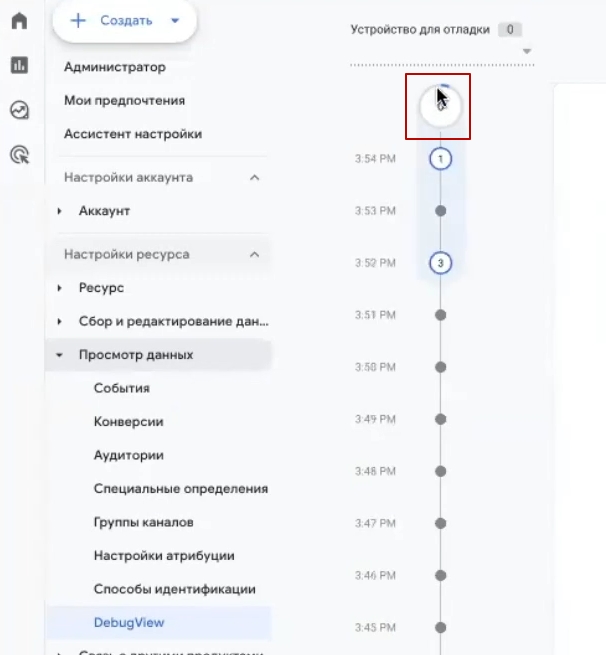
You will need debug mode to check this. Go to “Administrator” → “DebugView”. At the same time, you need to activate one of the debugging tools on the website.
What are the options:
- The Google Analytics Debugger extension is a simple and easy-to-use tool.
- The Tag Assistant Companion extension is a modern replacement for the old Google Tag Assistant Legacy plugin, if you are familiar with it.
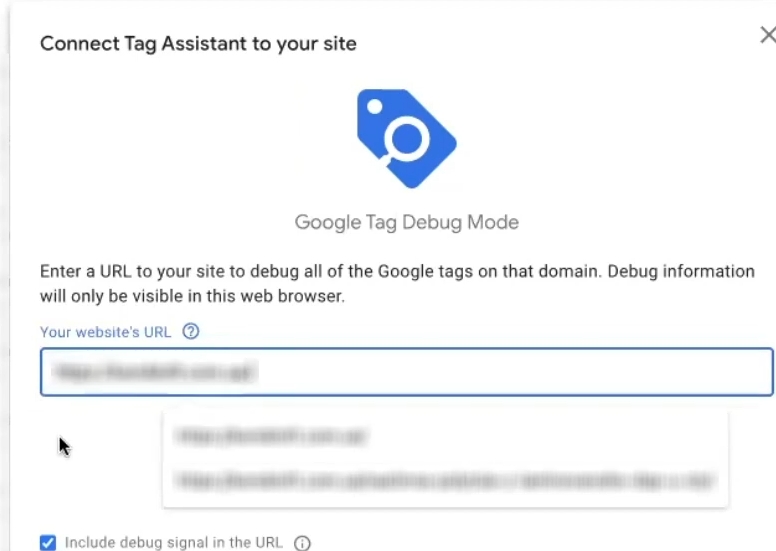
How to run a check: open your website, click on the extension icon, click “Add domain,” copy the domain name, paste it, and click “Connect.” Debug mode is now activated, and events will start appearing in GA4.
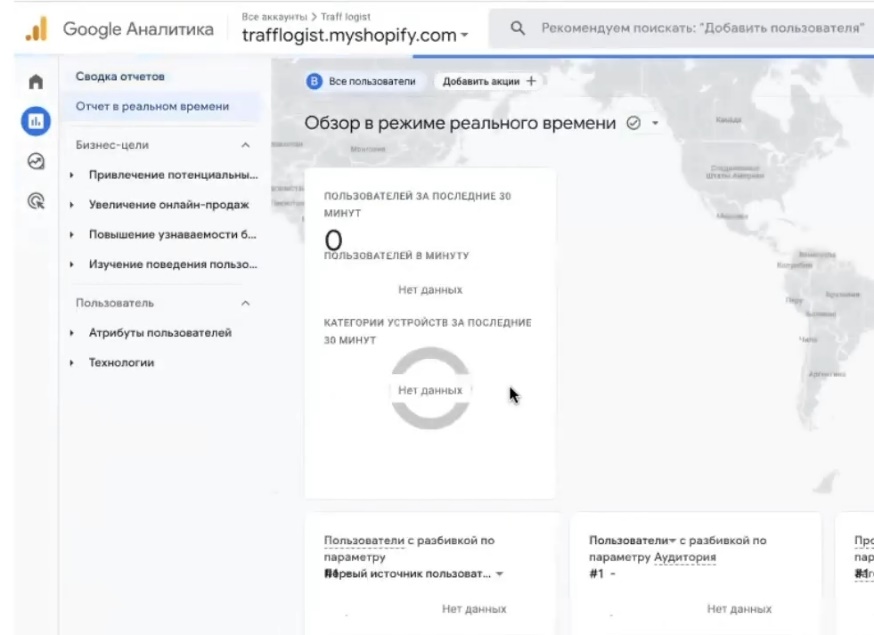
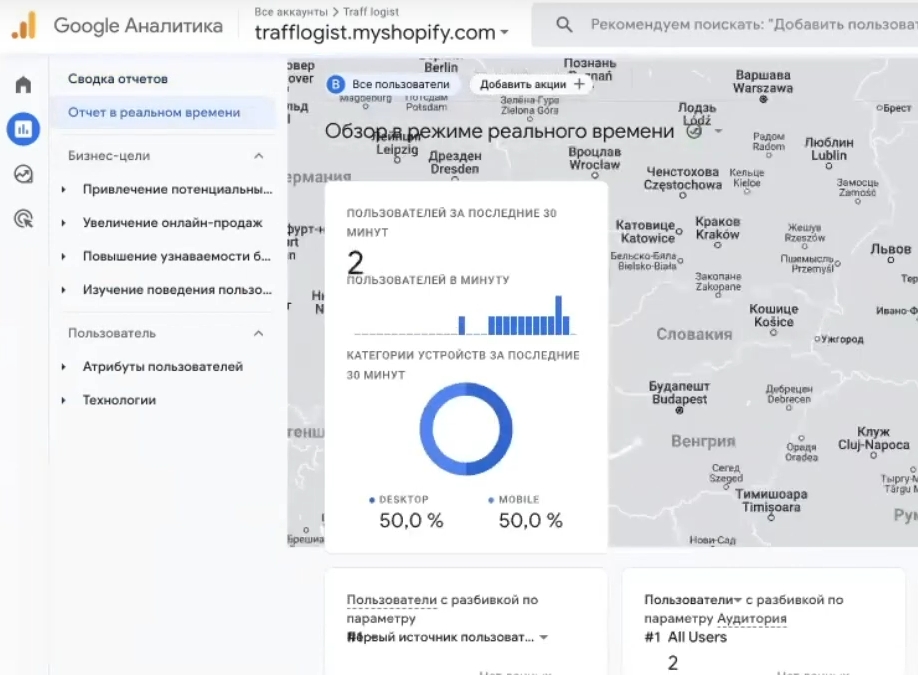
Please note that data may be transmitted with a slight delay — this is normal for fourth analytics, which does not always respond instantly. To make sure everything is working, check the “Real-time report.” If you are on the website, you will see yourself as one active user and a set of events.
Next, your task is to go through the entire buyer journey: open the product page, click “Buy,” go to the shopping cart, and place a test order. The corresponding events should appear sequentially in DebugView. The indicator circle will fill up, and you will see the full picture of what actions are being recorded on the website.
Проверка аналитики через Google Tag Assistant Legacy
There is another way to make sure that GA4 analytics is correctly installed on your website. You can download the Google Tag Assistant Legacy extension. Yes, it is outdated and Google will soon stop supporting it, but it is still great for quick checks.
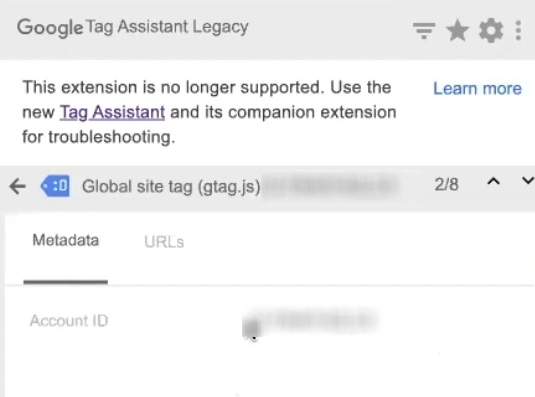
The main advantage of this tool is that you can immediately see which tags are on the page. Found your analytics ID in the list? That means the code is set up correctly. You can verify this by copying the ID from the extension and comparing it with the one specified in the GA4 settings. If they match, everything is fine.
Checking the “View item” event
Now let’s move on to the most interesting part—checking e-commerce events. Start from the main page of the website and select any product. Click on it to go to the product page.
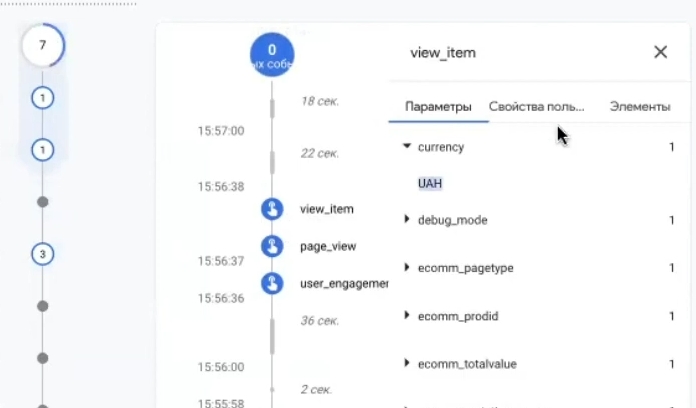
The view_item event must be triggered on this page — it records product views. Please wait a moment while the indicator in DebugView loads completely. The fourth analytics sometimes takes longer than desired.
When the view_item event appears, click on it and check the content. What to look for:
- value — the amount must correspond to the price of the item you opened
- currency — currency (UAH for hryvnia)
- items — an array with product data: name, SKU, category
By the way, prices in events are often displayed in a strange format—for example, 1299.00 instead of the usual “1,299 UAH.” This is normal and should be expected. The main thing is that all the “content” of the event is in place. If something is missing, then the event settings need to be refined.
Checking the “Add to cart” event
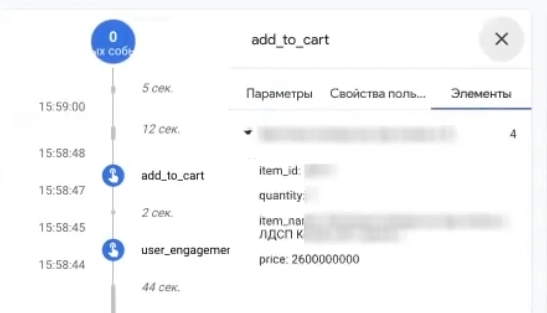
Great, we have view_item. Let’s move on — click the “Buy” button on the product. After that, the add_to_cart event should be sent to analytics.
A small caveat: newly installed GA4 can sometimes be temperamental and display data with a delay. If you set up analytics through Google Tag Manager, events usually come through faster and more consistently. But this is an option for advanced users.
What should you do if add_to_cart does not appear? Do not panic. Try adding another item to your cart. And then another. The event should definitely occur—it’s just that the fourth analytics sometimes takes longer than desired.
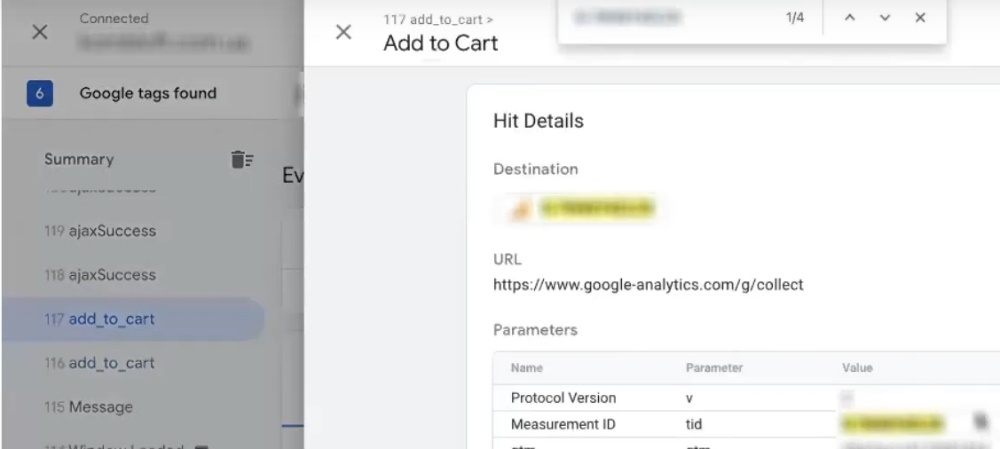
By the way, here’s a life hack for those who get lost in the DebugView interface: open Google Tag Assistant and select your analytics there. This extension immediately shows you which events are being tracked — no complicated codes or confusing graphs. See add_to_cart in the list? That means everything is working, but GA4 hasn’t had time to pull the data yet.
When the event finally appears, we check its contents using the same pattern: value, currency, items — all the “filling” must be in place.
Checking the “Begin checkout” event
The next step is to place a test order. Clear your cart of any unnecessary items, add one item, and click “Place order.”
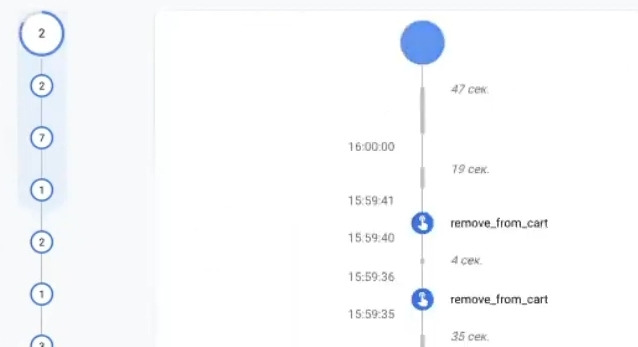
By the way, Khoroshop even transmits information about items being removed from the cart — the remove_from_cart event. This can be used to analyze buyer behavior: how many people add an item and then change their minds?
After clicking on checkout, the begin_checkout event should be triggered — the start of the order process. It may also be delayed, so please be patient.
If you want to make sure that the event has been sent, use Tag Assistant again. Use the search function (Ctrl+F) to enter your analytics ID and check whether the required event is linked to it. This way, you can find add_to_cart, remove_from_cart, and begin_checkout — all of them should contain your GA4 ID.
Verification of the “Purchase” event
The final stage is to check the most important event, which is the whole reason for doing this. You need to complete a test order to make sure that the purchase event is correctly transmitted to analytics.
Fill in all the fields, click “Place order,” and look in DebugView. To be honest, technical issues may arise at this stage—for example, Tag Assistant periodically crashed for me, and I had to start over. The fourth analytics tool sometimes behaves unpredictably, so be prepared for such surprises.
If Tag Assistant is glitching, there is an alternative way to check. Install the Google Analytics Debugger extension, open the developer tools in your browser (right-click → “View code” → “Console” tab) and search for the purchase event there. It’s not the most convenient method, but it works.
The good news is that even if the event doesn’t appear immediately, just wait a little while. Purchases often arrive with a delay, but they will arrive. That’s what happened to me — I had to wait, but in the end everything was displayed correctly.
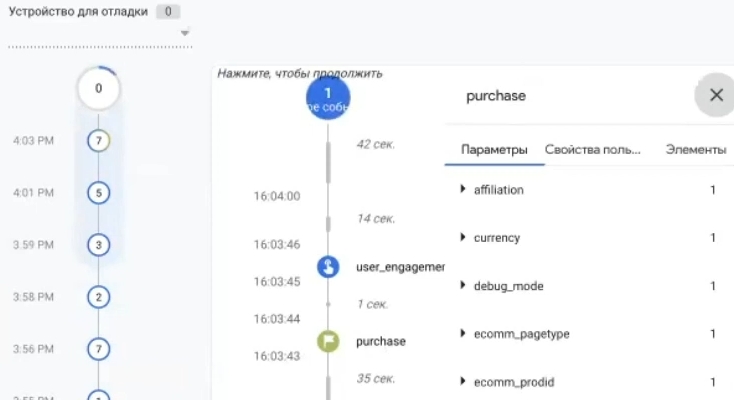
When the purchase event finally appears in DebugView, carefully check its contents:
- value — order amount, must match what you saw on the confirmation page
- transaction_id — unique transaction identifier, must be present
- currency — валюта (UAH)
- items — list of items in the order; if there are several items, all of them must be present
Taxes in Koroshop are not usually transferred as a separate parameter — this is normal, don’t worry. The main thing is that the basic purchase details are filled in. If everything matches up, congratulations, GA4 e-commerce is set up correctly and ready to collect data on real orders.
Real-time event monitoring
Here’s another way to check that works more reliably than extensions. Go to GA4, open “Real-time Report,” and look for the “Event Names” section. Scroll through the list, find “purchase,” and click on it.
All information about the purchase is displayed here. What we check:
- transaction_id — must match the order number on the website. In my case, it was 267 — and that is the number I see in the report.
- currency — currency. By the way, if you have previously worked with Prom and third-party analytics, you may recall that currency was displayed in dollars. There is no such issue on Khoroshop — the hryvnia is displayed correctly.
- value — order amount. I have 2100 UAH, and this exactly matches what was in the cart.
If all the data matches, congratulations, GA4 setup on Khoroshop has been successfully completed. The main purchase conversion is now automatically enabled as the primary conversion and will record all actual orders.
Yes, verification tools sometimes glitch — this is unpleasant, but not critical. The main thing is that the data reaches the analytics and is displayed in the reports. Your task now is to periodically check that events continue to be transmitted correctly. Made a real order? Take a look at the real-time mode and make sure that the purchase is there.
Announcement: How to set up a Google Ads purchase tag
What we have done today gives us a complete picture of user behavior on the website. But this is not enough to launch advertising on Google Ads. The advertising account needs its own conversions, and this will require installing additional codes.
In the next article, we will discuss how to place a Google Ads purchase tag on a website. For online stores on Khoroshop, this is even more important than GA4. The analytics we have set up today are a backup option and a tool for analysis. The Google Ads tag, on the other hand, directly affects the effectiveness of advertising campaigns and algorithm training.


