
Hello, everyone! My name is Yana Lyashenko, and I am a Google logistician. Today, we will figure out how to use Google Tag Manager to install a purchase tag on a website running on the Khoroshop platform. Why is this necessary? A purchase tag is a special type of conversion that transmits order data to your advertising account much more accurately than standard Google Analytics 4.
How do I insert Google Tag Manager on Khoroshop?
First, you will need to create a GTM container and connect it to your website. It’s quite easy to do this on Khoroshop:
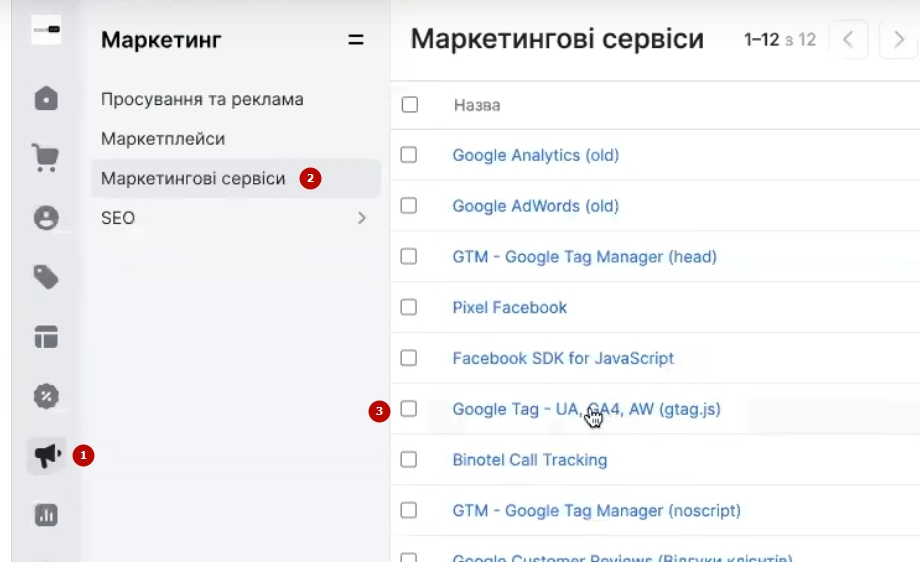
- Go to the admin panel and open the Marketing → Marketing Services section.
- Look for two fields: Google Tag Manager (head) and Google Tag Manager (body). The names indicate which part of the website code each fragment will go to — the <head> tag and the <body> tag, respectively.
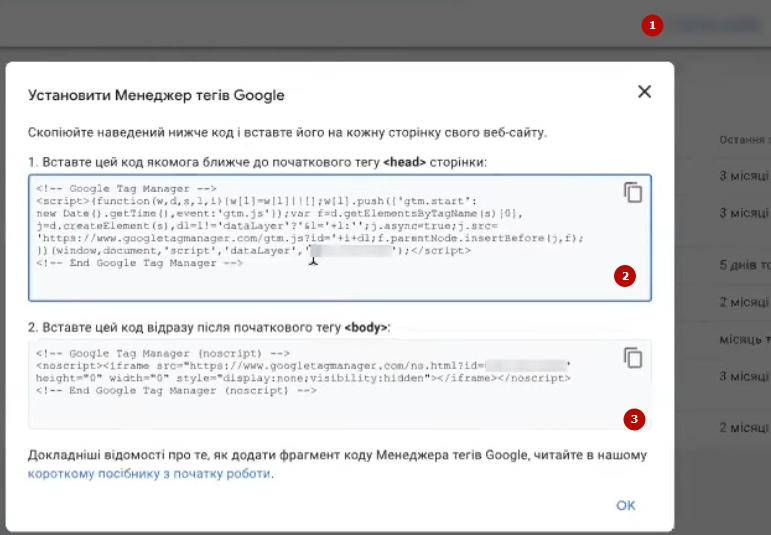
- Now go to your GTM account, click on the container ID (it looks like GTM-XXXXXXX) and copy it.
- Return to the Goodhop settings and paste the copied code first into the head field, then into the body field. The code is the same; just paste it into both blocks.
- Be sure to save your changes after each insertion—otherwise, nothing will work.
After these steps, GTM will be connected to your online store, and you can proceed to configure the purchase tag itself.
Placing a test order
When GTM is connected to the site, go directly to the Google Tag Manager interface and click the “Preview” button. A window will open where you need to paste the link to your site. My advice is to paste the URL of the product card right away, rather than the main page. This will save you time: you won’t have to wander through the catalog to find a product for a test order.
Next, place a test order. Go through the entire customer journey from start to finish: add items to your cart, fill in your contact details, select a delivery and payment method. Don’t skip anything — it’s important that the process is as close to real life as possible. Click “Place order” and wait for the thank you page to appear.
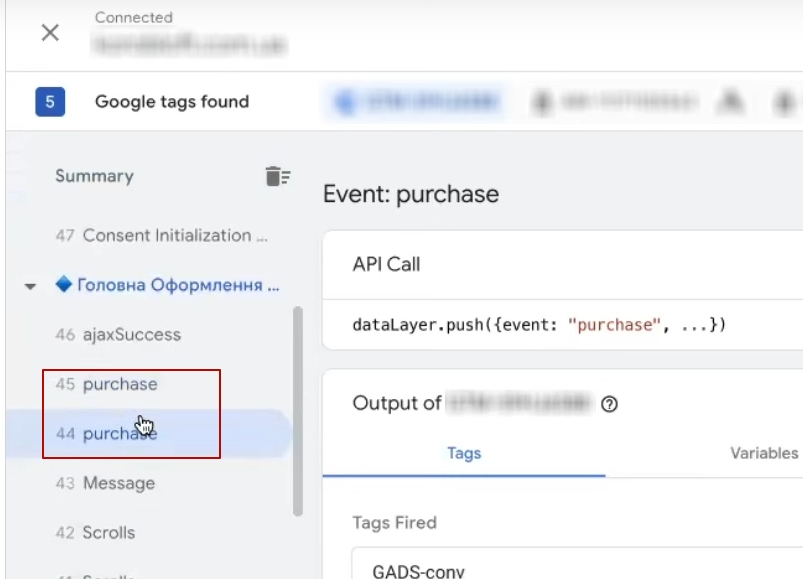
After completing the form, return to the GTM preview window. In the left column, look for the event named Purchase — this is the one that records the purchase. If the event appears in the list, it means that the website is correctly transmitting the transaction data.
Verification of Purchase event data
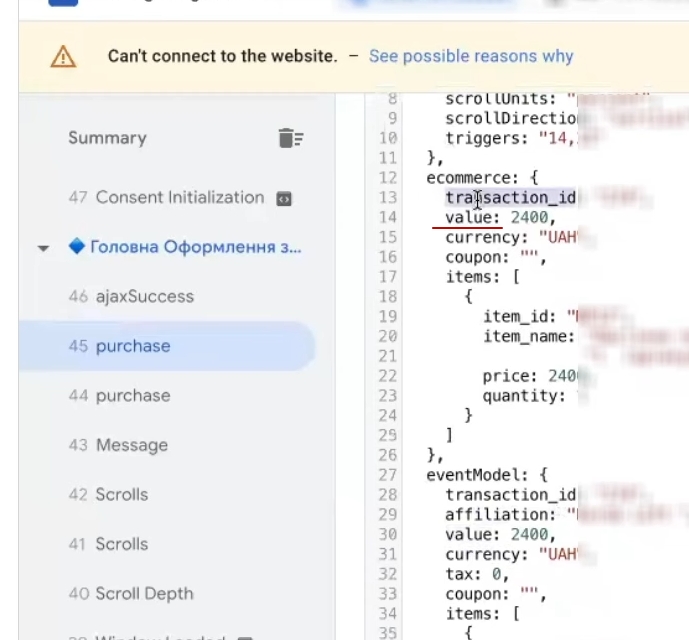
Found the Purchase event? Great, now you need to make sure it contains all the necessary information. Click on this event and go to the Data Layer tab. This is where the array of data that the website sends to GTM with each purchase is stored.

What will you see there? Usually, it is the transaction ID, order amount, currency, list of goods with their prices and quantities. These are the parameters we will use when setting up the purchase tag — they will allow us to transfer accurate information about each conversion to the advertising account.
Creating a “Purchase” conversion in Google Ads
Let’s move on to the settings in the advertising account. Open Google Ads in a separate browser tab, go to “Tools and settings” → “Conversions.”
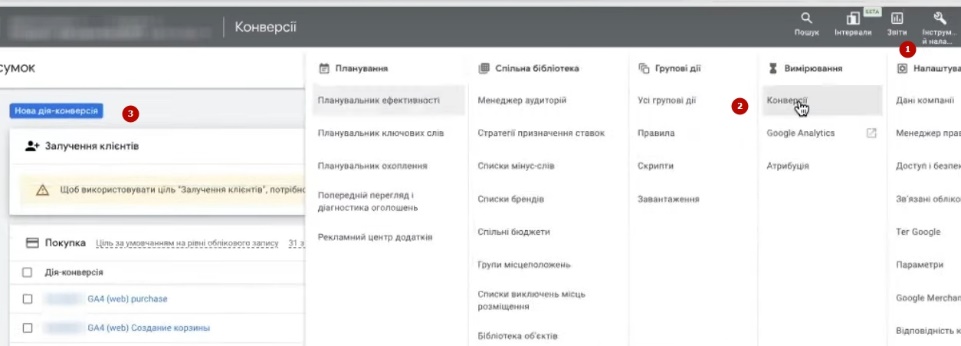
Click “New action-conversion” and select “Website” as the type. The system will ask you to enter your store’s domain — paste it in and click “Scan.” Google will offer automatically generated conversions, but they only track visits to certain pages. This is not suitable for us — we need a conversion that triggers based on an event, not a URL.
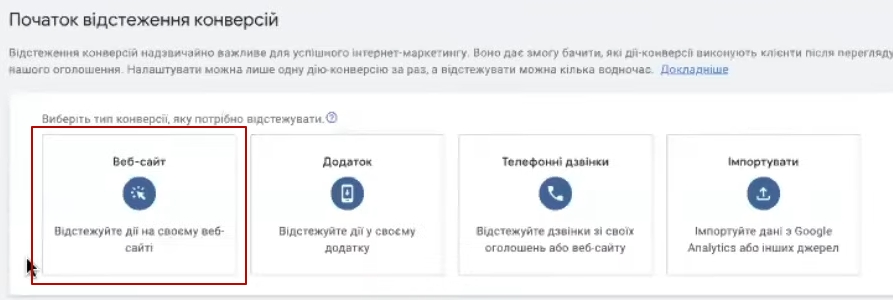
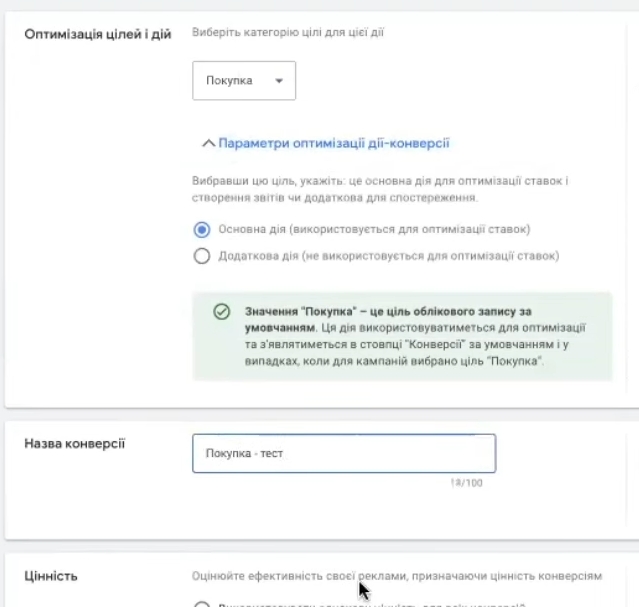
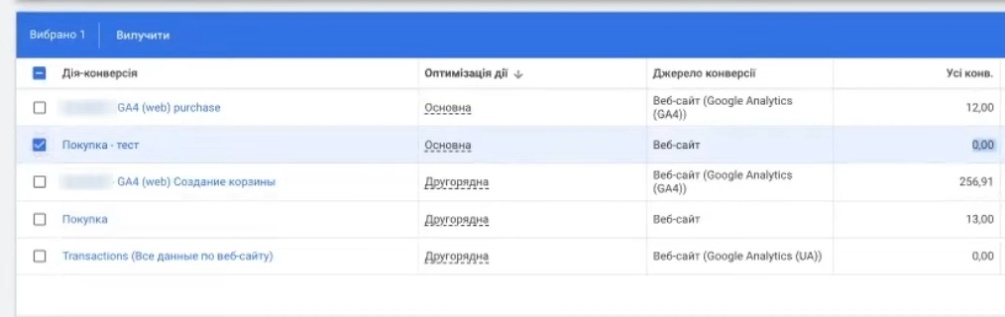
Select the “Purchase” category and specify the following parameters:
- Optimization — “Main action” (required)
- Name — for example, “Purchase” or “Purchase” (for testing purposes, I call it “Purchase — test” so as not to confuse it with existing ones)
- Value — select “Use a specific value for each conversion” (this way, the actual amount of each order will be transferred to your account)
- Accounting — “One”
- Attribution model — I recommend “Last Click” at the start, until you reach at least 200 conversions per month.
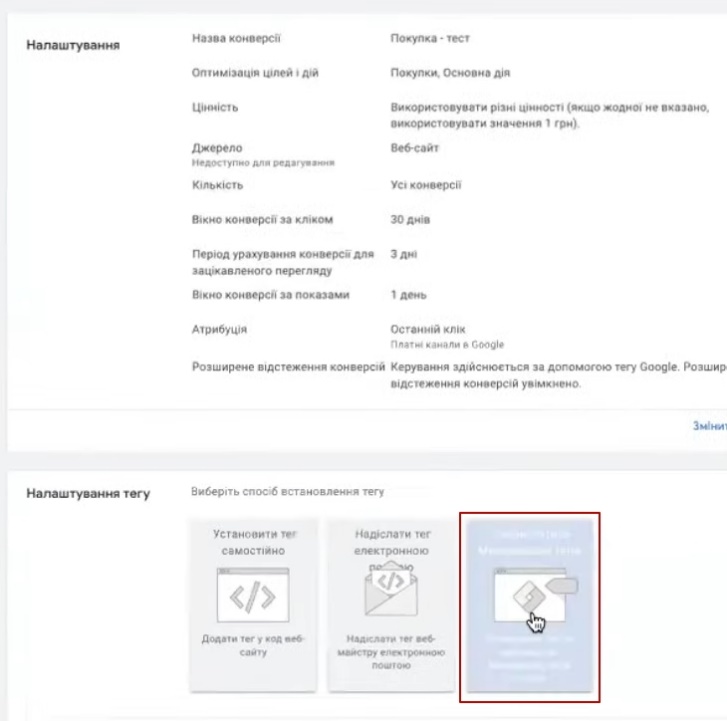
Save your settings. Now find the conversion you created in the list, open it, and expand the “Tag Settings” block. Here you will see two parameters that you will need later: the conversion ID and the conversion label.
Creating a conversion tag in Google Tag Manager
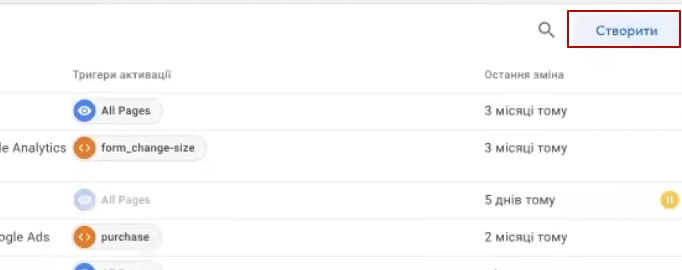
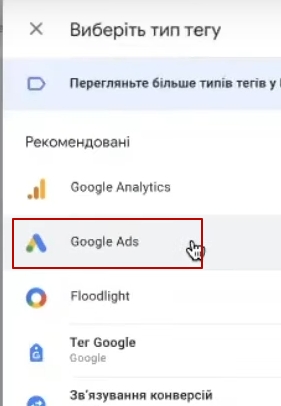
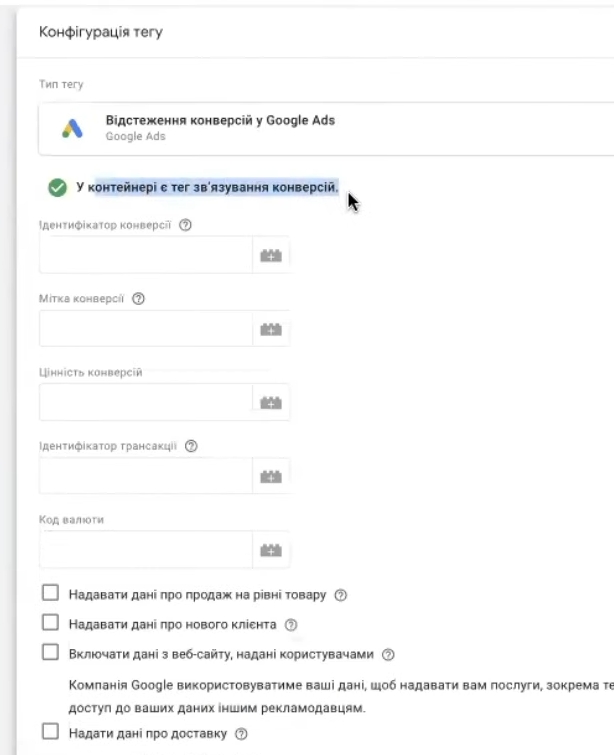
Return to GTM. Click “Create Tag” → “Configuration” and select the “Google Ads Conversion Tracking” type. If the system prompts you to create a conversion linking tag, agree and follow all the steps.
Now fill in the required fields:
- Conversion ID — copy from Google Ads and paste here
- Conversion tag — copy and paste in the same way
Next, we need to transfer dynamic data: order value, transaction ID, and currency. To do this, we create variables.
Conversion value:
- Click the plus sign in the “Conversion Value” field.
- Select “Data Level Variable”
- Return to the preview window, find the Purchase event, and see where the value is located.
- On Khoroshop, the path usually looks like this: ecommerce.value
- Enter this value, give the variable a meaningful name (for example, “ecommerce.value”) and save it.
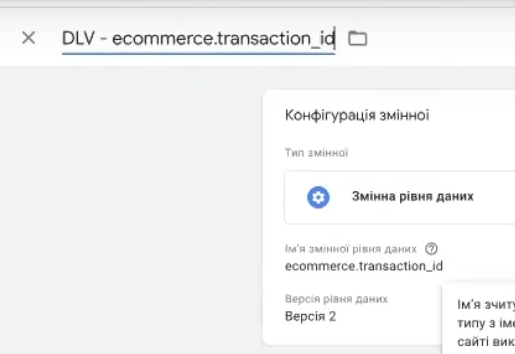
Transaction ID (transaction_id):
- Plus sign again → “Data level variable”
- Путь: ecommerce.transaction_id
- Save with the appropriate name
Currency code:
- Similarly, create a variable with the path ecommerce.currency
- This is convenient if you have a multi-currency store — you don’t have to set the currency manually.
Important note: when specifying the path to a variable, be sure to place a period between data levels. For example, ecommerce.value, not ecommerce value — without the period, nothing will work.
Configuring data transfer at the product level
If desired, you can send detailed information to Google Ads—not only the total order amount, but also data on each purchased item separately. This is an optional step, but it helps algorithms better understand which products are driving conversions.
To configure, select “Special Fields” and fill in:
- The merchant ID is your Merchant Center account ID. It’s easy to find: open Merchant Center and look in the upper right corner—there will be a set of numbers there. Copy and paste it.
- Country code — enter the two-letter code for the territory. For Ukraine, it is ua. For other countries, you can find the code in Google’s official documentation (just open the list and use the Ctrl+F search function).
- The feed language is the language in which your product feed is filled out. If it is Ukrainian, write uk; if it is Russian, write ru. Unfortunately, it is not possible to dynamically pull this parameter from the Data Layer, so we set it manually.
- Items — this is where the array of items from the order is transferred. Path to the variable: ecommerce.items
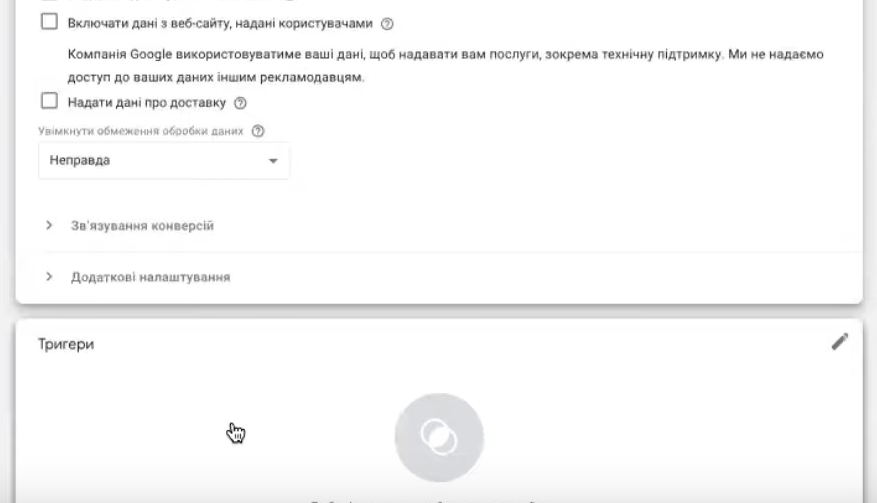
Setting up triggers
The tag is ready, but it won’t work without a trigger. You need to specify to GTM which event should activate this tag.
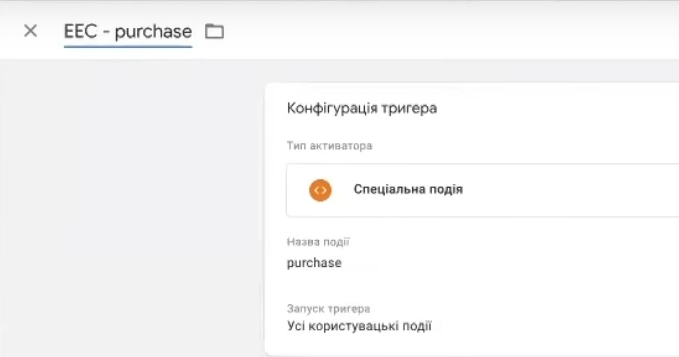
Click on the “Triggers” block → plus sign → “Trigger Configuration.” Scroll down and select “Special Event.” In the “Event Name” field, enter purchase — exactly as it is named in the Data Layer (we saw this in the preview: event: “purchase”).
Name the trigger clearly, for example, “EEC – purchase,” and save it. Then save the tag itself.
Functionality check
Now you need to make sure that everything is working correctly. Click “Preview” in GTM again and place another test order.
After completing the setup, the following should appear in the debug window: under the Purchase event, you will see your conversion tag (it will be marked as triggered). Click on it and switch to the Values tab. Verify that all the necessary parameters are being transmitted:
- transaction_id — unique order number
- value — purchase amount
- currency — currency code
- conversion ID and label (the ones you copied from Google Ads)
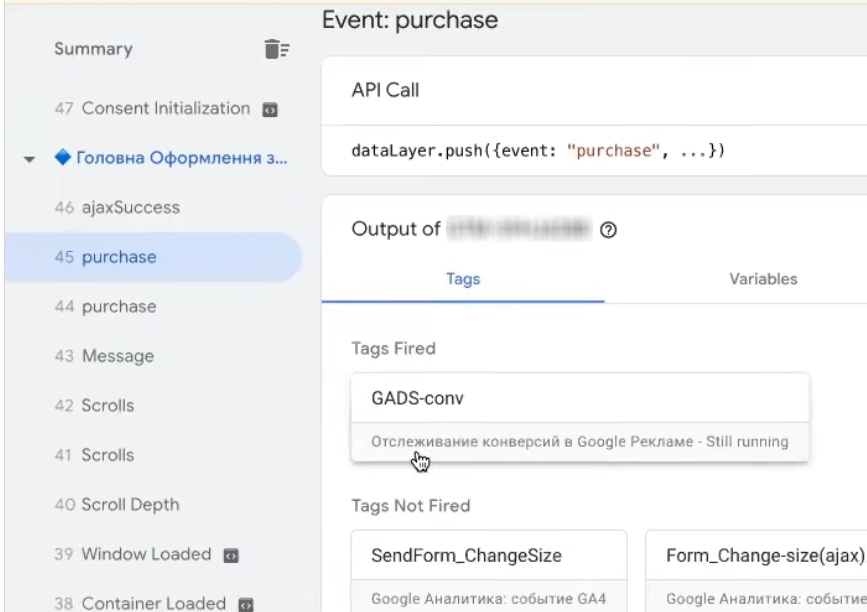
If you have configured the transfer of goods, the list should also include items. But even if they are not there, it is not critical, as the main data for ad optimization is already being transferred.
Can you see this picture? Great! All that’s left to do is click the “Send” button in Google Tag Manager to publish the changes to the live site.
Configuring data transfer at the product level
Want to send not only the total order amount to the advertising account, but also detailed information on each item? This is entirely possible. To do this, there are two options in the tag settings: “Data Level” or “Special Fields.” I recommend trying the data level first—this is often sufficient.
If you select “Special fields,” you will need to fill in several parameters:
- The merchant ID is your Merchant Center account number. Where can you find it? Go to Merchant Center and look in the upper right corner of the screen—there you will see a numeric ID. Copy and paste it into the appropriate field.
- Country feed — two-letter country code. For Ukraine, it is ua. If you are working with another country and do not remember the code, open the Google territory code reference, press Ctrl+F, and find the country you need.
- Feed language is the language in which your product feed is written. Ukrainian is uk, Russian is ru. Unfortunately, this parameter is not dynamically updated, so we have to enter it manually.
- Items — an array of products from the order. Path for the variable: ecommerce.items
Setting up dynamic remarketing on Khoroshop
Conversions have been set up, but that’s not all. For advertising campaigns to work effectively, dynamic remarketing is needed—it allows you to show users exactly the products they viewed on your website.
Let’s go back to the admin panel: “Marketing” → “Marketing Services.” Find the Google Tag block — this is where we will add the remarketing code.
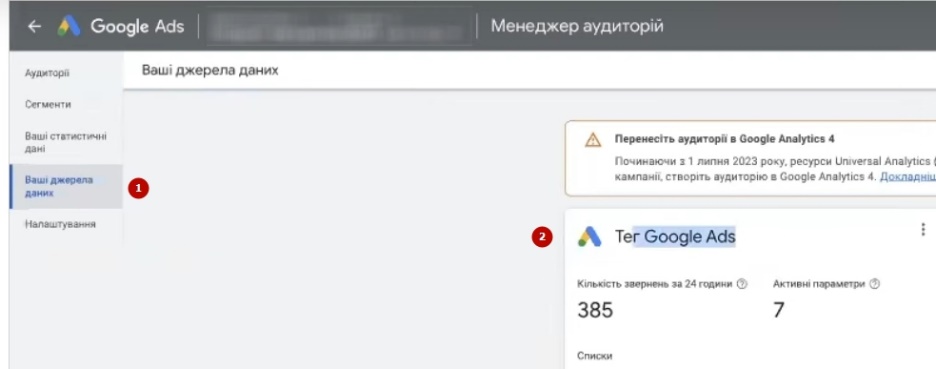
Now open Google Ads and go to Tools and Settings → Audience Manager → Your Sources. Find the Google Ads Tag block. It may already be active or in setup mode, depending on whether you have worked with it before.
If you are configuring from scratch, select the following parameters:
- “Collect data on specific actions”
- Business type — “Retail trade”
- Click “Save and Continue.”

Next, the system will offer installation options. We need the “Install tag manually” option. Look for the line that starts with gtag(‘config’… — this is the code fragment we need. Copy it in its entirety, without changing anything.
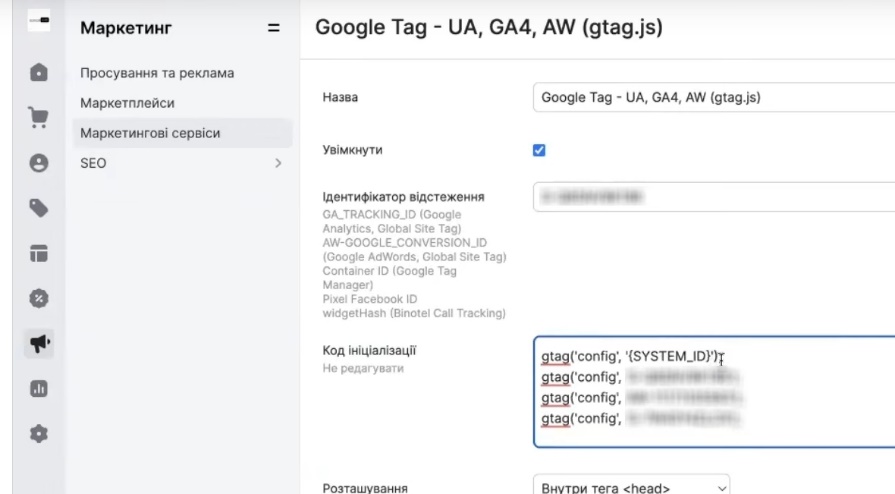
Return to the Khoroshop admin panel and scroll down to the field with codes. If there is already something there, add a space after the last line and paste the copied code. Check that everything looks correct and save your changes.
Conclusion
After these steps, dynamic remarketing in the basic version will start working. Yes, there is a more advanced configuration via Google Tag Manager, but what we have done is more than enough to get started.
So, what do we have in the end? A fully configured conversion tracking in Google Ads — now the advertising account will receive accurate data about each purchase. Plus, remarketing that works, which will help bring visitors back to the site.
This is the basic foundation for launching Performance Max and other smart campaigns. Without accurate analytics, Google’s algorithms simply cannot optimize properly — they will be working blind. With correctly configured events, machine learning receives all the signals it needs to work effectively.
We discussed setting up Google Analytics 4 in a separate article — if you missed it, be sure to check it out. In the meantime, good luck with your advertising on Khoroshop!


