
Imagine this scenario: a customer visits your online store on Khoroshop, browses a few items, maybe even adds something to their cart—and then leaves. Without making a purchase. Sound familiar? According to statistics, about 70% of shopping carts are abandoned. And that’s where dynamic remarketing comes in.
Unlike traditional remarketing, which simply reminds users of your brand with a generic banner, dynamic remarketing targets users precisely. It automatically generates ads featuring specific products that the user has already viewed. Did they look at a particular model of sneakers? Those very sneakers will “follow” the visitor across other websites and apps.
How does this work in practice? The service retrieves information from your product feed—a file that contains product data. It then matches this information with a specific user’s actions on the website. The result is a personalized ad that is shown exactly to the right person.
For store owners using Horoshop CMS, setting up dynamic remarketing is even easier than for others. The platform’s developers have made sure the setup process is as simple as possible—the system already includes built-in codes for standard events, and generating a feed in the admin panel takes just a few minutes. But let’s take it one step at a time.
How do I prepare to launch dynamic remarketing on Khoroshop?
Before we move on to setting up dynamic remarketing for Horoshop, let’s make sure all the necessary requirements are met.
Here’s what you’ll need:
- An active Google Ads account with access to the dashboard. If you don’t have an account yet, sign up in advance, as verification may take some time.
- A Merchant Center account (if you plan to use a product feed through it). This is the standard procedure for online retail stores.
- Access the admin panel of your online store on Khoroshop—specifically the “Marketing” → “Marketing Services” section.
- Product listings filled out correctly—with descriptions, prices in hryvnia, photos, and stock availability. The more complete the information, the more appealing the listings will look.
Important! Make sure you have online payment and address-based delivery enabled. Without these, you risk having your feed blocked by Google, and the launch will be delayed indefinitely.
By the way, if you’ve already set up Google Analytics using gtag.js, part of the work is already done—all that’s left is to add the ID as an additional product. But more on that below.
Where can I find the conversion tracking ID in Google Ads?
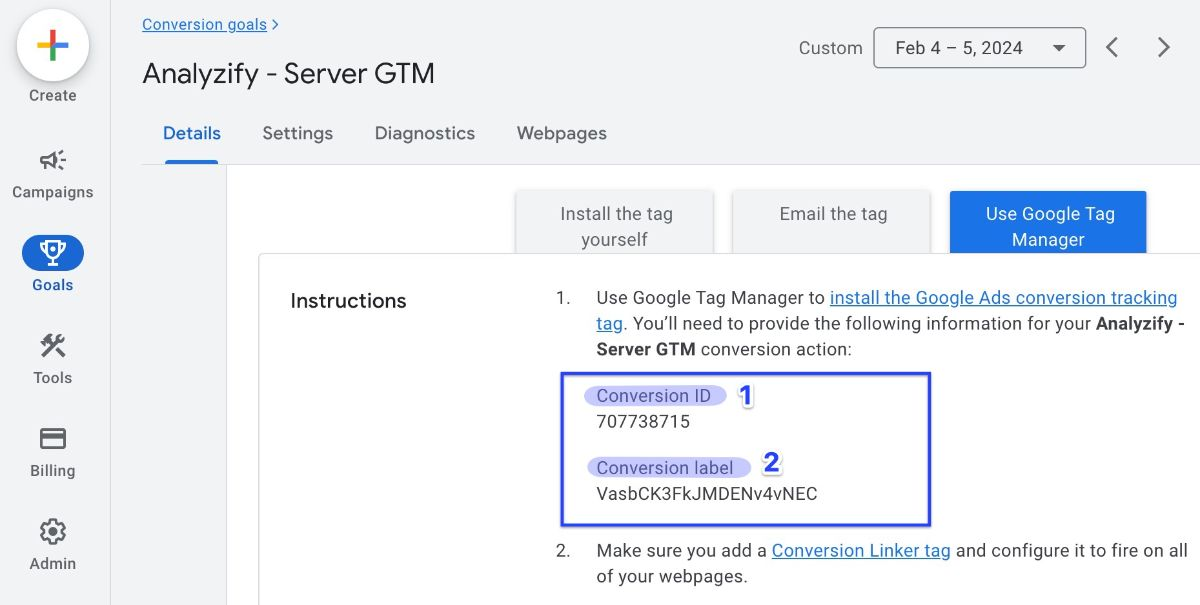
After completing the setup, the first step is to obtain the AW-GOOGLE_CONVERSION_ID, because nothing will work without it. This identifier links your online store to your account. It allows the platform to collect data on visitor behavior.
Here’s how to find it:
- Sign in to your Google Ads account.
- In the left-hand menu, locate “Tools.”
- Go to the “General Library.”
- Go to “Audience Manager.”
- Next: “Your data sources.”
- On the “Google Ads Tag” tab, click “Configure Tag.” If it has already been configured, click the three dots and select “Edit Source.”
- Now select “Install manually.”
- In the window that opens, look for AW-GOOGLE_CONVERSION_ID—that is your ID.
Copy it. You’ll need it in just a minute, when we move on to the settings in the online store’s admin panel.
Let’s say you’ve opened “Audience Manager” and see that there are no sources yet. Don’t panic—just click “Add Source.” The service will prompt you to enter a previously created tag, and it will collect data to build lists that will later be used when creating campaigns.
How do I set up the dynamic remarketing tag on Horoshop using Global Site Tag?
Now let’s move on to the platform itself. Setting up the dynamic remarketing tag on Horoshop is a process that takes just a couple of minutes.
A typical scenario (applicable in most cases)
In the online store’s admin panel, go to “Marketing Systems” → “Services.” Find the “Google Tag — UA, GA4, AW (gtag.js)” option and click on it.
The rest is easy:
- Enter the conversion ID in the appropriate field;
- Select “Enable” to activate the Global Site Tag;
- Click “Save.”
That’s it. Seriously, that’s all there is to it. Once you activate gtag.js in your online store, the built-in event codes that the Horoshop developers have integrated into the platform will start working. They automatically track key visitor actions: page views, adding items to the cart, placing orders, and requesting a callback.
If Google Analytics is already set up via gtag
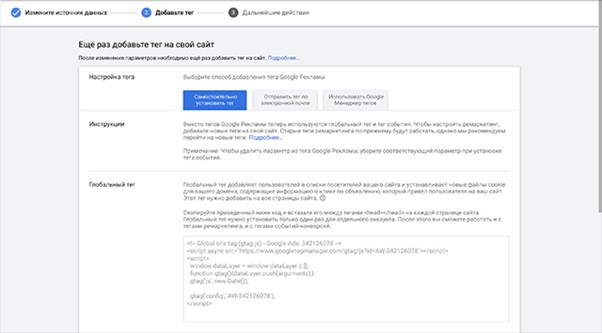
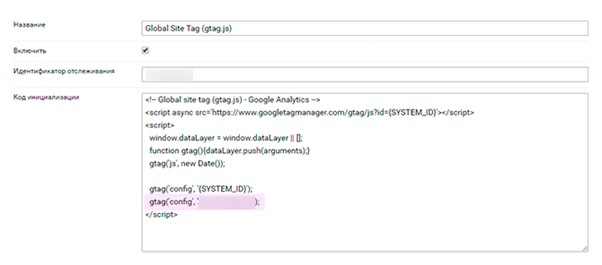
But there’s a detail here that many people overlook. If you’ve previously set up Google Analytics using the Global Site Tag, you’ll need to add the ID as an additional product in “Tracking Code.”
Important! You should only change the “Tracking Code” value in this specific situation. In all other cases, you should not modify it.
Essentially, you add a line containing `AW-GOOGLE_CONVERSION_ID` to the initialization code so that data is sent simultaneously to both Analytics and your advertising account. This allows you to connect multiple identifiers at the same time if you run ads through different accounts.
Installing the dynamic remarketing code on Khoroshop via GTM
If you need more flexibility—for example, if you work with a large number of marketing platforms or want to set up custom events—it makes sense to use Tag Manager (also known as GTM). Goodop supports this tool right out of the box.
To connect GTM:
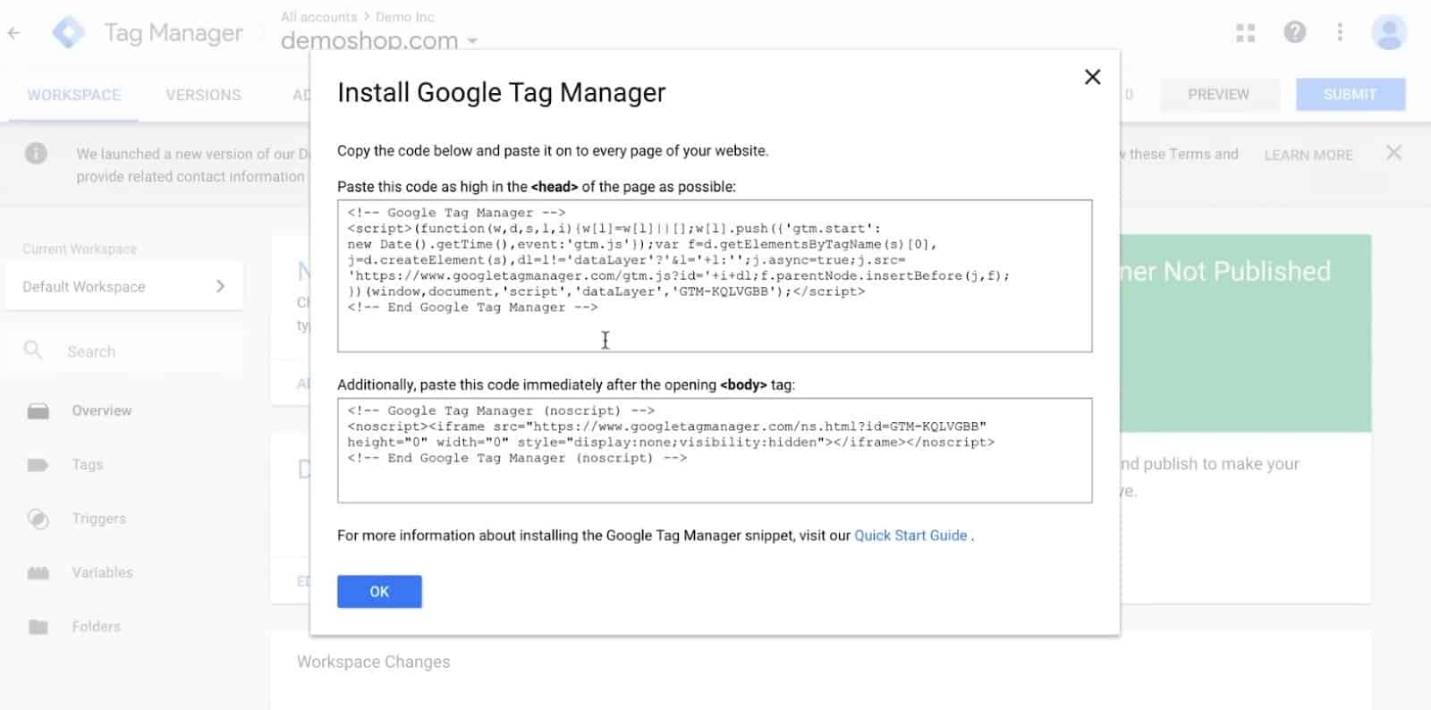
- Create a container in your Tag Manager account and copy its ID (in the format GTM-XXXXXXX);
- In the online store’s admin panel, go to Marketing → Marketing Services;
- Find the two fields: GTM (head) and GTM (body);
- Paste the copied container ID into both fields;
- Check the “Activate” box;
- Save it.
After that, you can configure the tag and triggers within GTM itself to track most events. By the way, the developers at Khoroshop recommend GTM specifically if you plan to scale your advertising. It offers more features than gtag.js and allows you to integrate not only Google products but also third-party services.
However, for basic setup of dynamic remarketing for an online store on Khoroshop—without complex custom events or pixels—the standard method of integration via the Global Site Tag is more than sufficient. So, if you’re new to this, don’t overcomplicate things.
Setting up a product feed for dynamic remarketing on Horoshop CMS
Without a feed, remarketing doesn’t work. Period. This is the file Google uses to retrieve information about your listings: titles, descriptions, prices, photos, and availability.
How do I generate a feed in the Khoroshop admin panel?
The good news is that you can create a feed on Horoshop CMS without needing a programmer. To do this:
- Go to the online store’s admin panel → Marketing → Marketplaces;
- Enable the feed for Merchant Center;
- As a result, fields for the feed will appear on the product page;
- Make sure the categories in your catalog match Google’s classification (this is a required attribute: `google_product_category`);
- Make sure you have filled in the title, description, price, availability, condition, photo, ID, and GTIN or MPN (if applicable);
- Click “Save” and wait for the generation to complete.
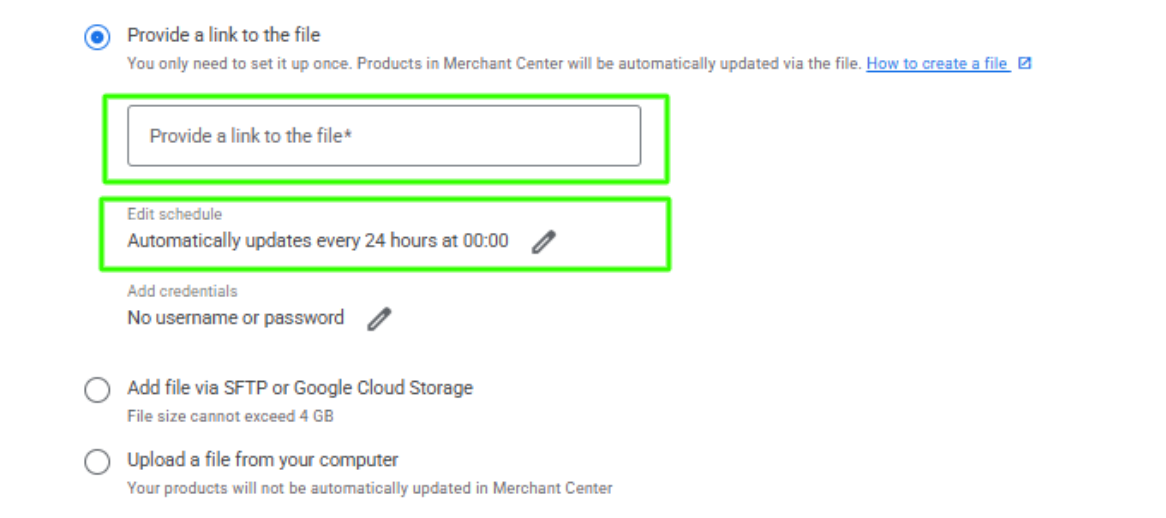
After that, you will receive a link to the XML file—you will need to specify this link in Google Merchant Center as the source.
For bulk setup (when you have hundreds of products in your store), it’s easier to use the import feature. Prepare a CSV or Excel file with a field labeled “Upload to marketplaces” and the value “Google Feed for Merchant Center.” Upload it via the import feature, and all your products will be added to the feed.
What should you keep in mind when working with a feed?
Here are a few practical tips to save you time:
- Products marked with the “Do not display in the storefront” attribute will not appear in the feed—check this setting if a product has “disappeared.”
- If the description is too long, you can use the “Marketplace Description” field in the Khoroshop admin panel to provide a shorter version of the text.
- Categories not included in the settings will not be exported, even if the individual product items are checked for export.
- Update your feed regularly, especially if prices or availability change frequently. In Merchant Center, you can set up automatic updates on a schedule.
Important! The IDs in the feed and on the website must match. If they don’t match, the system won’t be able to match the information, and remarketing simply won’t work.
Setting up a dynamic remarketing campaign for Khoroshop
So, the tag is installed and the feed is uploaded. Now you need to link Google Ads and Merchant Center so that the data from the feed is imported into your advertising account. After that, you can finally launch your campaign.
How do I link Merchant Center to Google Ads?
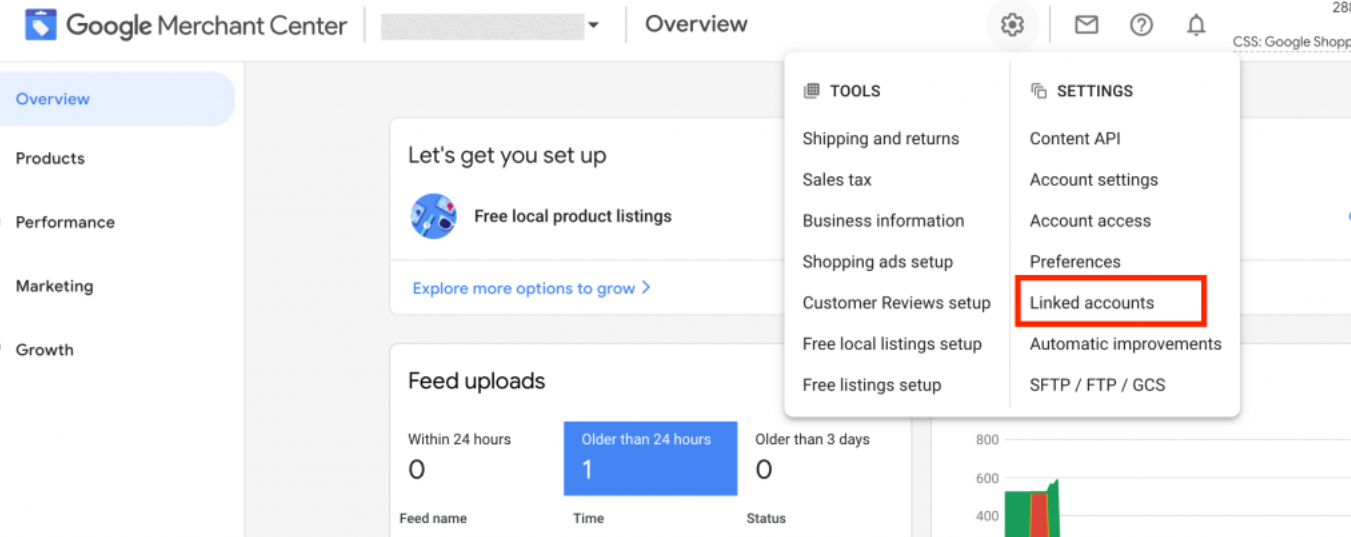
Open the platform and go to “Settings” → “Linked Accounts”;
- Submit a request to link your Google Ads account;
- Go to your advertiser dashboard and confirm the request.
That’s basically it. Once confirmed, your feed will be available in Google Ads, and you’ll be able to use it when creating campaigns.
Tip! Horoshop customers can add a product listing feed directly to Google Ads via the “Commercial Data” → “Feeds” section. This is an alternative method that can sometimes be more convenient.
How do I launch an advertising campaign?
Let’s look at two main options: a classic campaign on the Display Network and Performance Max.
Remarketing Campaign in KMS
This is the “classic” format. Ads are displayed on Google’s partner websites, in apps, and on YouTube.
To create:
- In Google Ads, click “Create a campaign”;
- Select a goal—for example, “Sales” or “Leads”;
- Type — KMS;
- Specify the source: if the information is imported via Merchant Center, select the associated account;
- Set up a strategy—in our case, automated strategies like “Target Return on Investment” or “Maximize Conversion Value” work well;
- Go to the Audience section and select the desired lists—for example, “All Visitors,” “Product Viewers,” “Abandoned Cart Users”;
- Create responsive dynamic ads—Google will automatically pull products from your feed and generate ad creatives.
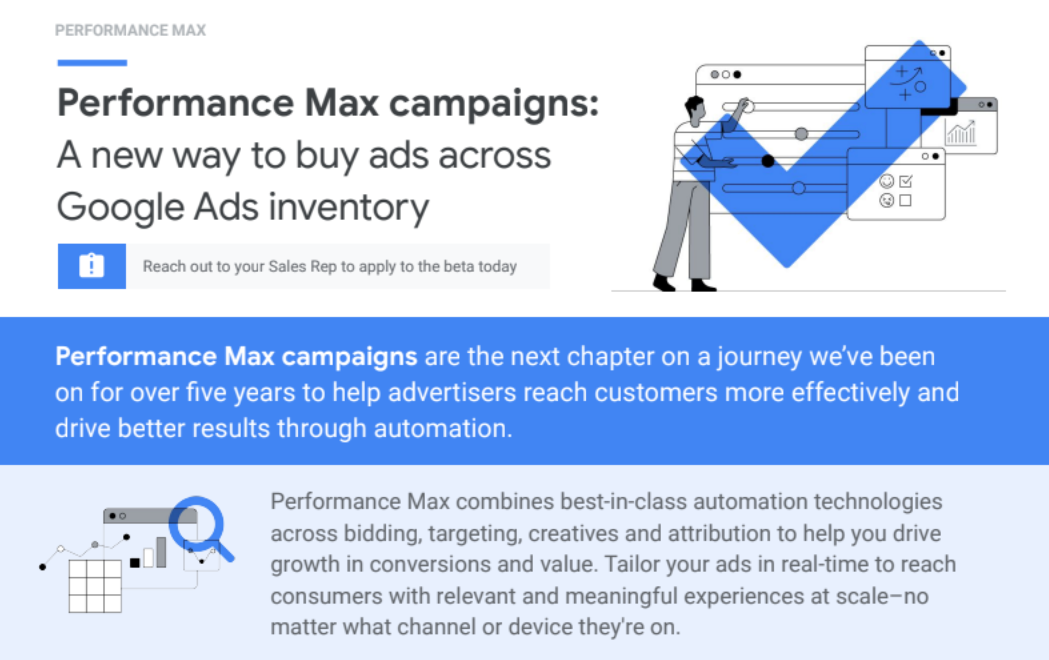
Performance Max
A campaign designed for maximum effectiveness that displays ads across all channels at once: Search, Display, YouTube, Gmail, Discover, and Maps. It also uses product feeds and lists, but allocates the budget automatically.
With Performance Max, there’s no need to set up targeting separately—the system automatically determines who to show the ad to and when. But if you want to “guide” the algorithms, you can add audience signals by including your lists.
Let’s say you’ve just launched an online store and are currently seeing low traffic—say, 50 to 100 visitors a day. In that case, Performance Max may prove more effective than classic PPC advertising because it covers more platforms and gathers data faster for subsequent optimization.
Who should be added to the remarketing lists for Horoshop?
The effectiveness of a remarketing campaign depends directly on how effectively you segment your audience. Showing the same ad copy to someone who simply visited the homepage and to someone who placed an order for 5,000 UAH but didn’t pay isn’t the best idea.
Here are a few segments that typically perform best:
- They viewed the product page but didn’t add it to their cart (in the last 7–14 days). These people are interested in the product, but something was missing—perhaps a discount or an additional selling point.
- Added to cart but not purchased (in the last 7 days). This is the “hottest” segment. Be sure to follow up with these customers first.
- Customers (last 30–90 days). You can offer them related products and new arrivals.
- All visitors (last 30 days). Wide reach, but lower conversion rates.
To set up targeting, go to your ad group settings and select the relevant segments. Google offers two modes: automatic (the system makes the decisions) and manual (you select specific audience lists). You can start by trying the first one—and then, once you’ve gathered more data, switch to manual mode for more precise targeting.
How can I verify that dynamic remarketing on Khoroshop is set up correctly?
Once you’ve completed all the steps, make sure the mechanism is actually running and working properly.
To do this, you can use:
- Tag Assistant. Install the Chrome extension and visit your website. It will show you which tags are firing on each page. Make sure the remarketing tag is active and sending the correct data (including product IDs).
- “Audience” Report. Check the “Audience Manager” 24–48 hours after installing the tag—users should start appearing there. If the list is empty, something went wrong.
- Diagnostics in Merchant Center. Open the “Products” section and check the feed attributes for errors. Common issues include missing images, price discrepancies, and incorrect GTINs.
- Preview mode in GTM. If you’ve used Tag Manager to set up tags, use preview mode. It will show you which tags are firing and exactly what data is being sent for each event.
To be honest, don’t expect immediate results. The system will need time to gather enough data to build audiences and optimize ad delivery. The first results usually become visible 1–2 weeks after launch—provided you have sufficient traffic.


