
Let’s figure out what you need to launch dynamic remarketing on a WordPress website. First, install the GTM4WP plugin developed by Thomas Geiger. The plugin is completely free, has an excellent reputation in the community, and a well-deserved 5-star rating in the catalog.
Why this one? GTM4WP covers most of the tasks that arise when preparing a website for advertising campaigns. If you browse through the description, you will see an impressive list of features.
But we are interested in the main thing: the plugin automatically generates the necessary data set and transfers it to GTM (Google Tag Manager). We will use this data to set up dynamic remarketing and launch it.

Setting up dynamic remarketing code
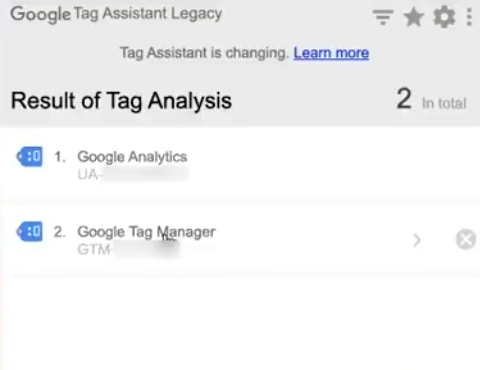
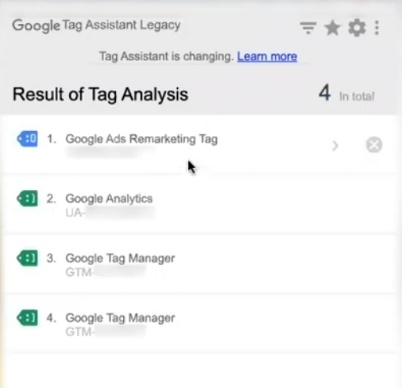
Let’s check what’s happening on the website right now. Open the product card and look through Tag Assistant. What do we see? Only two codes — Google Analytics and Tag Manager (it is always duplicated in preview mode). But there is no dynamic remarketing code here yet.
To install it, you need to explain to Tag Manager what data it will need. And this is where the main advantage of the GTM4WP plugin, which I mentioned above, comes into play: it can generate different code variations for different tasks.
What is the difference between data formats? For Universal Analytics (third version), the following parameters are transmitted: products, id, name, sku, category, price. For Google Analytics 4, the parameters are different: item_id, item_name, item_brand, price, and so on. The names are different, and it is important to take this into account.
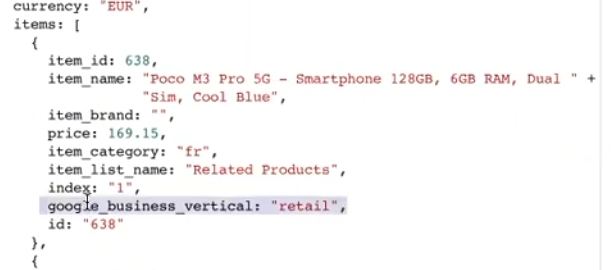
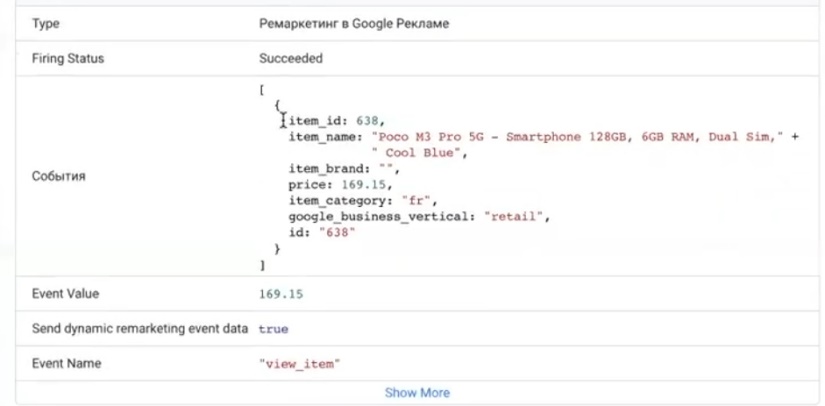
The key parameter we are interested in is google_business_vertical. It is responsible for transferring event data to dynamic remarketing.
Now let’s move on to the practical part. First, we create the code directly in the Google Ads account, and then we install it via GTM:
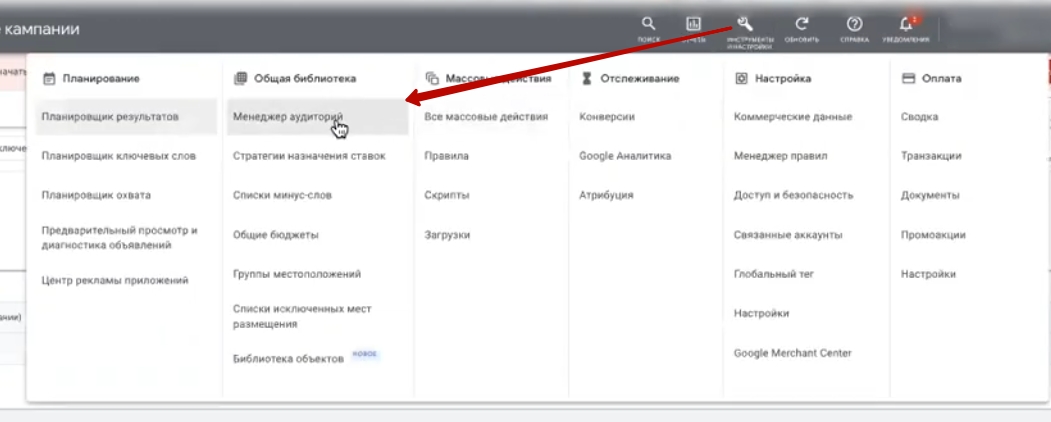
- Go to Tools → Settings → Audience Manager;
- Find the “Data Source” section (or “Set Up Audience Source”);

- Select “Google Ads Tag” and click “Configure Tag”;
- In the settings, select “Collect data on specific actions”;
- Select the type of business — “Retail trade”;
- Skip the remaining items and click “Save and Continue.”
In fact, it’s not as complicated as it may seem at first glance. The main thing is to follow the sequence of steps.
Connecting remarketing in Google Ads
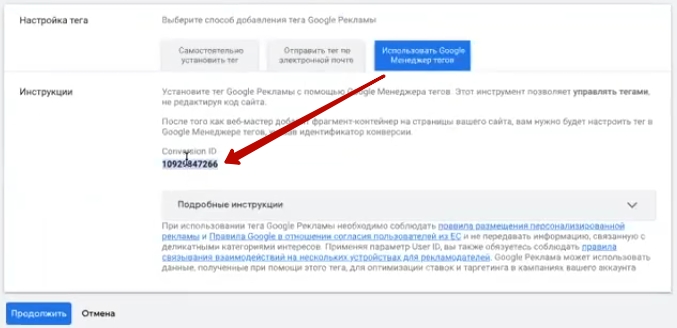
Let’s move on to the next step — working in Google Tag Manager. After saving your settings in Google Ads, you will see a Conversion ID. Copy it and return to GTM.
Click “Create” and select the tag type — “Remarketing in Google Ads.” Paste the copied conversion ID into the appropriate field. As for the conversion linking tag, just create it, give it any meaningful name, save it, and don’t come back to it.

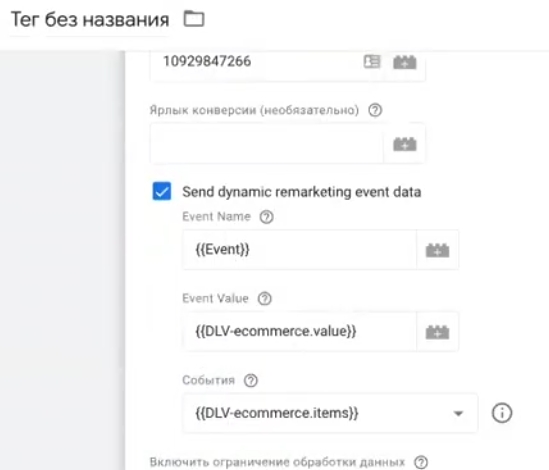
After inserting the Google Ads ID, check the box next to Send dynamic remarketing event data. Now you need to fill in a few important parameters.
Event name is the name of the event. And here’s the key point: names must strictly correspond to those suggested by Google. There’s no point in coming up with your own options — they simply won’t work correctly. More precisely, the data will be collected, but it will be useless if you don’t know how to use it later.
To find a list of eligible events, Google “Dynamic remarketing events and parameters” — Google will show examples of code with the necessary names.
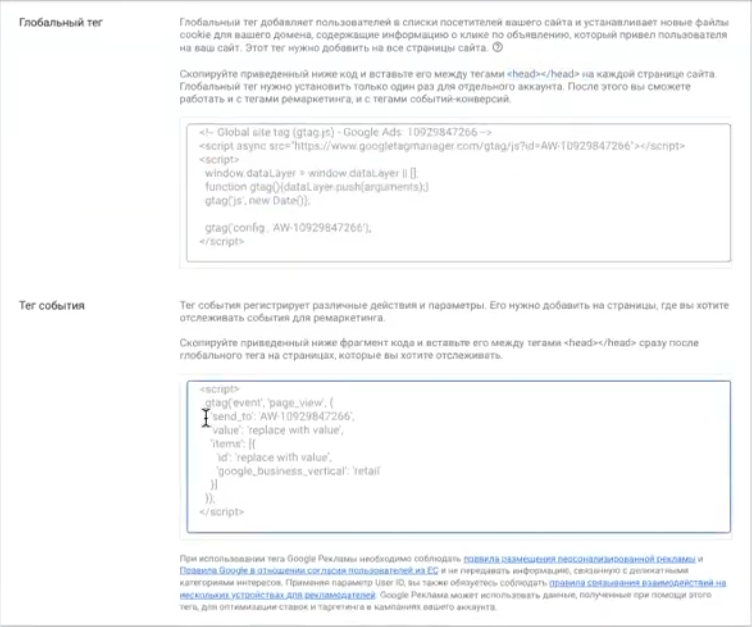
If you select “Set tag yourself” in the settings, you will see that the dynamic remarketing code consists of two parts:
- Global site tag — basic code that is placed in the header of the website;
- The event code is a dynamic part that changes depending on the page.
The event code contains elements that must be substituted automatically. First and foremost is the name of the event. Here are the events used by Google:
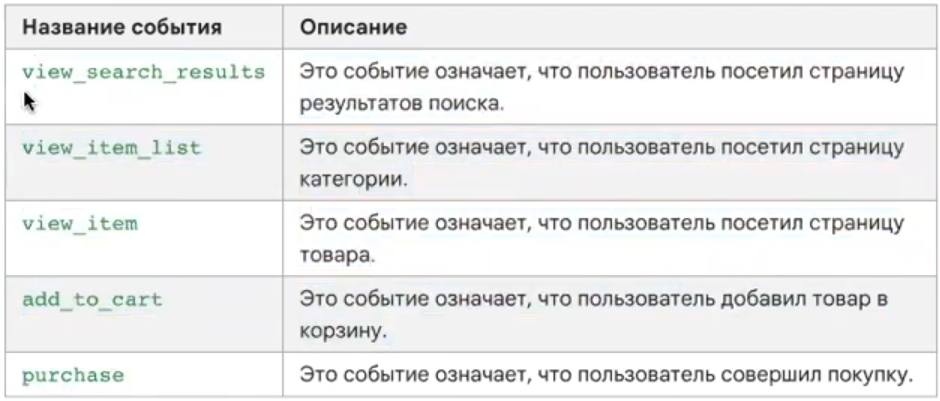
- view_search_results — view search results;
- view_item_list — view list of products (category);
- view_item — view product card;
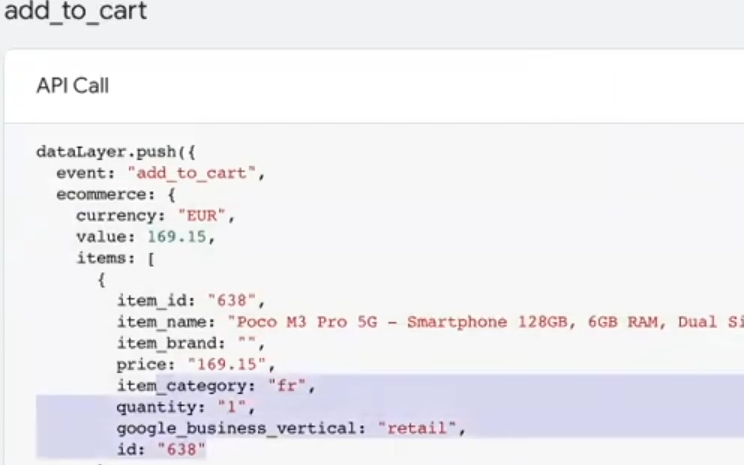
- add_to_cart — add to cart;
- purchase — покупка;
- page_view — can be safely placed on the home page.
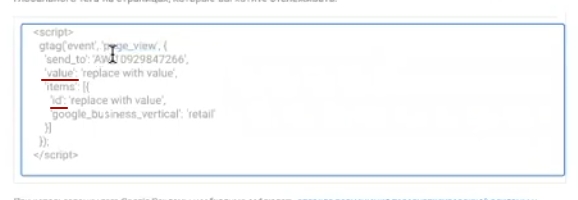
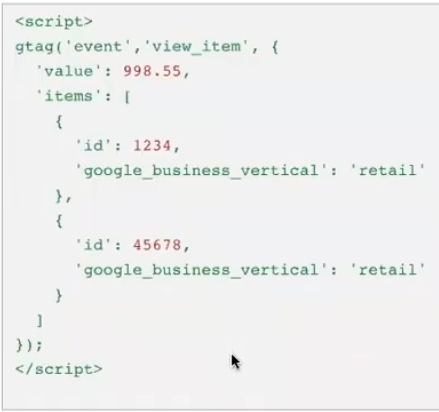
In addition to the event name, you need to dynamically replace the value (amount) and id of the product item. For example, if there are two items in the cart with a total amount of 998, the code should automatically calculate this amount and transfer the identifiers of both products. All this is configured through variables in GTM, which we will discuss further.
Setting up tags in Google Tag Manager
Now you need to set up event transmission to the remarketing tag. This is made as simple as possible if you have installed the GTM4WP plugin. It automatically creates all the necessary events — view_item, view_item_list, add_to_cart, and others. You won’t have to write them manually.
Simply select the ready-made Event variables, and the names of the necessary events will be pulled up automatically. The plugin ensures that they comply with Google’s requirements.
In addition to the event name, you need to pass the value (the sum of the positions). To do this, we create a separate variable. There is nothing complicated here — let’s take a step-by-step look at it.
How to create a variable for value:
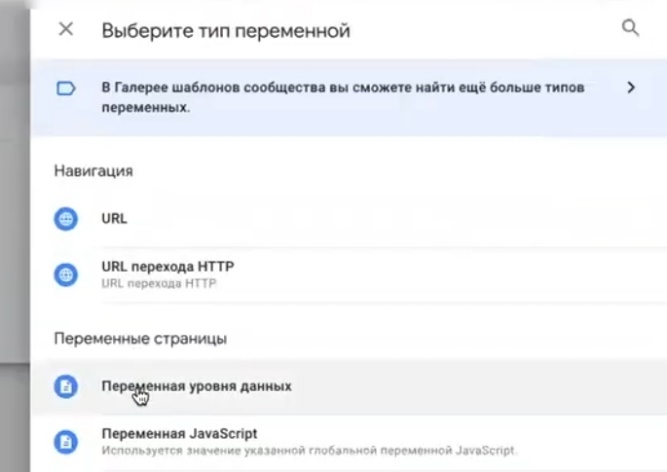
- Go to the “Variables” section and click “Create.”
- Select the “Data Level Variable” type.
- In the variable name field, enter the path to the desired value.
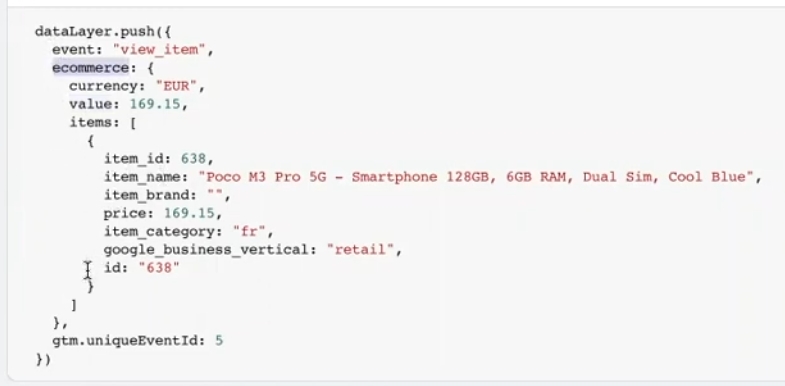
Please note that the data in the dataLayer has a hierarchical structure. To access the value, you must first refer to the ecommerce object, and then specify the value using a dot. I may not be explaining this in the most academic language, but the essence is this: the deeper the parameter is nested, the longer the path to it.
We write: ecommerce.value. We name the variable, for example, “DLV-ecommerce.value” and save it.
Next, you need to pass the product IDs and the google_business_vertical parameter. The latter is important because we are setting up remarketing for retail. For other types of businesses, other values would be used.
Let’s create another variable:
- Select “Data Level Variable” again.
- We specify the path: ecommerce.items.
- Save.
Please note: if your dataLayer data is transferred as products (rather than items), the path will be different. Check this in GTM preview mode, otherwise the variable may not work.
After these settings, the dynamic remarketing tag will simultaneously transmit the event name, order amount, and a complete set of product data.
Creating a trigger
Now we need to set up triggers that will activate our remarketing tag. There are several ways to do this: you can create a separate trigger for each event, or you can do something smarter — combine everything into one trigger using regular expressions.
How to create a universal trigger:
- Go to the “Triggers” section and click “Create”;
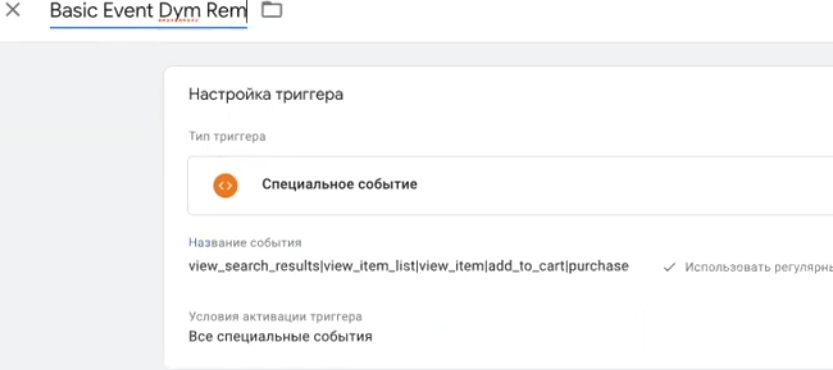
- Select the “Special Event” type;
- In the conditions of triggering, select “matches regular expression”;
- List all necessary events separated by vertical bars: view_item_list|view_item|add_to_cart|purchase;
- Name the trigger clearly, for example, “Basic Event Dym Rem”;
- Save.

Important note: be sure to check that the event names match exactly those recorded by Google Tag Manager. No extra spaces — they can break the entire triggering logic.
After that, return to your dynamic remarketing tag, give it a clear name (for example, “Dym Remarketing”) and link the trigger you created.
Click “Preview” in GTM and open the website. At the same time, launch Tag Assistant to track tag activation in real time. Go through different pages — product cards, categories, shopping cart — and make sure that the remarketing tag is activated at every step.
Checking the result
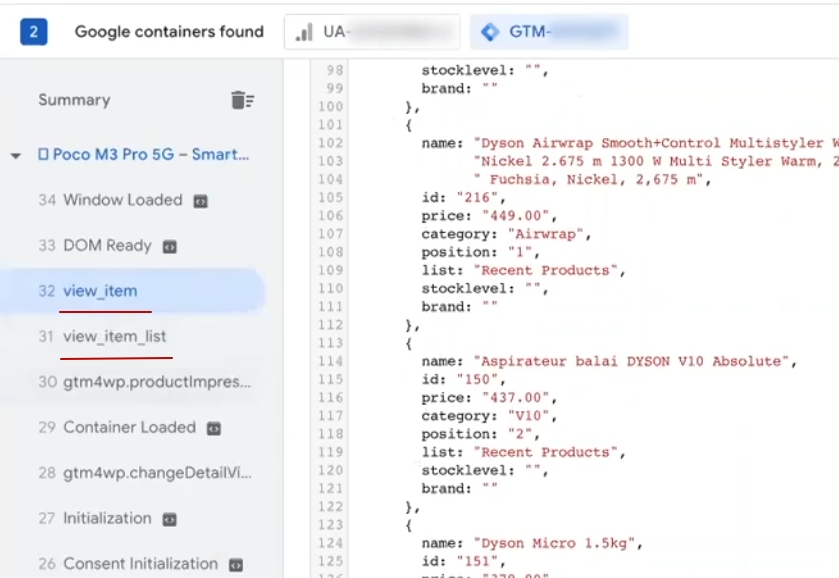
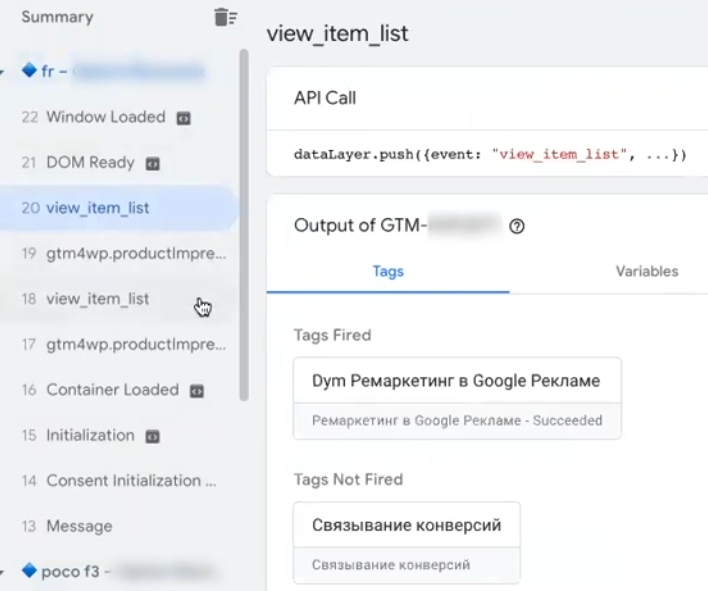
Everything has loaded — let’s move on to testing. Open the category page and look at Tag Assistant: the view_item_list event has been recorded, and the dynamic remarketing tag has worked. If you expand the value block, you will see the full set of transmitted data. Great, the first stage is complete.
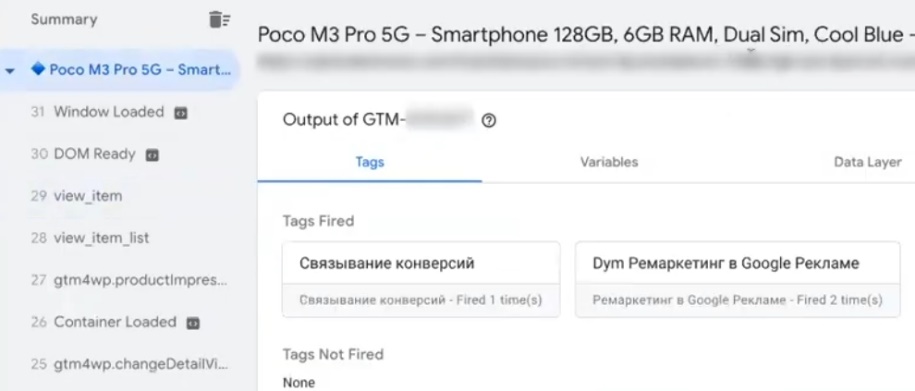
Now let’s check the product card. Go to any product and see: the view_item event is there, the tag worked. In the “Variables” tab, you can see in detail which items are pulled up and whether the value matches the price on the page. It is also useful to look at the “Tags” tab, where you can see exactly what data the system selects and transmits.
But the most important thing is that Google accepts all the data. Click “Request” and check: if everything is displayed correctly and without errors, the code is working as it should.
A minor detail: on some pages, view_item_list may be transmitted where it is not entirely logical. This is a feature of the site’s code and will not cause any critical harm — just keep it in mind.
Add the item to the cart and check the add_to_cart event. It worked. Open “Variables” — everything is in place, the data is being transferred correctly.
The only thing that may be confusing is that sometimes more data is transmitted than necessary. To fix this, you can use special variables that convert the items array into a cleaner format. After this configuration, only one specific product is transmitted during the view_item event, rather than the entire array. The same applies to add_to_cart — the data will only contain the item that was added.


This is how you can set up dynamic remarketing on WordPress—quickly, without unnecessary complications or headaches. The GTM4WP plugin does most of the work, and all you have to do is connect everything correctly in Google Tag Manager.

If you need a ready-made GTM container with configured tags and variables, please write in the comments. I will prepare a file for import that you can edit for your project and use right away.
That’s all!


