
So, we’ve figured out Google Analytics 4 setup — now let’s move on. Next up is another important conversion type called “Purchase Tag.” And I want to clarify one thing right away to avoid confusion: this conversion belongs specifically to the Google Ads advertising account, not to the fourth analytics. These are different things.
Yes, you can continue using the standard purchase from GA4 — technically it works. But I still strongly recommend following Google’s official manual from start to finish. Why? Because with this setup, you pass all enhanced purchase data — and this is critically important for the correct operation of smart campaigns.
For example, if you’re launching Performance Max or Google Shopping, Google’s algorithms need to receive the most complete information about each transaction. The more data — the more accurately machine learning selects the audience and optimizes bids. Essentially, you’re “feeding” Google’s AI quality signals, and it will reward you with cheaper conversions.
So let’s not skip this step and set up one more conversion properly.
Setting up “Purchase Tag” conversion: connecting Google Ads to the website
To move forward, you need to go to your Google Ads advertising account and complete a couple of important settings. Remember: when we installed the Google Listings & Ads plugin, we confirmed the connection to the advertising account at one of the steps. If you go to the plugin settings now, you’ll most likely see the status “Disconnected” — and that’s normal.
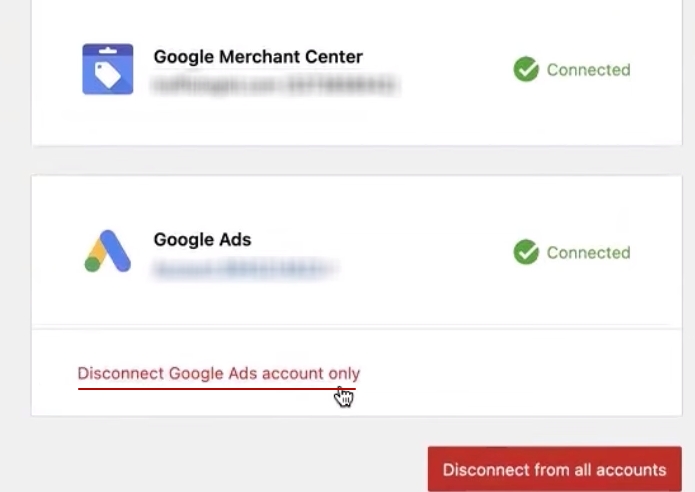
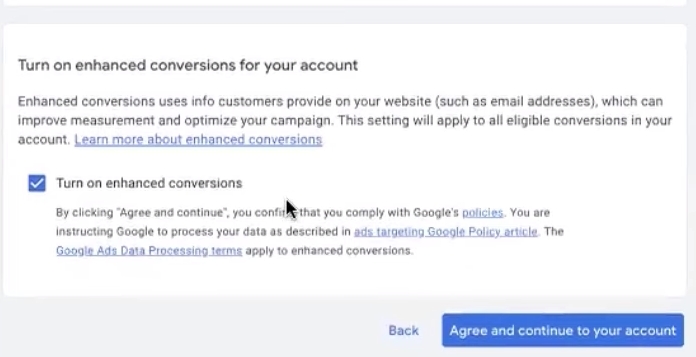
Why is that? The thing is, at that stage we only sent a request for access to Google Ads. But the access itself still needs to be confirmed. To do this, go to the advertising account, open the access section, and confirm that the plugin can indeed manage campaigns. Click through pop-ups like “I’ll do this later” — at this stage, it’s not critical.
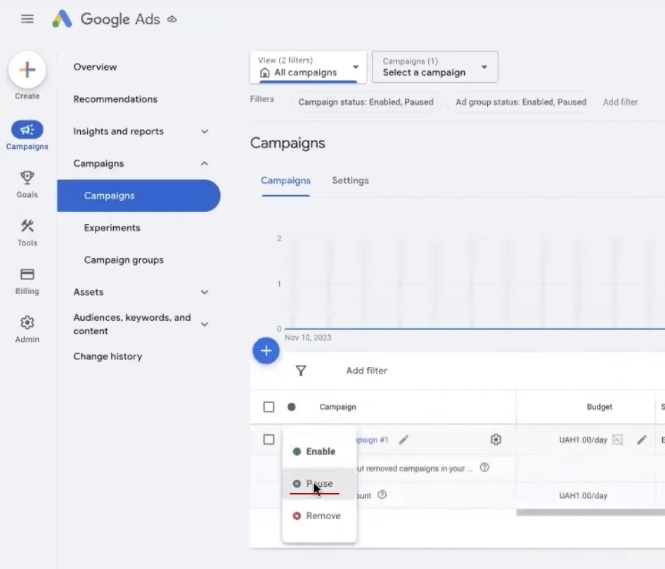
Why is it mandatory to pause the campaign?
An important point that many people miss. If a campaign was created automatically in the account (which happens during initial setup) and you’ve already entered payment details — be sure to pause this campaign. This is necessary so that while we’re working on the settings, nothing extra happens — no accidental impressions, no budget deductions.
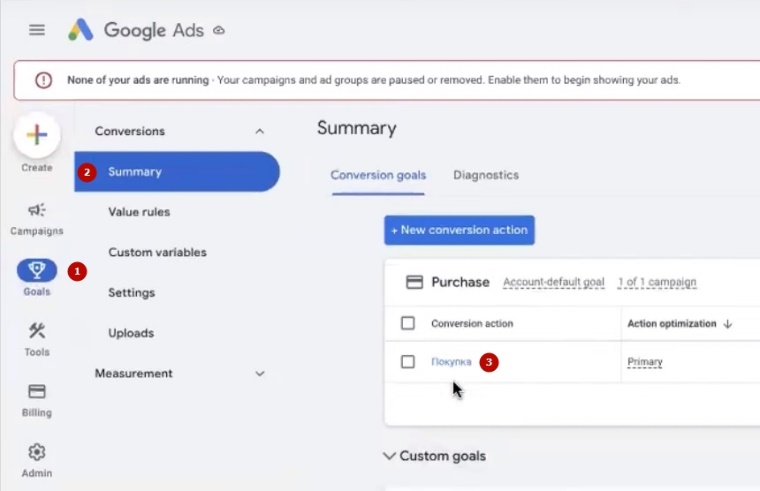
After that, go to the Goals → Summary section. Most likely, there will already be some default purchase conversion there. But we’ll take a different approach — we’ll create everything from scratch to keep it clean and clear.
Creating “Purchase Tag” manually
Delete the old conversion (if there was one) and start fresh. Step by step:
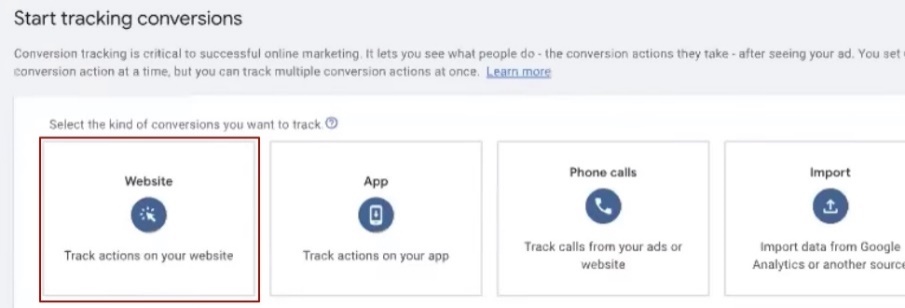
- Click “New conversion action,” select type — Website. Enter your website address in the field.

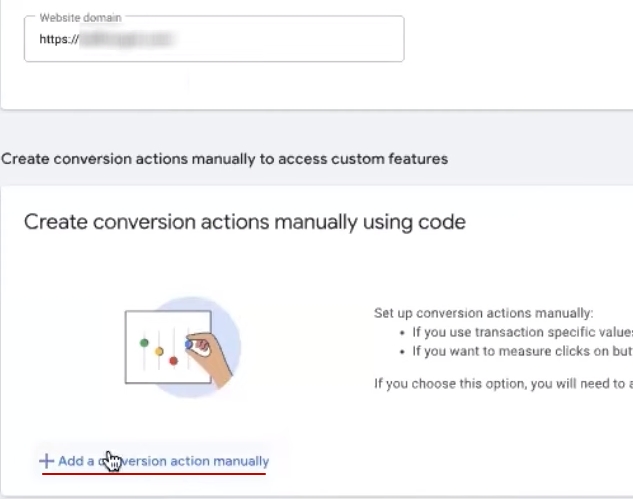
- Click “Scan” and wait for Google to scan the page. Then click “Add conversion manually” — this is important because we need manual setup.

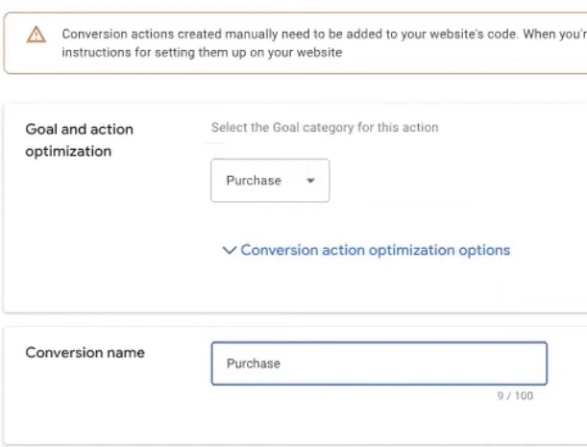
- Select category “Purchase.” You can name it anything — for example, simply “Purchase” or “Purchase manual” to distinguish from automatic ones.

- For value parameter, be sure to leave “Use different values” — this way Google will see the actual amount of each order, not a fixed number.

- Conversion count — leave “Every,” because every purchase matters to us.

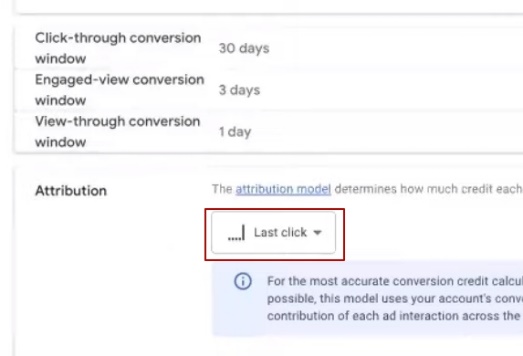
- Attribution model — I usually choose “Last click,” but this is up to you. If you don’t have a clear understanding of which model fits, Last click is a good option to start.
- Click “Done,” then “Save and continue,” and “Done” again.


Conversion created. But we don’t stop here — it needs additional configuration.
Fine-tuning “Purchase Tag” through Google Tag Manager
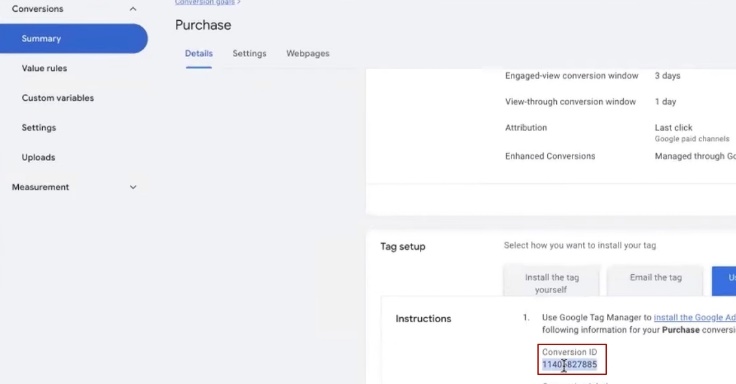
Go to the created conversion, open settings, and navigate to the Tag Manager section. Here we’ll need the Conversion ID — copy it.
Then go to Google Tag Manager, open the Tags section. A small warning: Google may “complain” that we’re adding another Google tag, since the tags will essentially be similar. But I’m adding it specifically and intentionally — this is needed for correct operation.
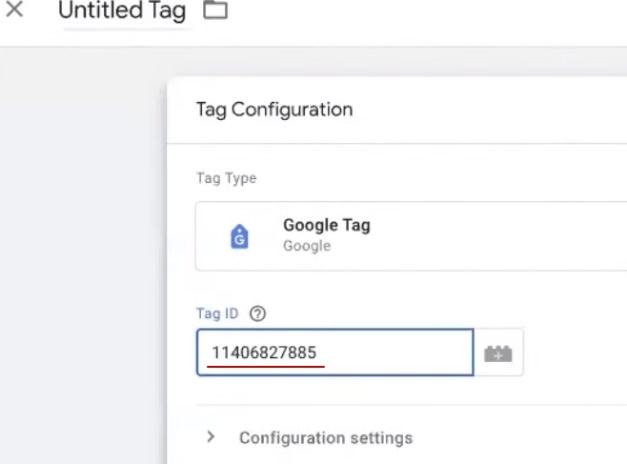
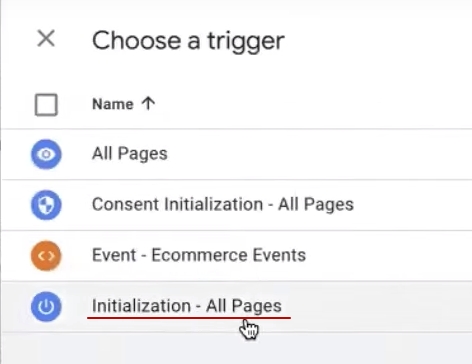
Create a new Google Tag, paste the copied Conversion ID. For triggers, select “Initialization.” In the name, write something like “AW-id.” Save.
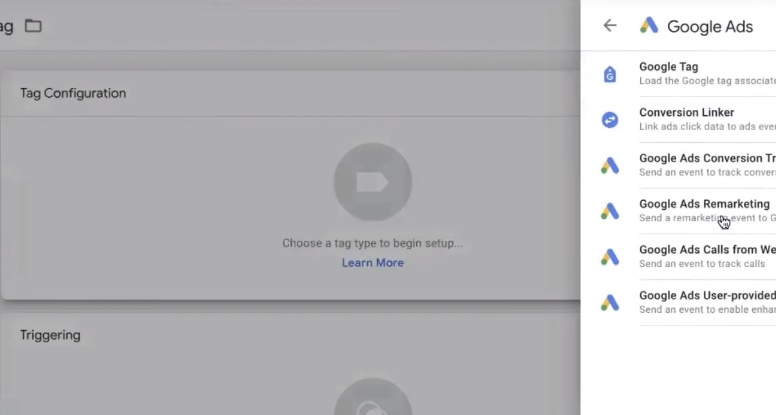
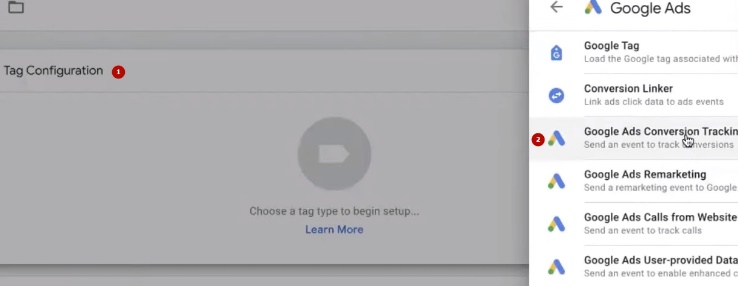
Now return to Google Ads, copy the Conversion ID again (if you lost it from the clipboard). In Tag Manager, create another tag: New → Tag configuration → Google Ads → Conversion Tracking. Click “Save.” This is the key block — it determines whether the coveted green checkmark appears in Google Ads.
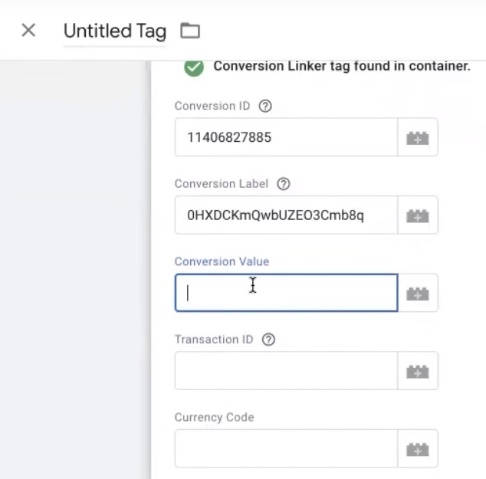
Now the interesting part — we need to pass purchase data to the tag. Insert the Conversion ID, then return to Google Ads and copy the conversion label. Paste it into the corresponding field.
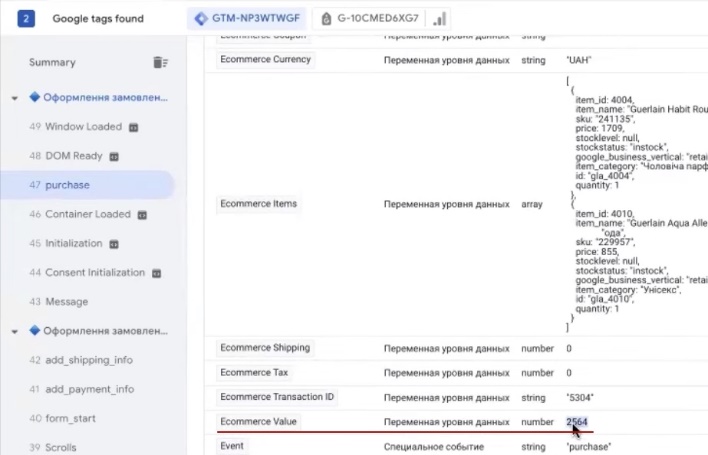
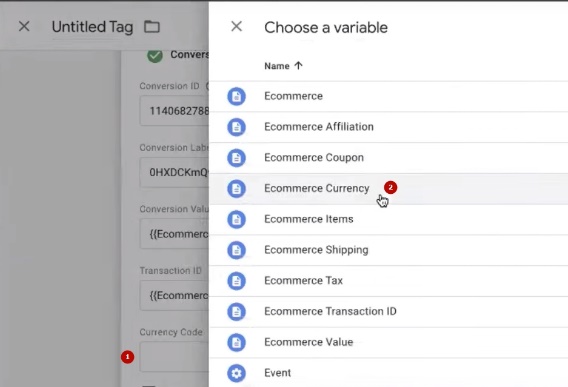
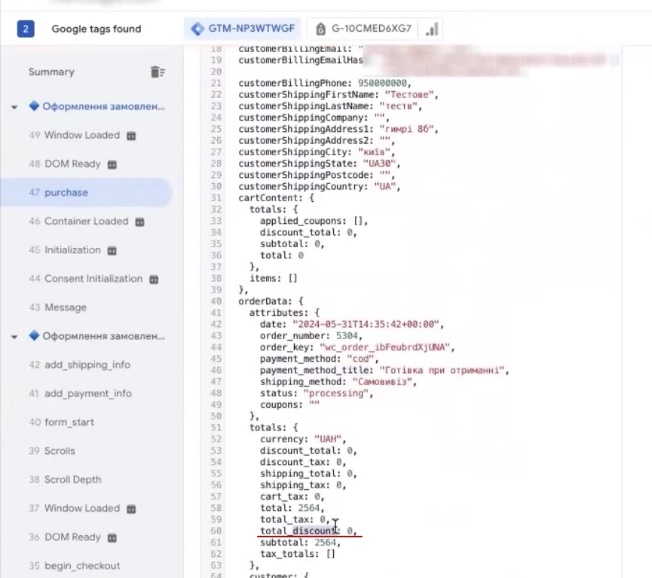
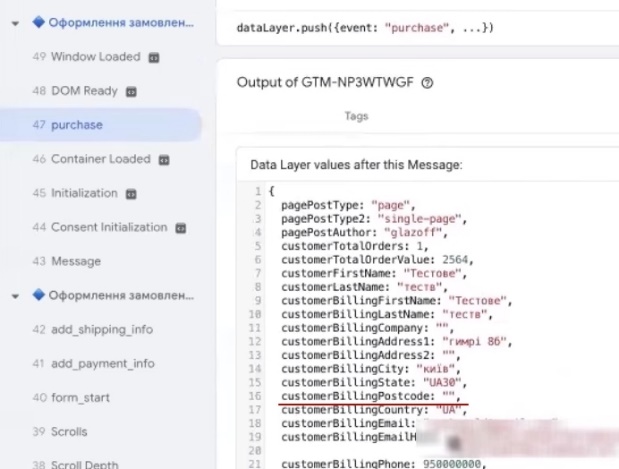
Next, we need to fill in three parameters: value (order amount), Transaction ID, and currency. Where to get them? Remember, we previously uploaded a container with a bunch of variables? That’s where they’ll come in handy. Open the debugger (Preview) in Google Tag Manager, find the Purchase event, and look at the variables section. Scroll down and look for the needed values.
For example, for value, find the Ecommerce Value variable — there will be the order amount (say, 2564). Return to the tag settings, click the plus sign in the value field, and select Ecommerce Value.
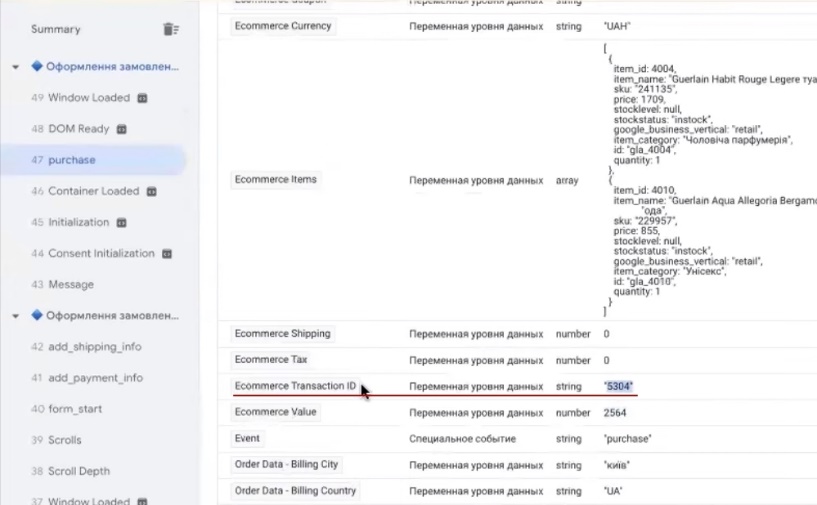
Using the same principle, pull in Transaction ID — it’s also among the variables in the Purchase event. If there’s no Purchase event — simply click Preview in Tag Manager, go through the entire path to checkout on your website, and the event will appear along with all variables.
And finally — Currency Code. Find the Ecommerce Currency variable and select it. Done — all three parameters are in place.
Additional data: “Product-level sales data” block
At this stage, we already have the basic “Purchase Tag” conversion setup, and in principle, this is enough to work. But I recommend going further and adding Product-level sales data — data about sales at the individual product level. Yes, you’ll have to tinker a bit, but nothing overly complicated here, and the benefit is tangible: Google will get a much more complete picture of each transaction.
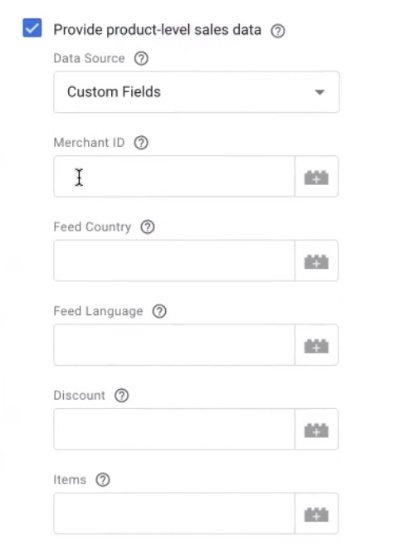
First thing you need — Merchant ID. Take it directly from Google Merchant Center: go to the account, and the ID will be visible. Paste it into the corresponding field.
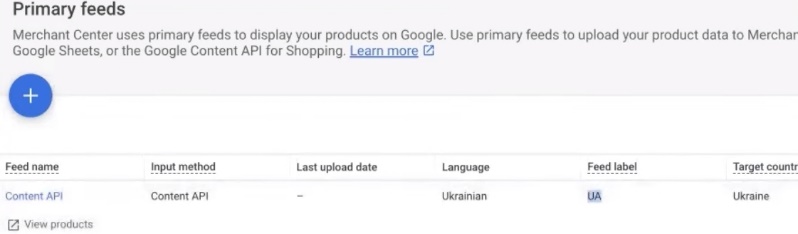
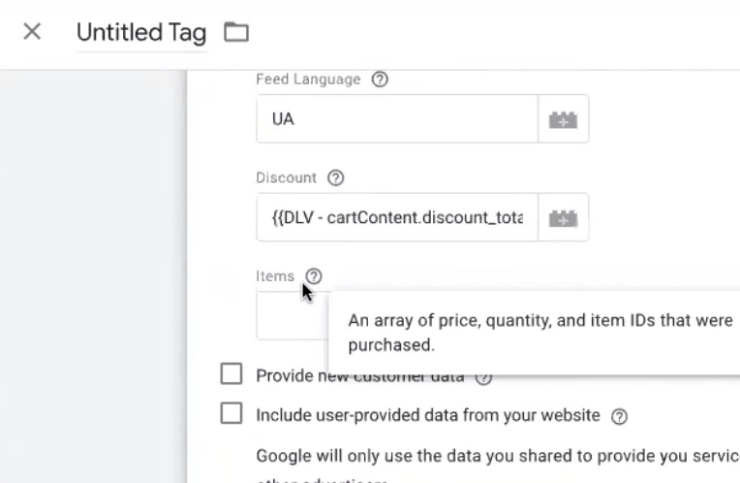
Next parameter — Feed Country. To find it, go to Merchant Center in the feeds section. There you’ll see Target countries and Feed label fields — for example, for Ukraine, this will be “UA.” If you’re unsure whether you identified the country code correctly, you can follow the link in Google’s help and select your country from the list. Leave the language as the one used in the feed.
By the way, if you have multiple language versions on your website, the needed country code can potentially be found in the Data Layer. But parameters like Merchant Center ID, Payment method, or Coupons are usually not passed automatically in Data Layer — we didn’t set them anywhere. This isn’t critical: you can enter them manually, or you can skip these two blocks. Nothing terrible will happen.
The discount story is similar. Ideally, it should be pulled automatically, but if it’s not there — we’ll create a variable manually.
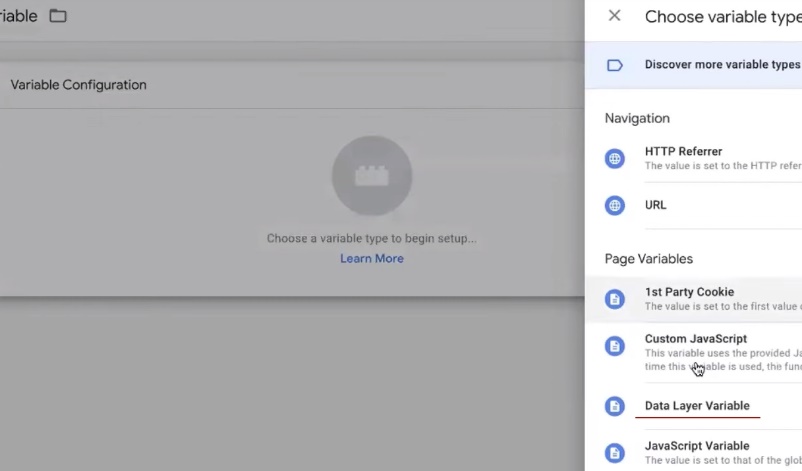
How to do this? Go to Google Tag Manager, click the plus sign to create a new variable. Select Data Layer Variable type.
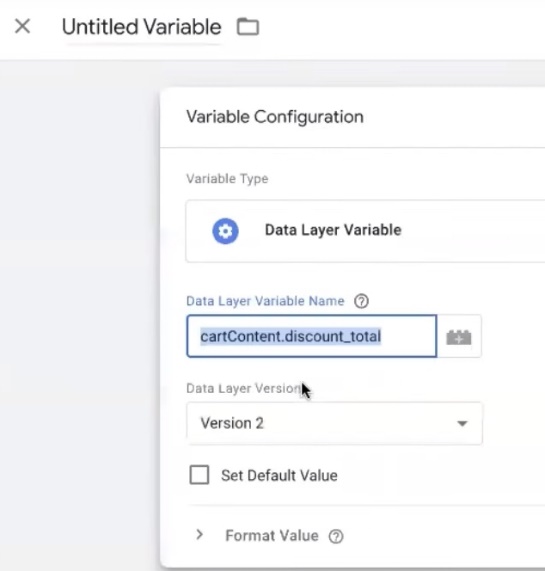
In the variable name field, write the path: cartContent.discount_total (or whatever value matches your Data Layer — look carefully at what this parameter is called in your case). Save the variable under a clear name, for example “DLV — Discount Total.”
Now the most interesting part — we need to pass the items array. This isn’t just a random set of data. Each element must have three parameters: Price (product price), Quantity (quantity), and Item ID (product identifier).
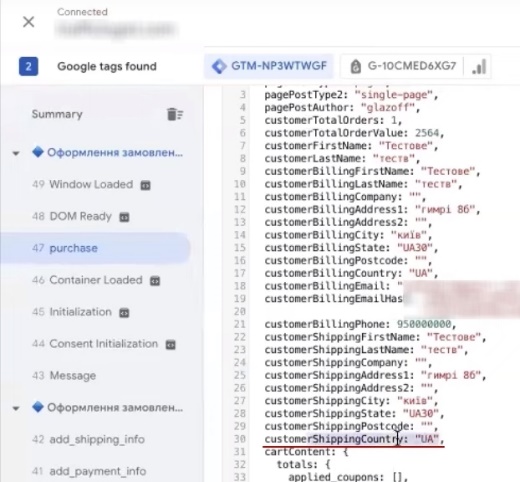
Where to get them? Open the debugger and find in the Data Layer the block that has an ID field. It may appear multiple times in different places — it’s important to find exactly the block that relates to products in the order.

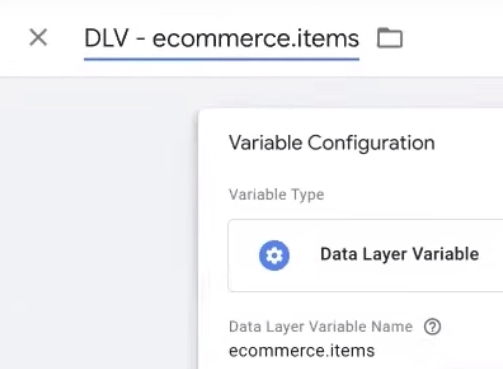
In our case, it’s done as simply as possible: create a new Data Layer Variable and write the path ecommerce.items. Why exactly like this? Because inside this object, there’s already ID, quantity, and price — everything we need. Name the variable, for example, “DLV — Ecommerce Items” and save.
Setting up User Data transmission
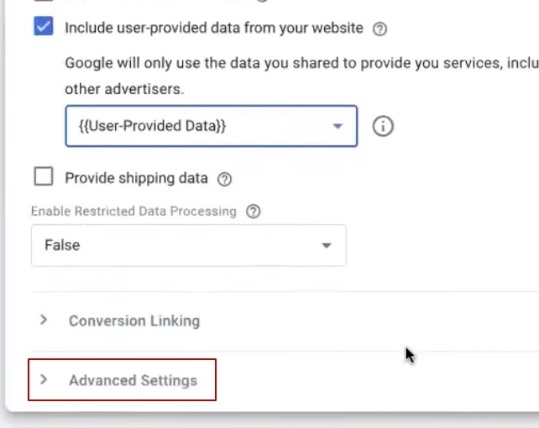
Moving on — now let’s add user data transmission. This is a fundamentally important block, especially for Google’s algorithms. The minimum that needs to be passed — email and phone number. But you can pass an extended data set.
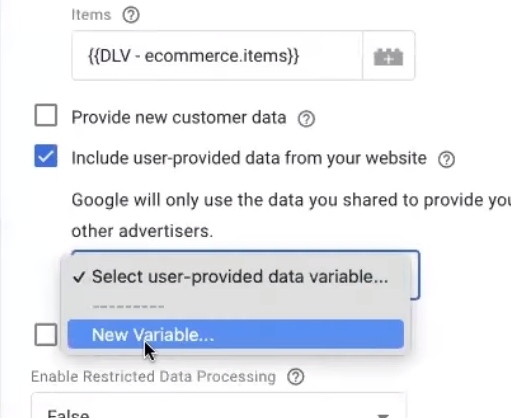
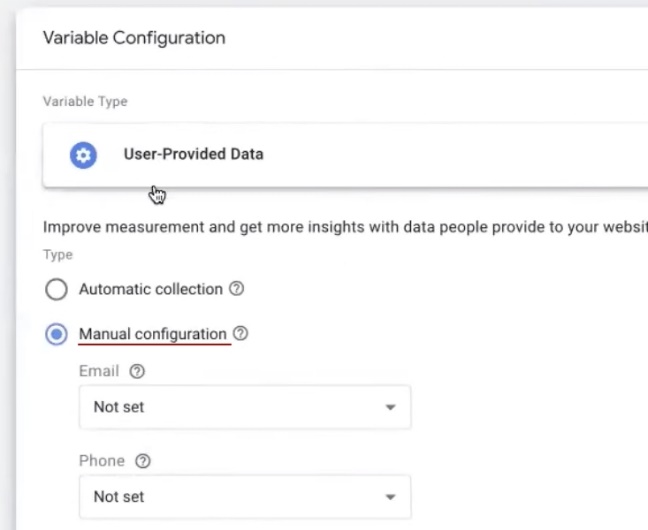
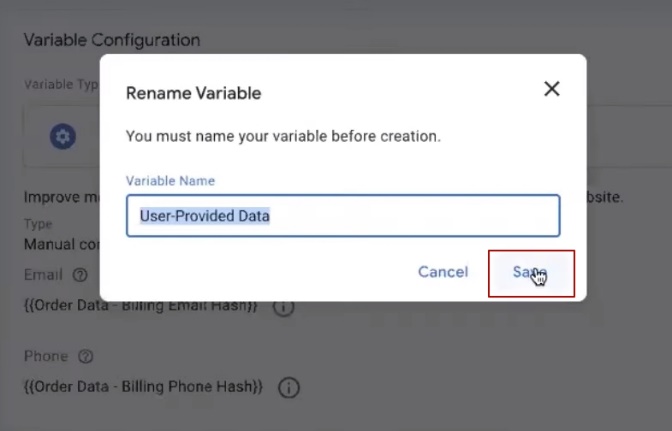
How to set up? Click “New variable,” the User-Provided Data tag configuration opens. Be sure to select “Manual configuration” and start picking the needed variables.
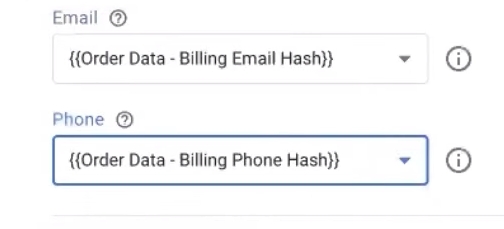
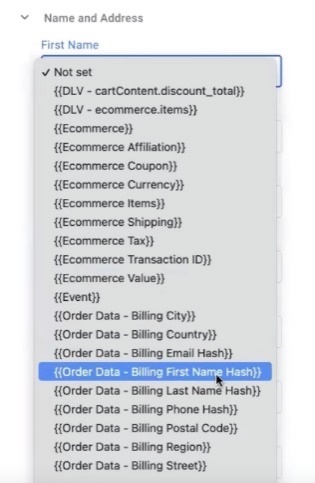
For email and phone, it’s simple. Remember when we imported the container for GA4, there was a whole batch of ready-made variables? That’s where they’ll come in handy. For email, select Billing Email Hash, and for phone — Billing Phone Hash. These variables are already hashed, which is what’s needed for correct transmission.
Additionally, you can pass first name (First Name Hash), last name (Last Name Hash), street, city, region, country, and postal code. But there’s a nuance here.
For example, for Ukraine, this is often not relevant. If the buyer chooses delivery via Nova Poshta, there likely won’t be a postal code — the field will remain empty. And passing empty values isn’t just useless, but even harmful: Google will receive incomplete data, and this will worsen targeting rather than improve it.
So the rule is simple: if the data really exists in the Data Layer and is filled — pass it. If empty — better not touch it.
But if you’re running ads for Europe, Australia, Canada, or the States — postal codes are filled in almost always. In this case, I recommend going through all fields: First Name, Last Name, Street, City, Region, Country, Postal Code. The more data — the more accurately Google can match the user.
Finished filling in everything you have? Save and move on.
Setting up Consent Settings
Next step — go to “Advanced settings” and find the Consent Settings section. Here you need to determine whether your website requires additional user consent for data collection.
It all depends on which country you’re working for. If your project is focused on Ukraine, it doesn’t fall under GDPR jurisdiction and isn’t subject to UK rules — meaning, you don’t need to set up additional Consent Mode. You can simply skip this block.
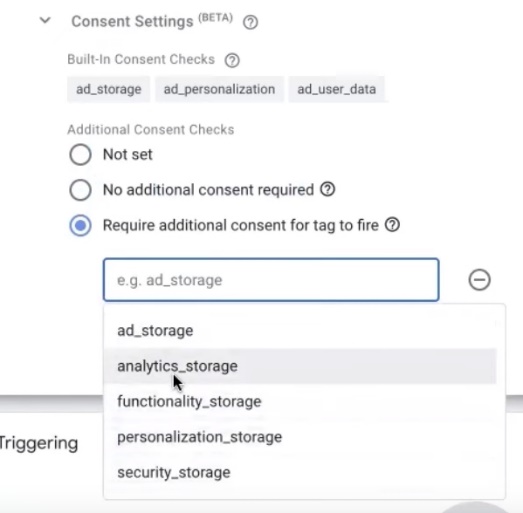
But if you’re running ads for EU countries, the UK, or other regions with strict privacy rules — you can’t do without Consent Mode. In this case, select the needed parameters: for example, ad_storage, analytics_storage, or other attributes, depending on what data you’re collecting and transmitting.
Setting up trigger for “Purchase Tag”
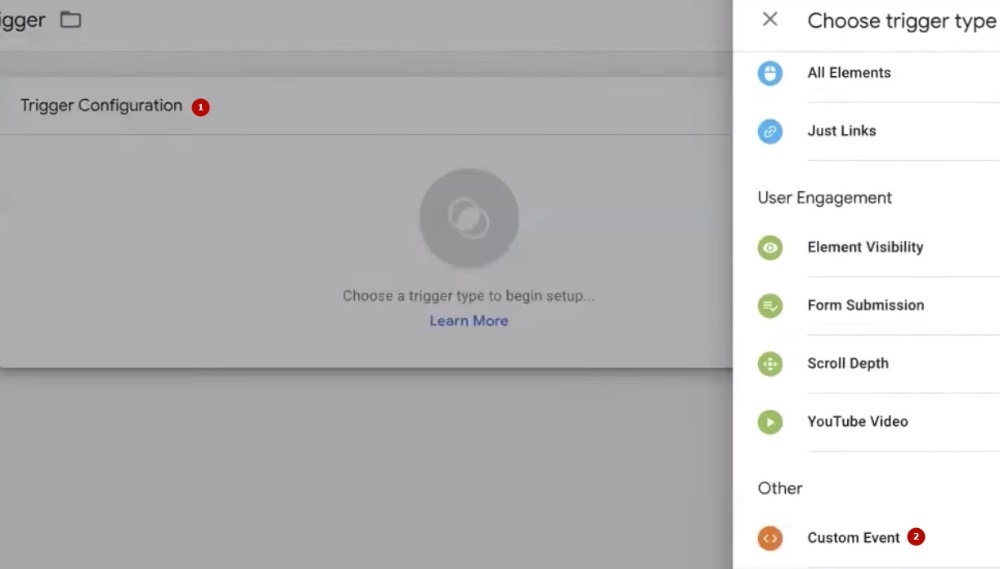
Now we need to set a trigger — that is, the condition under which our tag will fire. The logic is simple: the tag should “fire” on the purchase event, that is, when the purchase is completed.
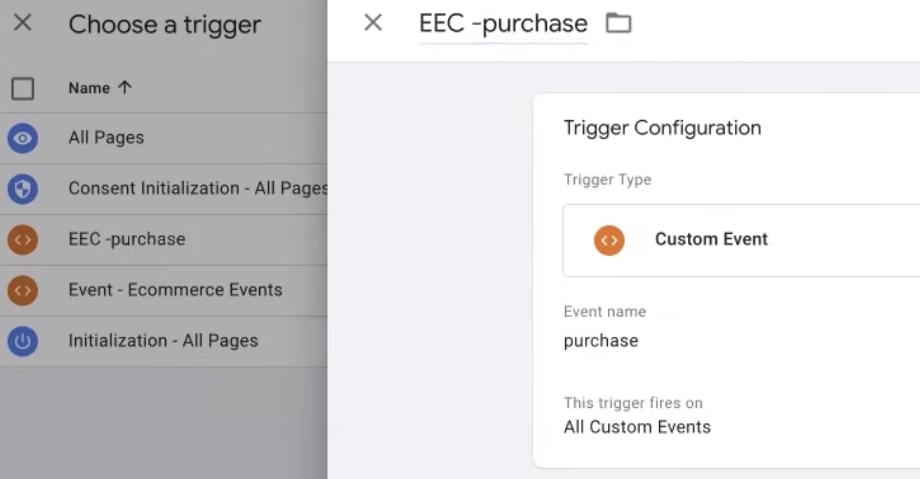
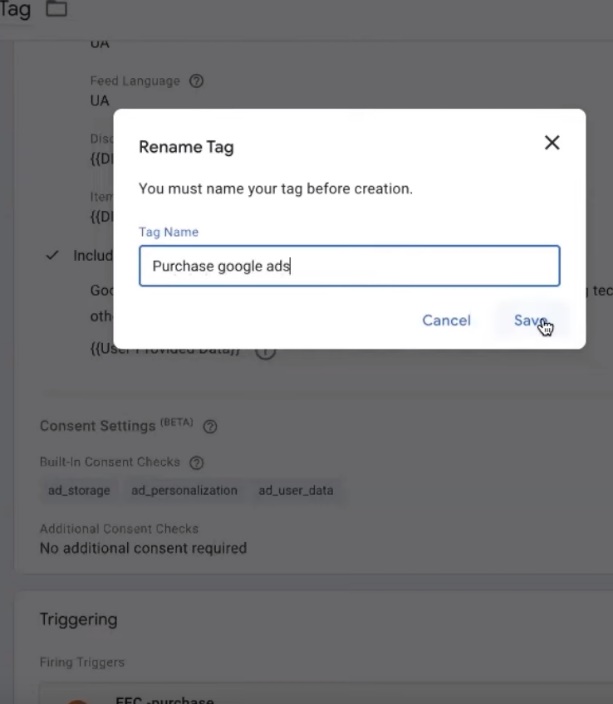
Go to Google Tag Manager, click the plus sign to create a new trigger. Select “Trigger configuration” → Custom Event. The system itself will suggest the purchase event — select it. Save the trigger, and you can name the conversion tag itself, for example, “Purchase Google Ads” — so you don’t confuse it with other tags later. Save.
Checking that the tag works correctly
Setting up is half the job. The second half — making sure everything is transmitted correctly. This is a mandatory stage for any project, regardless of niche.
Click Preview in Google Tag Manager, copy the link to any product card, and make a test order: add product to cart, proceed to checkout, fill in details, confirm purchase.
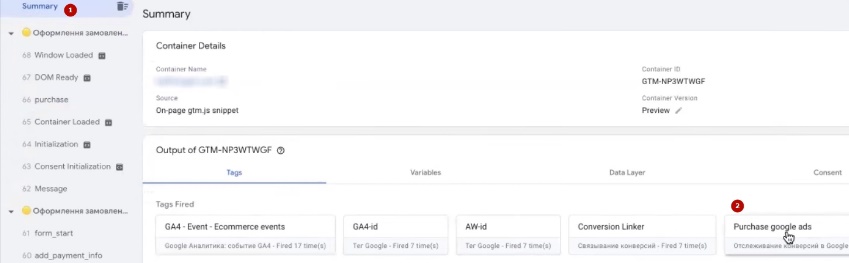
After that, return to the debugger window and find the purchase event. Go to the Summary tab and see how many times each tag fired. Critically important: the “Purchase Google Ads” tag must fire exactly once. If it fires twice — it means the trigger is duplicated somewhere, and this needs to be fixed.
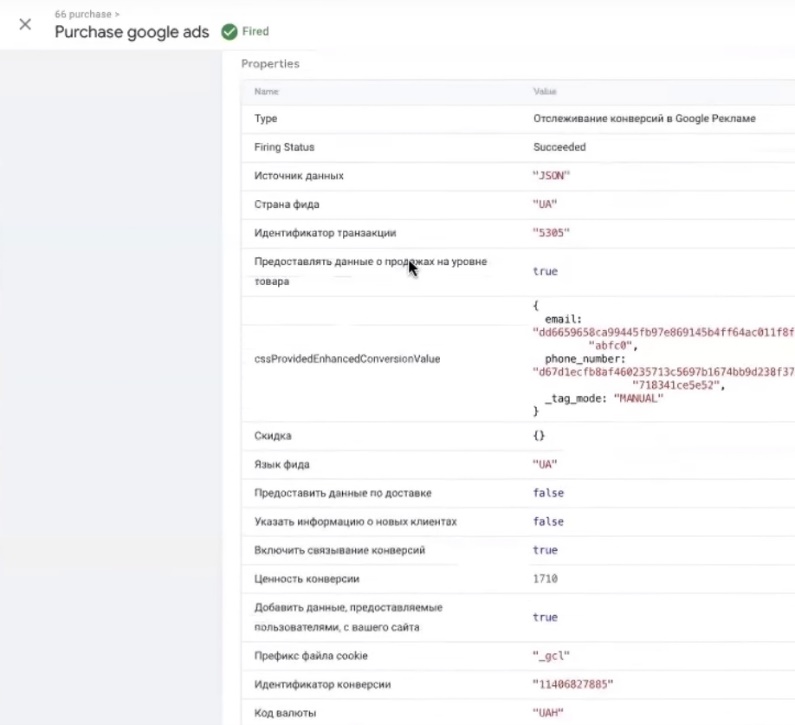
Click on the purchase event, switch to the Values tab, and check point by point that everything is in place:
- Transaction ID — transaction identifier is transmitted;
- Feed Country — feed country (which you set manually) is transmitted;
- Hashed data — buyer’s email and phone are transmitted in encrypted form;
- Conversion Value — order amount is transmitted;
- Items — product array is transmitted, and inside there’s ID, quantity, price, and google_business_vertical;
- Merchant ID and conversion label — also in place.
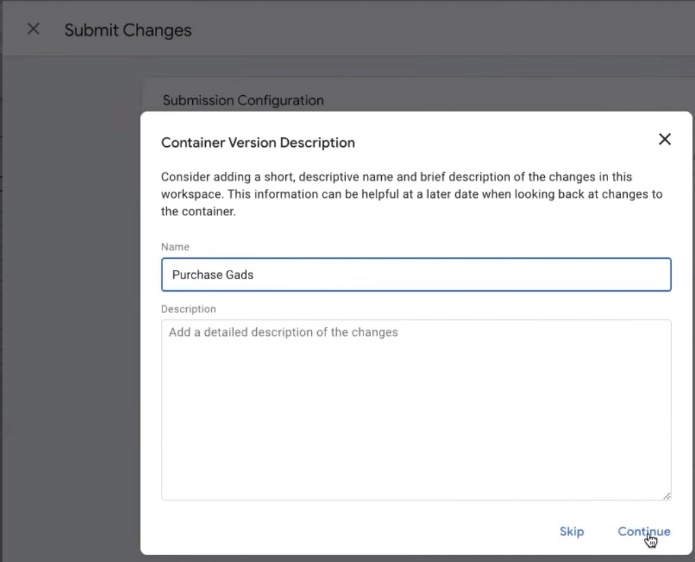
If you see all this in the debugger — congratulations, your Google Ads purchase tag setup was successful. All that’s left is to publish the container in Google Tag Manager — click “Submit” and you’re done.
What’s next?
Essentially, if you’ve set up Google Analytics 4 and implemented the “Purchase Tag” conversion in Google Ads — you already have everything needed to launch ads. You can confidently proceed to creating Performance Max and launching full-fledged advertising campaigns.
But since we agreed to do the maximum setup — in the next block, we’ll tackle dynamic remarketing setup. This is another important tool that will help bring back users who have already interacted with your website and products. So stay tuned!


